Chevrolet Equinox Service Manual: Rear Axle Lower Control Arm Replacement Control Arms Lower Control Arm
Removal ProcedureRaise and support the vehicle. Refer toLifting and Jacking the Vehicle.Remove the rear tire and wheel assembly. Refer toTire and Wheel Removal and Installation.Remove the stabilizer shaft link. Refer toStabilizer Shaft Link Replacement.Position a jackstand underneath the lower control arm.Raise the jackstand slightly to compress the coil spring.

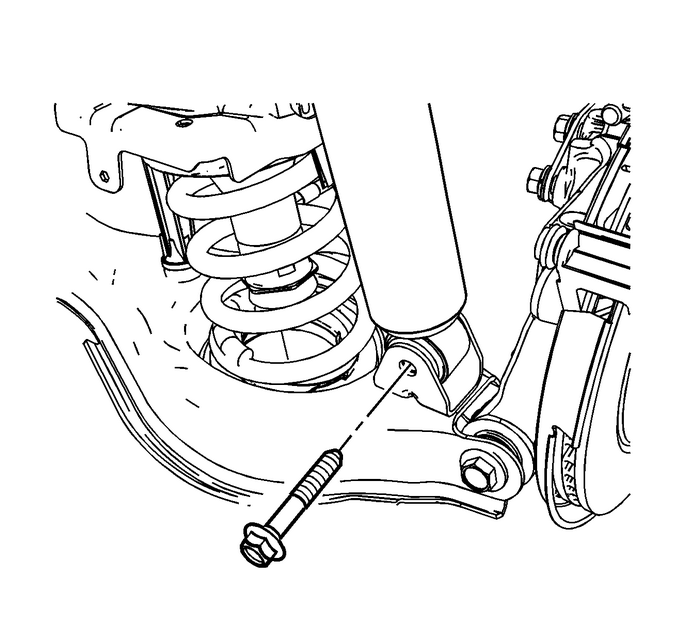
Remove the lower shock bolt and nut.

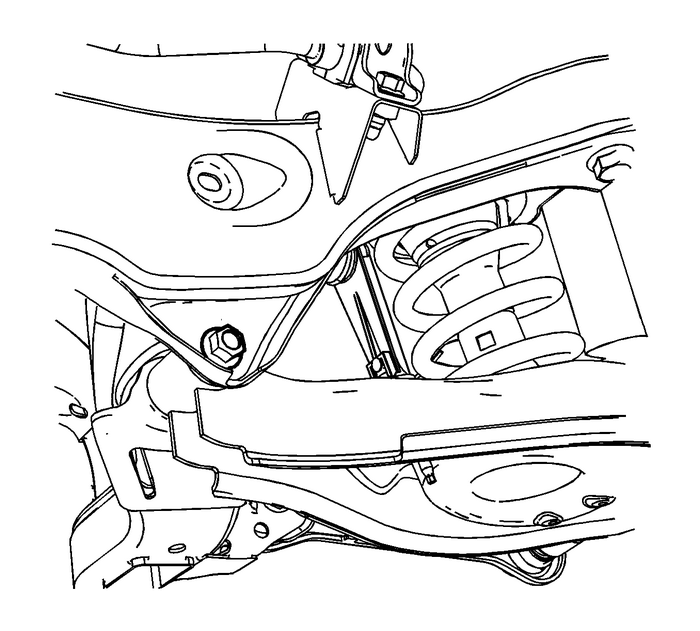
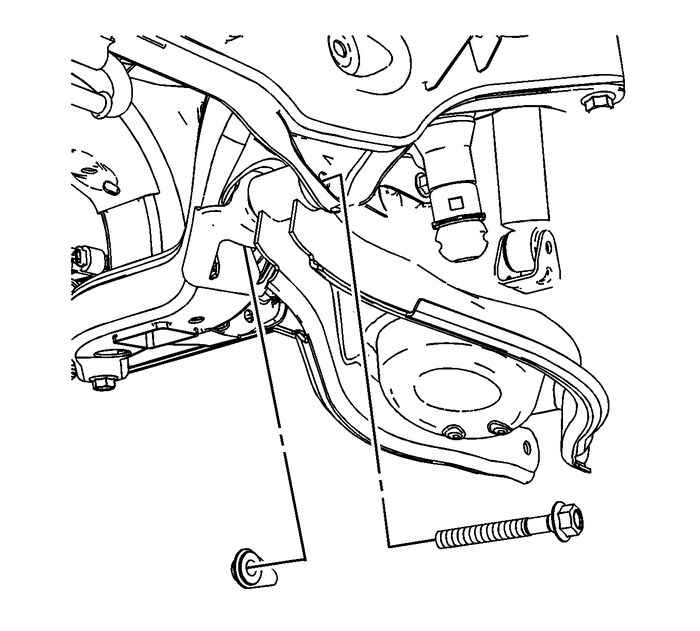
Loosen the lower control arm to support frame nut and bolt.

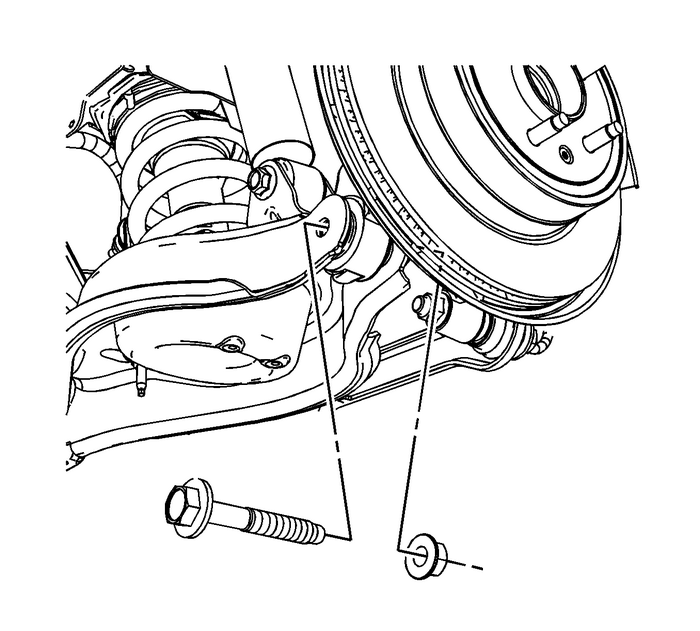
Remove the lower control arm to knuckle nut and bolt.Slowly lower the control arm in order to unload the coil spring.Remove the coil spring.Remove the jackstand.

Remove the lower control arm to support frame nut and bolt.Remove the lower control arm.Installation ProcedureInspect the coil spring upper and lower insulators, if damage exists replace the insulators.Refer toRear Spring Insulator Replacement.

Position the lower control arm to the support frame and loosely install the nut andbolt.Position the jackstand under the lower control arm.Position the spring with the rubber insulators into the vehicle.Raise the jackstand to compress the spring.

Caution:Refer toFastener Caution.
Position the lower control arm to the knuckle and install the nut and bolt and tightento 160-Y (118-lb-ft).
Tighten the lower control arm to support nut and bolt to 125-Y (92-lb-ft).

Install the shock to the lower control arm nut and bolt and tighten to 110-Y (81-lb-ft).Remove the jackstand from under the vehicle.Install the stabilizer shaft link. Refer toStabilizer Shaft Link Replacement.Install the rear tire and wheel assembly. Refer toTire and Wheel Removal and Installation.Lower the vehicle.Check the rear alignment. Refer toWheel Alignment Measurement.
 Trailing Arm Bracket Replacement Control Arms
Removal ProcedureRaise and support the vehicle. Refer toLifting and Jacking the Vehicle.Remove the park brake cable from the trailing arm and fromthe frame. Refer toParking Brake Rear Cable Replacemen ...
 Shock Absorber Replacement Strut Assembly Dampers/Shocks
Removal ProcedureRaise and support the vehicle. Refer toLifting and Jacking the Vehicle.Remove the rear tire and wheel assembly. Refer toTire and Wheel Removal and Installation.Using the proper jackst ...
Other materials:
Door Lock and Ignition Lock Folding Key Blade Removal and Installation Locks
Special ToolsBO-51098 Flip Key Blade FixtureFor equivalent region tools, refer toSpecial Tools.Caution:Failure to properly support the Remote Keyless Entry (RKE) transmitter assembly whilereplacing the key blade may cause internal damage to the transmitter assembly.Insert the RKE transmitter in the ...
