Chevrolet Equinox Service Manual: Knuckle Replacement Knuckles
Special Tools
J 37043 Park Brake Cable Release Tool
Removal ProcedureRaise and support the vehicle. Refer toLifting and Jacking the Vehicle.Remove the tire and wheel. Refer toTire and Wheel Removal and Installation.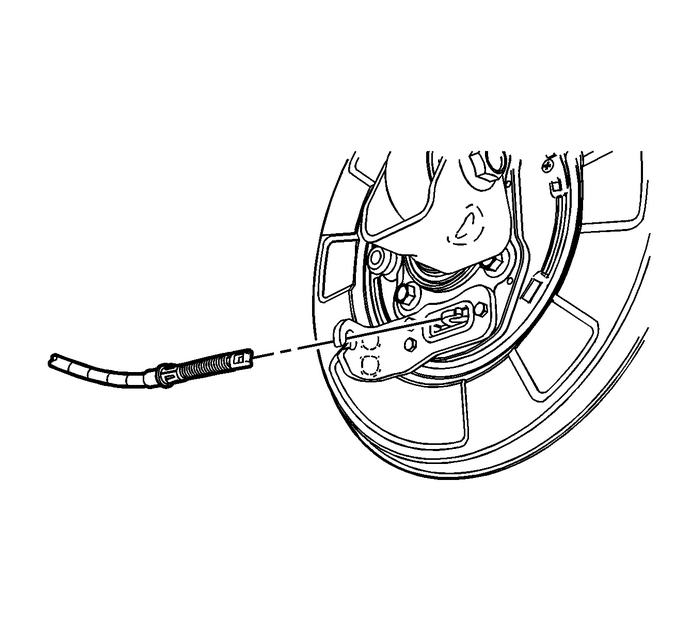
Disconnect the rear park brake cable from the park brake actuator.Using the J 37043 park brake cable release tool, remove the park brake cable from the mounting bracket
Caution:Support the brake caliper with heavy mechanic wire, orequivalent, whenever it is separated from its mount and thehydraulic flexible brake hose is still connected. Failure tosupport the caliper in this manner will cause the flexible brakehose to bear the weight of the caliper, which may cause damage tothe brake hose and in turn may cause a brake fluid leak.
Remove the brake caliper and bracket as an assembly and support it with heavy mechanicswire or equivalent. Refer toRear Brake Caliper Bracket Replacement.Remove the wheel bearing/hub assembly. Refer toRear Wheel Bearing and Hub Replacement.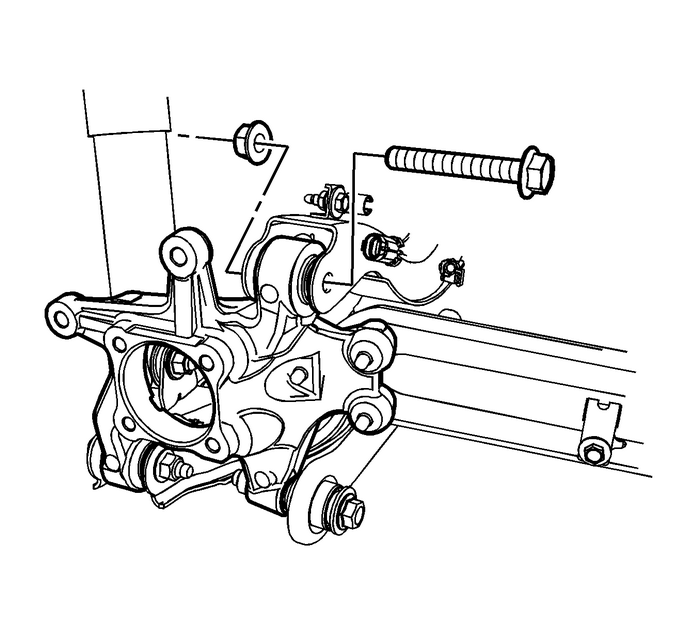
Remove the upper control arm to knuckle bolt and nut.
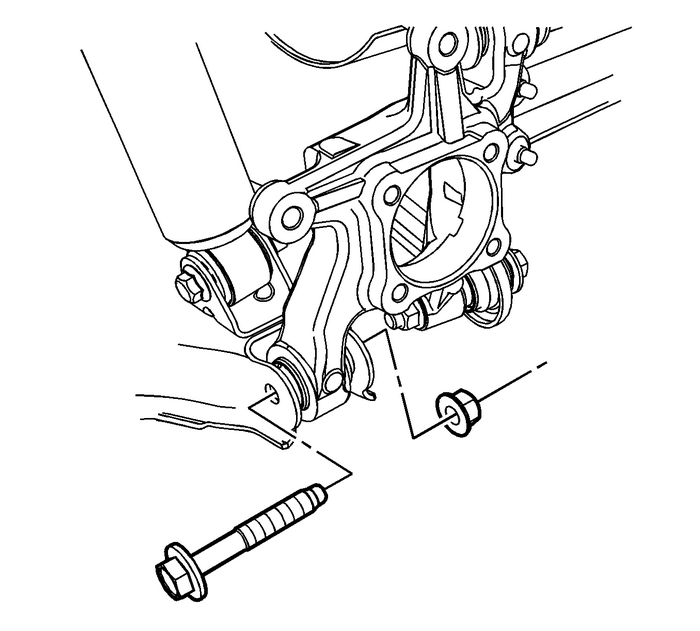
Remove the lower control arm to knuckle bolt and nut.
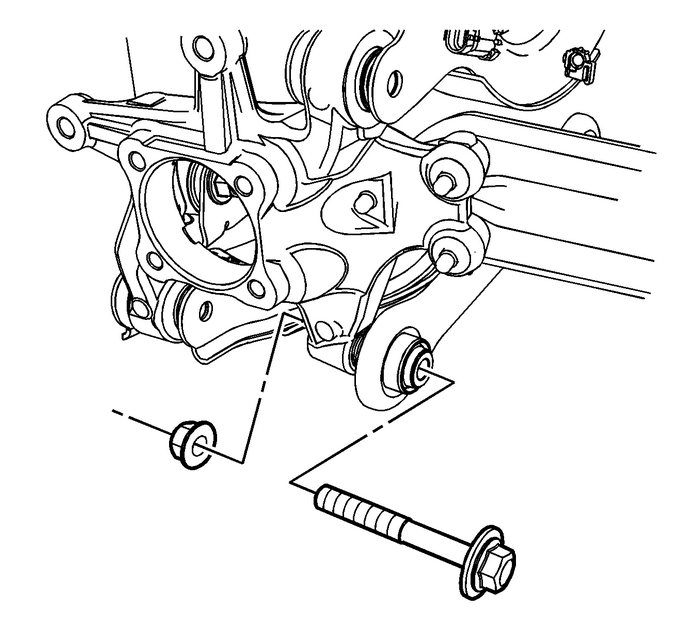
Remove the toe link to knuckle bolt and nut.
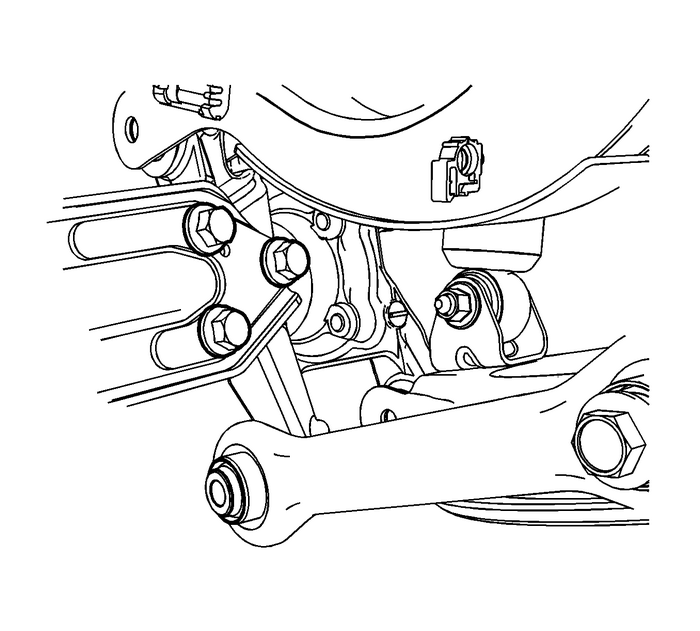
Remove the 3-trailing arm to knuckle bolts.Remove the knuckle from the vehicle.Installation Procedure

Install the knuckle to the lower control arm. Loosely install the bolt and nut.

Install the knuckle to the upper control arm. Loosely install the bolt and nut.

Install the knuckle to the toe link. Loosely install the bolt and nut.

Apply an approved threadlocker the knuckle bolts.Install the-3-trailing arm to knuckle bolts and hand tighten the bolts and nuts.
Caution:Refer toFastener Caution.
Tighten the bolts and nuts in the following sequence:Tighten the knuckle to lower control arm bolt and nut to 160-Y (118-lb-ft).Tighten the knuckle to upper control arm bolt and nut to 160-Y (118-lb-ft).Tighten the knuckle to toe link bolt and nut to 160-Y (118-lb-ft).Tighten the-3-trailing arm to knuckle bolts to 150-Y (110-lb-ft).Install the wheel bearing/hub assembly. Refer toRear Wheel Bearing and Hub Replacement.Caution:Support the brake caliper with heavy mechanic wire, orequivalent, whenever it is separated from its mount and thehydraulic flexible brake hose is still connected. Failure tosupport the caliper in this manner will cause the flexible brakehose to bear the weight of the caliper, which may cause damage tothe brake hose and in turn may cause a brake fluid leak.
Remove the supporting wire and position the brake caliper and bracket assemblies backonto the knuckles. Refer toRear Brake Caliper Bracket Replacement.
Connect the rear park brake cable through the mounting bracket and onto the park brakeactuator.Install the tire and wheel. Refer toTire and Wheel Removal and Installation.Lower the vehicle.Perform a vehicle wheel alignment. Refer toWheel Alignment Measurement.
 Drivetrain and Front Suspension Frame Replacement
Special Tools DW-110-060 Engine Assembly Support FixtureRemoval ProcedureSupport the powertrain using the support fixture. This fixture is used to keep thepowertrain from rocking fore/aft once the fro ...
 Lower Control Arm Replacement Control Arms Lower Control Arm
Special ToolsJ-42188-B -Ball Joint SeparatorFor regional equivalent tools, refer toSpecial Tools.Removal ProcedureRaise and support the vehicle. Refer toLifting and Jacking the Vehicle.Remove the tire ...
Other materials:
Measuring Frequency
Special Tools EL–39200 Digital Multimeter (DMM)For equivalent regional tools, refer toSpecial Tools.Caution:Refer toTest Probe Caution.The following procedure determines the frequency of a signal.Note:Connecting the Digital Multimeter (DMM) to the circuit before pressing the Hz buttonwill allow th ...
