Chevrolet Equinox Service Manual: Lower Control Arm Replacement Control Arms Lower Control Arm
Special Tools
J-42188-B -Ball Joint Separator
For regional equivalent tools, refer toSpecial Tools.
Removal ProcedureRaise and support the vehicle. Refer toLifting and Jacking the Vehicle.Remove the tire and wheel assembly. Refer toTire and Wheel Removal and Installation.
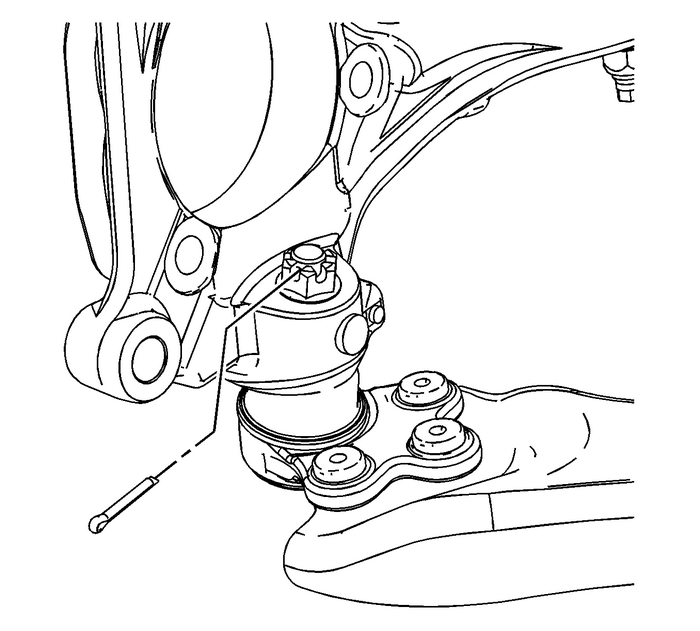
Remove and discard the lower control arm ball joint cotter pin.Loosen the front lower control arm ball stud nut until it is level with the top ofthe lower control arm ball joint stud.Use the J-42188-B -Ball Joint Separator-to separate the lower control arm ball joint from the steering knuckle.

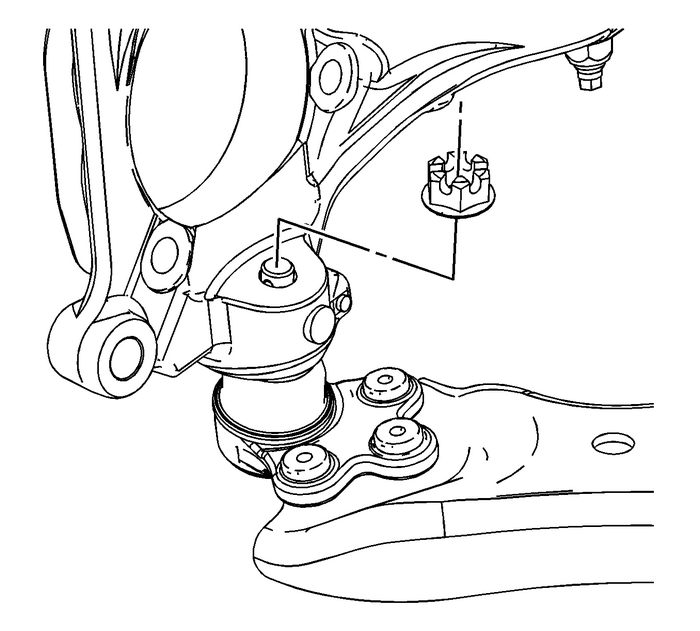
Remove the front lower control arm ball stud nut and disconnect the lower controlarm ball joint from the steering knuckle.

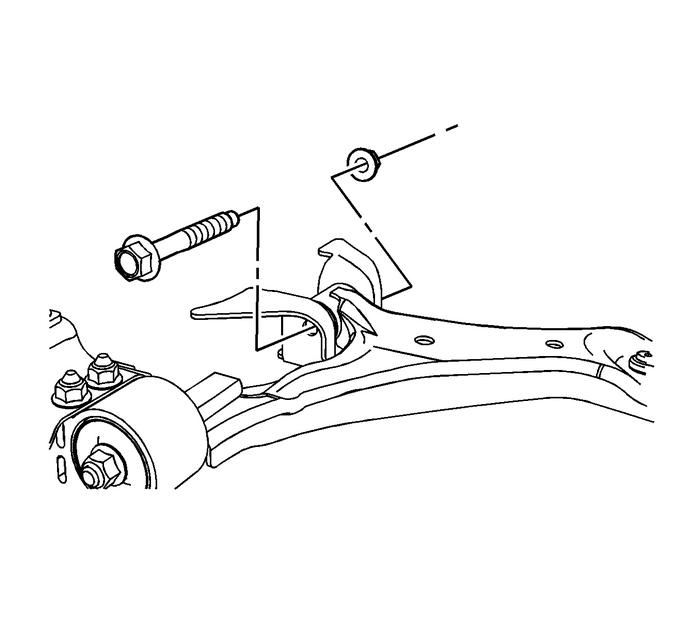
Remove the front lower control arm front nut and bolt. Discard the nut and bolt.

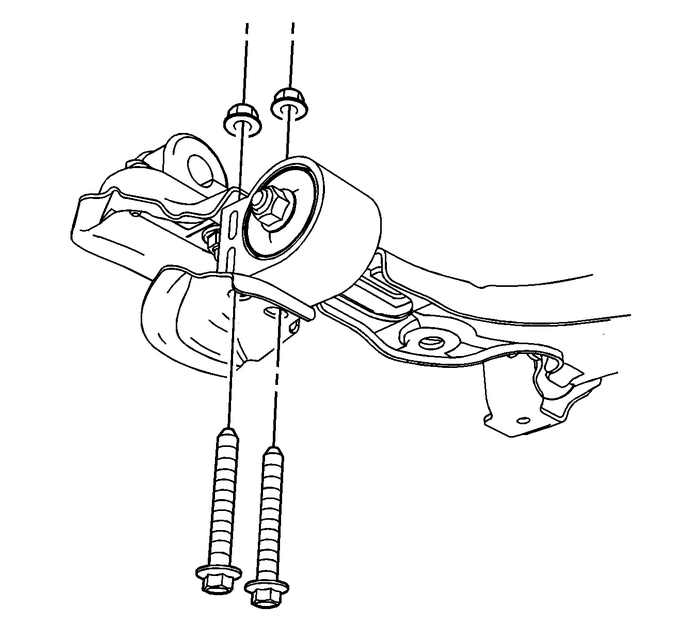
Remove the control arm-to-frame rear nuts and bolts. Discard the nuts and bolts.Remove the lower control arm from the vehicle.Installation ProcedurePosition the lower control arm on the vehicle.

Caution:Refer toFastener Caution.
Install NEW front lower control arm rear bolts and nuts and tighten to 70-Y (52-lb-ft).
Install a NEW front lower control arm front bolt and nut and tighten to 115-Y (85-lb-ft).

Connect the lower control arm ball joint to the steering knuckle.Install the front lower control arm ball stud nut and tighten to 10-Y (89-lb-in)-+-165-degrees.

Note:
Do not loosen the front lower control arm ball stud nut when installing the cotterpin.The lower control arm ball joint cotter pin must not contact the wheel speed sensoror drive axle.Install the NEW lower control arm ball joint cotter pin.Install the tire and wheel assembly. Refer toTire and Wheel Removal and Installation.After repairs, verify the front wheel alignment and adjust if necessary. Refer toWheel Alignment Measurement. Knuckle Replacement Knuckles
Special Tools J 37043 Park Brake Cable Release ToolRemoval ProcedureRaise and support the vehicle. Refer toLifting and Jacking the Vehicle.Remove the tire and wheel. Refer toTire and Wheel Removal and ...
 Strut, Strut Component, or Spring Replacement Strut Assembly
Special ToolsJ 42991 Strut Rod Nut SocketJ 45400 Strut Spring CompressorRemoval ProcedureInstall the strut assembly in the J 45400 strut spring compressor using the following procedure.Adjust the lowe ...
Other materials:
Driveline Working Angles Measurement
Special ToolsJ-23498-ADriveshaft Inclinometer, or equivalentJ-23498-20Driveshaft Inclinometer Adapter, or equivalentNote:This measurement procedure is intended to measure U-jointsworking angles only, not constant velocity (CV) joint or couplerassembly working angles.Note:This procedure is intended t ...
