Chevrolet Equinox Service Manual: Intake Manifold Installation Intake and Forced Induction Intake Manifold
Special Tools
EN-48896 HP Fuel Pump Installation Alignment Gauge
For equivalent regional tools, refer toSpecial Tools.
Caution:Refer toFastener Caution.
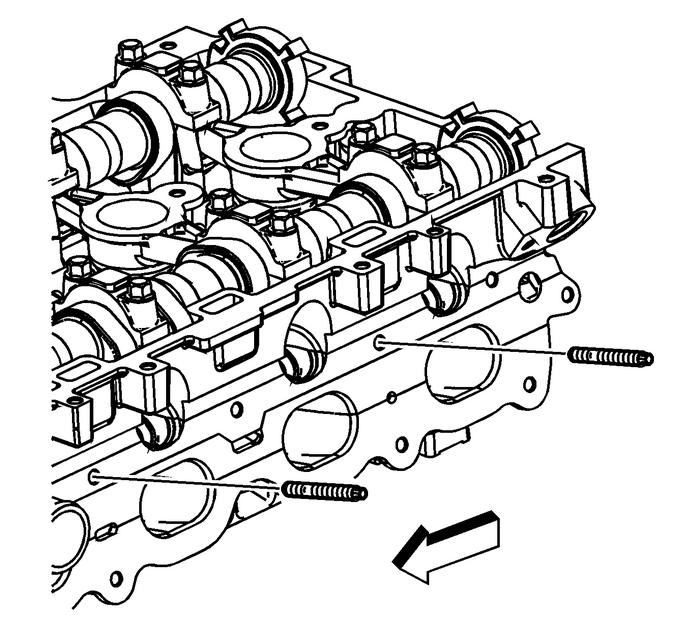
Install the intake manifold studs in the manifold face and tighten to 15-Y (11-lb-ft).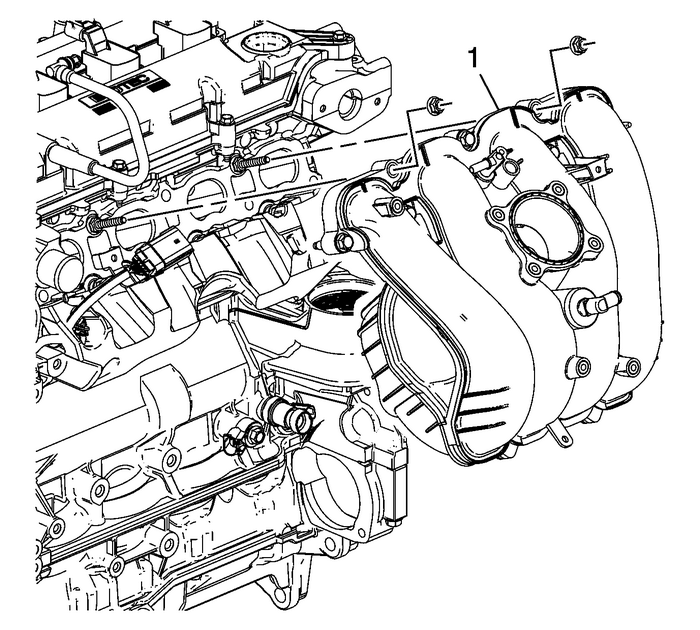
Install the intake manifold-(1). Start and hand tighten the intake manifold boltsand nuts.
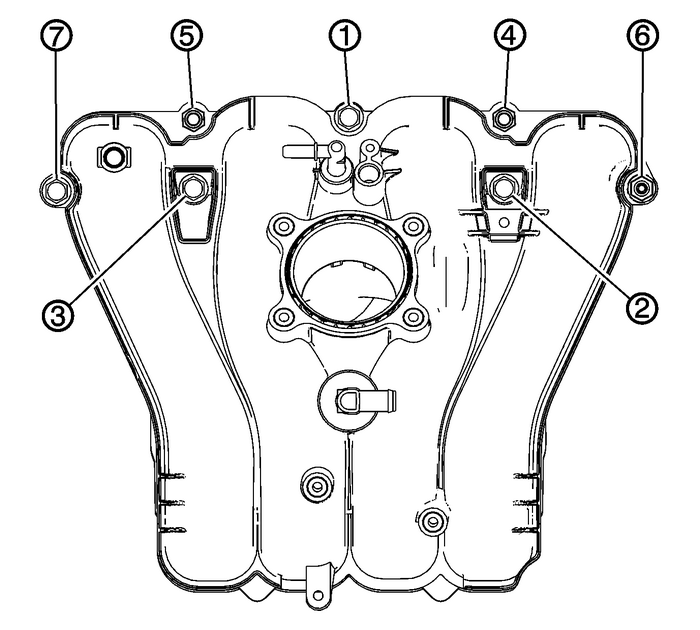
Tighten the bolts and nuts in sequence to 25-Y (18-lb-ft).
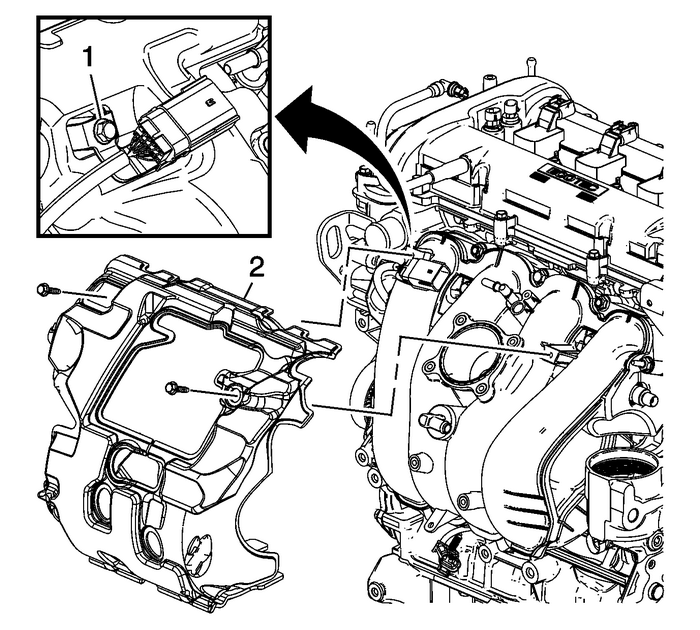
Install the intake manifold insulator-(2).Install the insulator bolt and tighten to 10-Y (89-lb-in).Install the fuel rail harness connector bracket-(1) to the intake manifold. Tightenthe bracket bolt to 10-Y (89-lb-in).
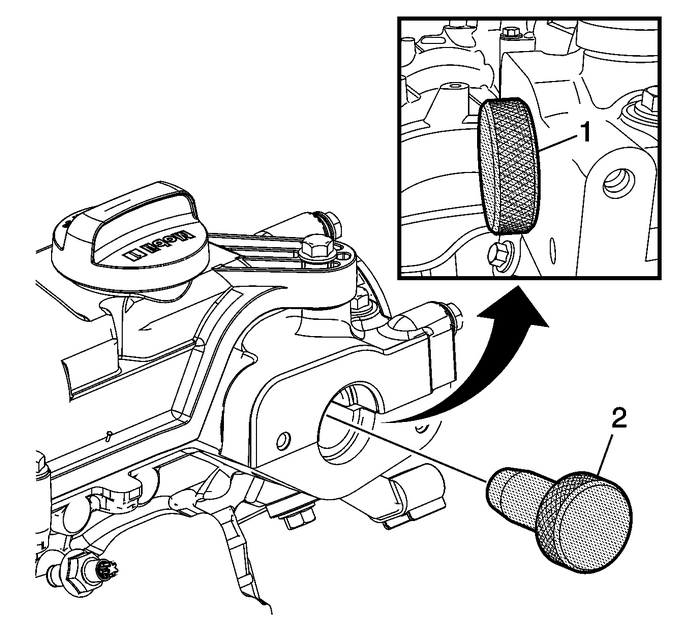
Note:The camshaft must be in the base circle position before the high pressure fuel pumpis installed.
Use the EN-48896 alignment gauge-(2) to ensure that the camshaft lobe is in the base circle position. At base circleposition, the tool will be flush with the head-(1).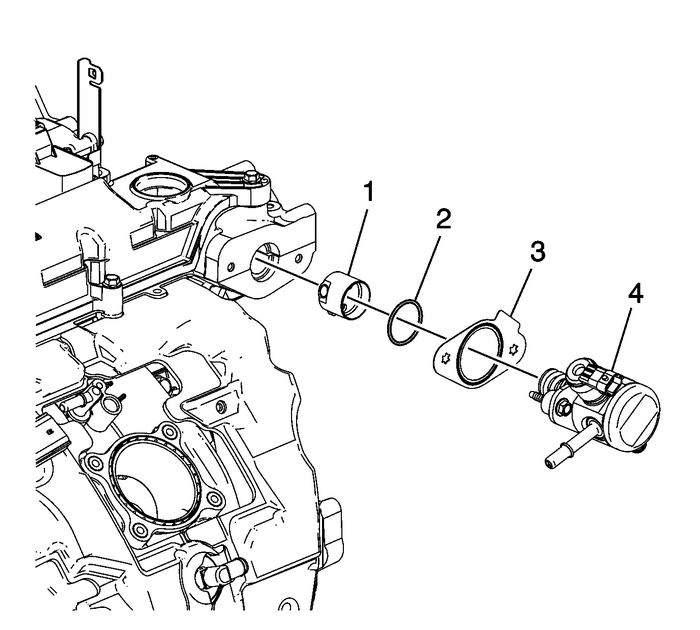
Lubricate the high pressure fuel pump cylinder head bore with 5W30 engine oil.
Note:Ensure that the high pressure fuel pump roller lifter is oriented properly, the camshaftis at base circle, and the number-1 piston is at top dead center-(TDC) on the exhauststroke. The distance from the mounting flange surface to the camshaft at base circleshould be 52-mm (2.05-in).
Lubricate the high pressure fuel pump roller lifter-(1) with 5W30 engine oil and installinto the cylinder head bore.Install a NEW fuel pump housing O-ring-(2) and gasket-(3).Note:Ensure the plastic bolt retainers are installed in the high pressure fuel pump mountingholes before installing.
Install the fuel pump assembly-(4).Start and hand-tighten the fuel pump assembly bolts evenly. Tighten the fuel pumpbolts evenly to 15-Y (11-lb-ft).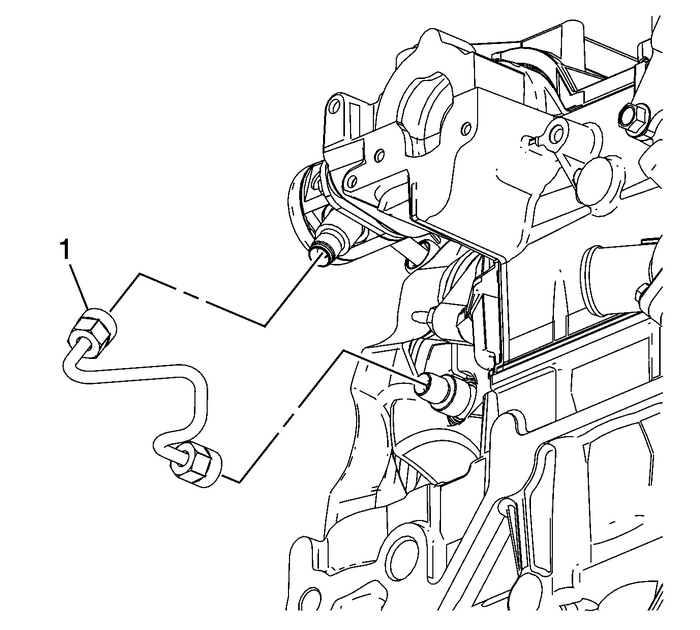
Install and hand-tighten both ends of the NEW high pressure fuel line-(1). Tightenthe high pressure fuel line fitting nuts to 30-Y (22-lb-ft).
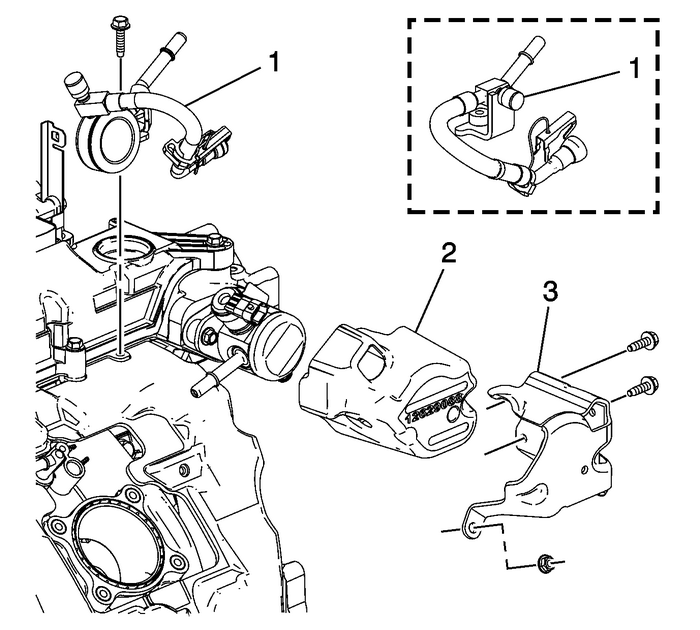
Install the fuel pump insulator-(2).
Note:The low pressure fuel pipe used is model dependent.
Install the low pressure fuel pipe assembly-(1).Install the fuel pump cover-(3) and nut. Tighten the nut to 10-Y (89-lb-in).Install the fuel pump cover bolts. Tighten the bolts to 10-Y (89-lb-in).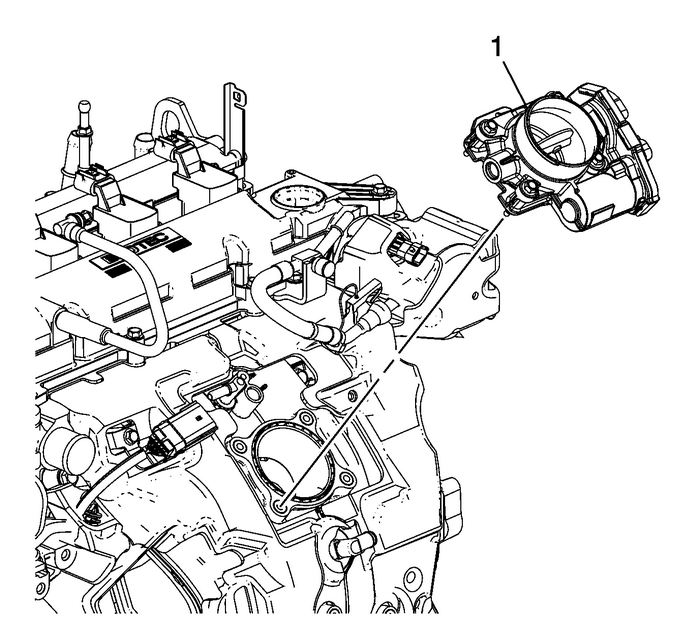
Install a new throttle body gasket.Install the throttle body-(1).Install the throttle body bolts and tighten to 10-Y (89-lb-in).
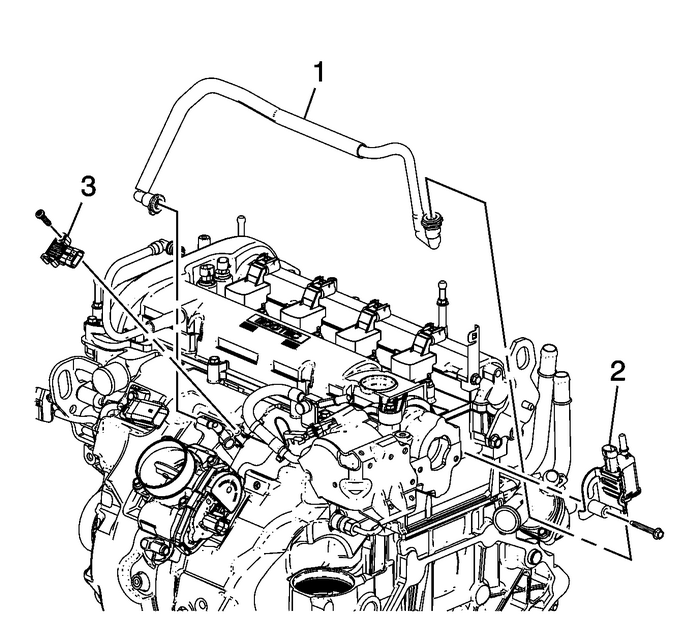
Install the MAP sensor-(3). Tighten the sensor bolt to 4-Y (35-lb-in).Install the EVAP canister valve-(2) and tighten to 25-Y (18-lb-ft).Install the EVAP canister valve tube-(1).
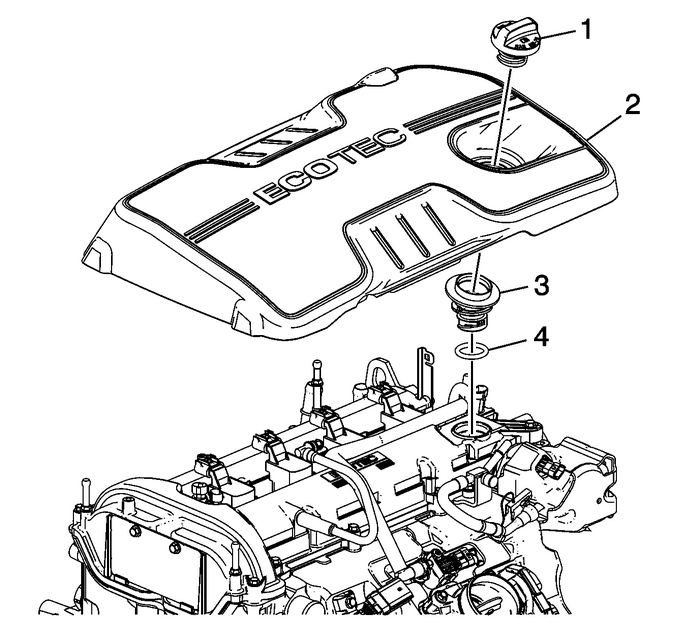
Install the O-ring and oil fill tube assembly-(3).Install the intake manifold cover-(2) onto the camshaft cover ball studs.Install the oil fill cap-(1).
 Crankshaft Sprocket Installation Engine Block Cylinder Block Crankshaft Sprocket
Special ToolsEN-48589Crankshaft Rotation SocketFor equivalent regional tools, refer toSpecial Tools.Ensure the crankshaft sprocket is installed with the timingmark-(1) visible.Install the crankshaft s ...
 Fuel Pump Installation Fuel System Fuel Pumps
Special Tools EN 48896 HP Fuel Pump Installation Alignment GaugeFor equivalent regional tools, refer toSpecial Tools.Note:The camshaft must be in the base circle position before the high pressure fuel ...
Other materials:
Rear Tow Eye
If the vehicle is equipped with a
hitch, there is no provision to use
the tow eye in the rear of the
vehicle. The hitch may be used to
load the vehicle onto a flat bed tow
truck.
If equipped, carefully open the cover
by using the small notch that
conceals the rear tow eye socket.
In ...
