Chevrolet Equinox Service Manual: Front and Rear Side Door Outside Handle Package Installation Moldings
Installation Instructions Part Number
15929604
4 | Outside Door Handle |
1 | Keyed Cap |
3 | Keyless Cap |
1 | Installation Instructions |

Open the door, remove the access plug located in the upperinner door.
Note:Do not remove the screw retaining the lock cylindercap.
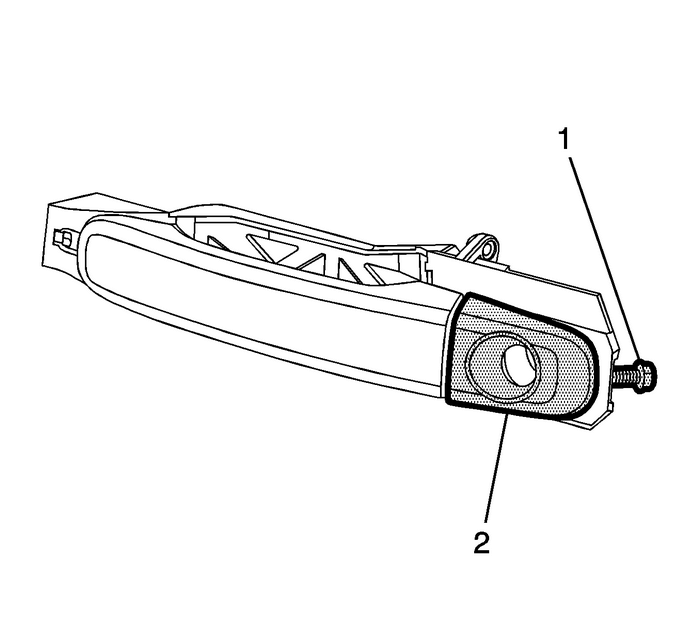
Insert a TORX #25 driver through the access hole to loosenthe screw-(1) retaining the lock cylindercap-(2).
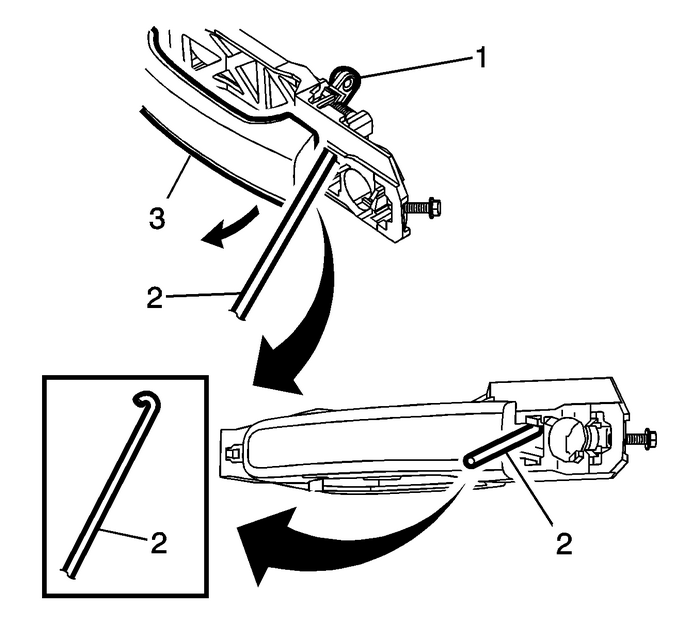
Note:Prior to removing the door outside handle, pull the outsidehandle part way open in order to see the bell crank lever. The bellcrank lever is spring loaded to keep the handle closed.
Insert an appropriate hook tool-(2) through thehandle-(3) opening to hold the bell cranklever-(1) fixed with the handle in ‘partialopen’ position.
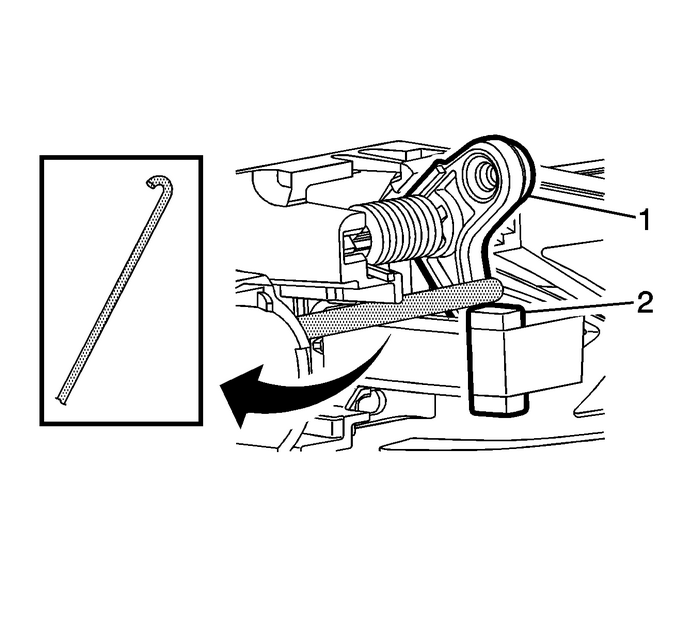
Note:Use care not to break the bell crank when removing it fromthe handle housing.
With the bell crank-(1) in the partial openposition, push the handle closed to relieve the spring pressure andpush the handle-(2) rearward to clear the bell cranklever-(1).
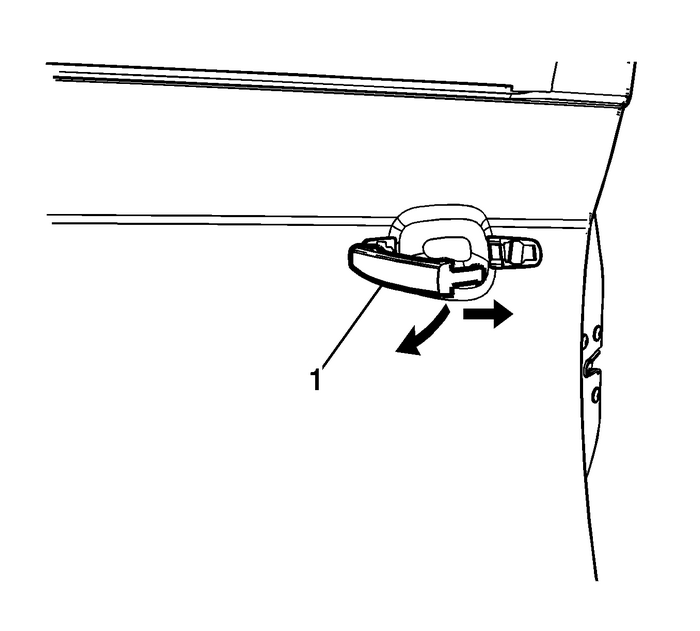
Pull the outside door handle-(1) rearward torelease the outside door handle from the handle housing.Installation Procedure

Insert the outside door handle-(1) to the handlehousing.Slide the outside door handle back and forth to ensurefit.Install the lock cylinder cap to the door.

Caution:Use the correct fastener in the correct location. Replacementfasteners must be the correct part number for that application.Fasteners requiring replacement or fasteners requiring the use ofthread locking compound or sealant are identified in the serviceprocedure. Do not use paints, lubricants, or corrosion inhibitorson fasteners or fastener joint surfaces unless specified. Thesecoatings affect fastener torque and joint clamping force and maydamage the fastener. Use the correct tightening sequence andspecifications when installing fasteners in order to avoid damageto parts and systems.
Insert a TORX #25 driver through the access hole to installthe screw-(1) retaining the lock cylindercap-(2), tighten the screw to5-Y(44-lb-in)Install the access plug located in the upper innerdoor.Inspect the door for proper operation. Rear Bumper Fascia Bumper Guard Pad Replacement Bumpers Rear Bumper
i!\-Rear Bumper Fascia Bumper Guard Pad ReplacementCalloutComponent NameProcedureRemove the rear bumper energy absorber. Refer toRear Bumper Energy Absorber Replacement.1Rear Bumper Fascia Bumper Guar ...
 Front Fender Mud Flap Package Installation Moldings
Installation Instructions Part Number19171148Note:Please read instructions thoroughly before starting.Front Fender Mud Flap Kit ContentsItem No.QtyDescription11Left Hand Mud Flap21Right Hand Mud Flap3 ...
Other materials:
Rear Wheel Speed Sensor Replacement Sensors Wheel Speed Sensors
Rear Wheel Speed Sensor ReplacementCalloutComponent NameWarning:Refer toBrake Dust Warning.Preliminary ProceduresRaise and support the vehicle. Refer toLifting and Jacking the Vehicle.Remove the tire and wheel. Refer toTire and Wheel Removal and Installation.Remove the park brake shoes. Refer toPark ...
