Chevrolet Equinox Service Manual: Crankshaft and Bearing Cleaning and Inspection Engine Block Cylinder Block Crankshaft
Cleaning ProcedureClean the following components in solvent:Crankshaft bearingsConnecting rod bearingsCrankshaft journalsCrankpin journalsCrankshaft oil passagesCrankshaft threaded holes
Warning:Refer toSafety Glasses Warning.
Dry the following components with compressed air:Crankshaft bearingsConnecting rod bearingsCrankshaft journalsCrankpin journalsCrankshaft oil passagesCrankshaft threaded holesVisual Inspection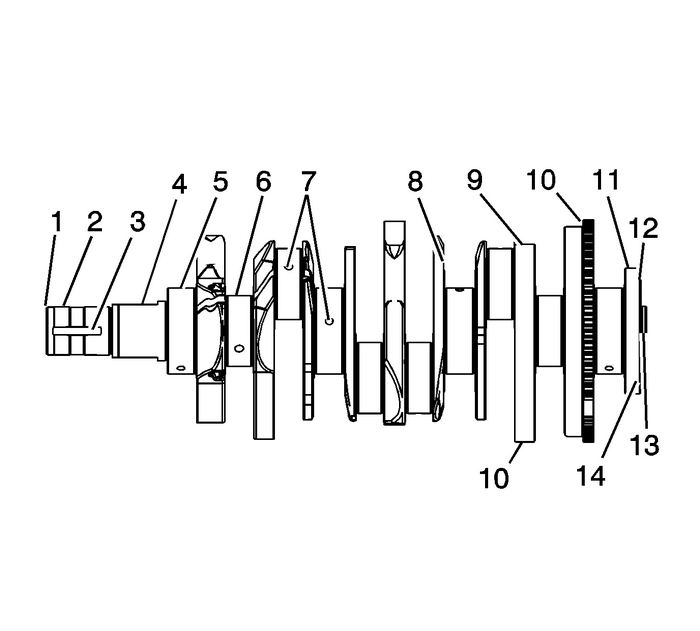
Perform the following visual inspections:Inspect the crankshaft balancer bolt hole-(1) forthread damage.Inspect the crankshaft balancer mounting area-(2)for damage.Inspect the crankshaft keyway-(3) fordamage.Inspect the oil pump drive flats-(4) fordamage.Inspect the crankshaft main journals-(5) fordamage.Inspect the crankshaft connecting rod journals-(6)for damage.Inspect the crankshaft oil passages-(7) forobstructions.Inspect the crankshaft main bearing thrust wallsurfaces-(8) for damage.Inspect the crankshaft counterweights-(9) fordamage.Inspect the crankshaft reluctor ring teeth-(10)for damage.Inspect the crankshaft rear main oil sealsurface-(11) for damage.Inspect the crankshaft engine flywheel mountingsurface-(12) for damage.Inspect the crankshaft pilot hole-(13) fordamage.Inspect the crankshaft engine flywheel boltholes-(14) for thread damage.Repair or replace the crankshaft as necessary.Crankshaft Bearing Inspection

Note:
All connecting rod and main journal bearings that have beenused in a running engine must be replaced. Never re-usethe crankshaft or connecting rod bearings.The following bearing wear conditions should be used todiagnose engine operating conditions or root cause of acondition.Inspect for fatigue indicated by craters or pockets.Flattened sections on the bearing halves also indicatefatigue.
Inspect for excessive scoring or discoloration on both frontand back of the bearing halves.Inspect the main bearings for dirt embedded into the bearingmaterial.

Inspect for improper seating indicated by bright, polishedsections.Crankshaft Measurement
Special Tools
GE 7872Magnetic Base Dial Indicator
For equivalent regional tools, refer toSpecial Tools
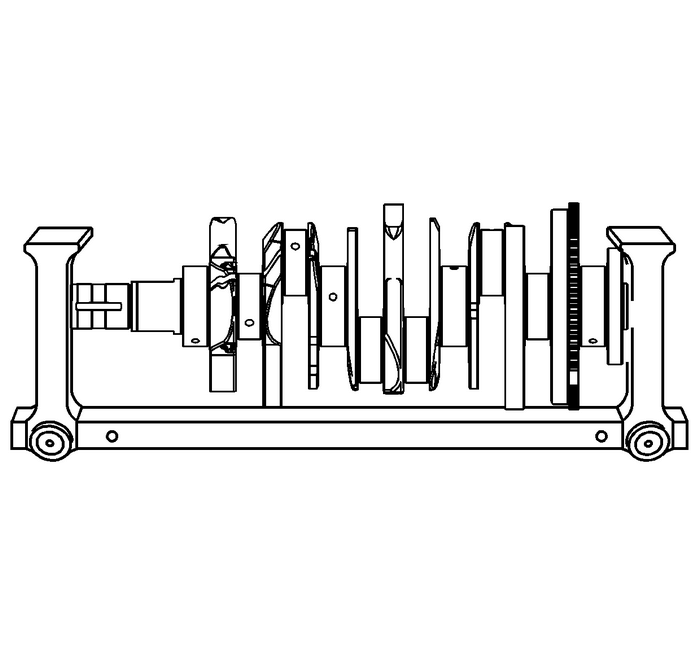
Using a suitable fixture, support the crankshaft.
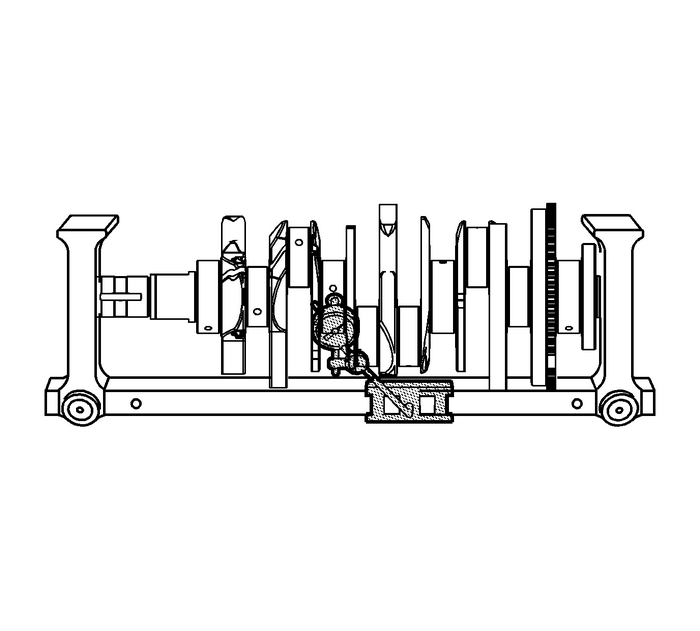
Install theGE 7872indicator.Measure the crankshaft runout using theGE 7872indicator. Refer toEngine Mechanical Specifications.
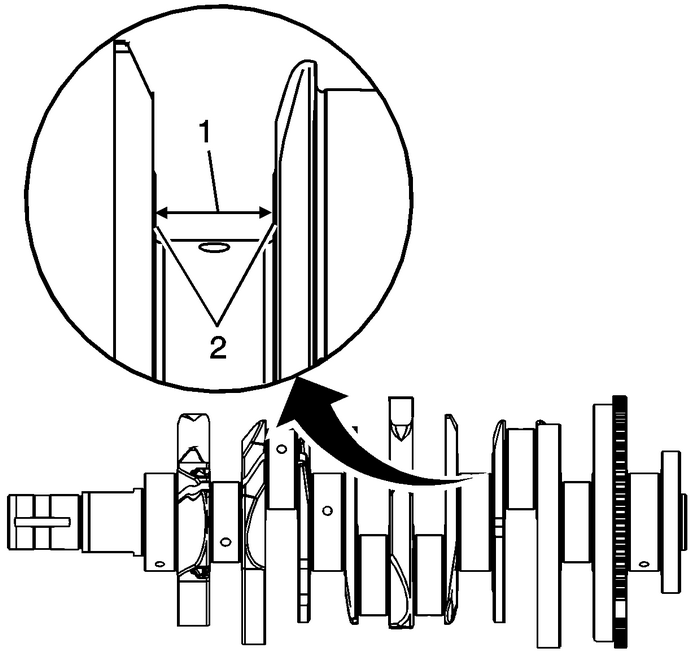
Measure the crankshaft thrust wall width-(1) forwear using an inside micrometer. Refer toEngine Mechanical Specifications.Measure the crankshaft thrust wall surface-(2) forrunout using theGE 7872indicator. Refer toEngine Mechanical Specifications.If the crankshaft journals are damaged or worn beyondspecifications, the crankshaft may be ground 0.25-mm(0.010-in). There is only 1-size of oversizedmain bearings available for service.
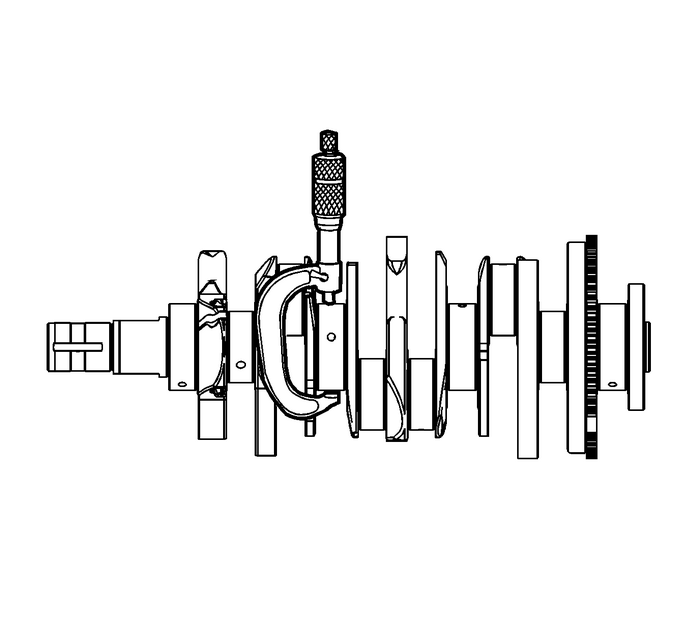
Inspect the crankshaft main journals for undersize, using anoutside micrometer.
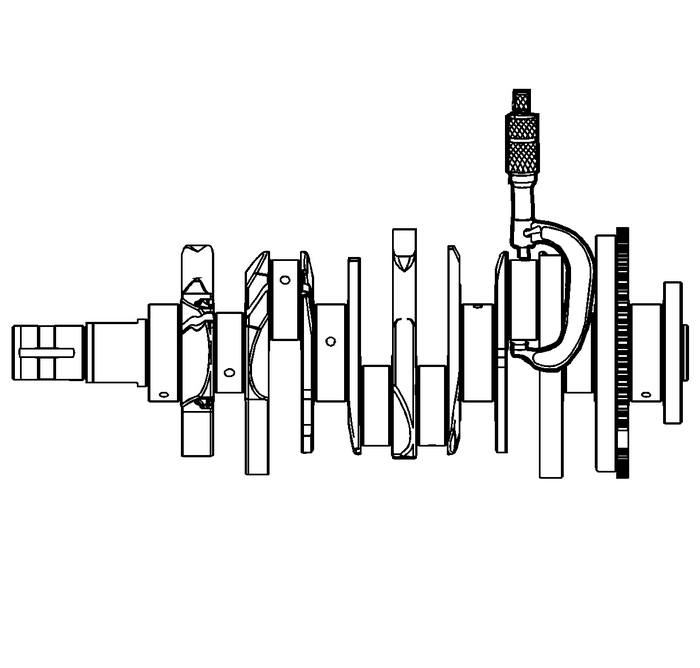
Inspect the crankpins for undersize using an outsidemicrometer.Compare your measurements with those listed in theEngine Mechanical Specifications. If the crankpin journalsare worn beyond the specifications, the crankshaft may be ground0.25-mm (0.010-in). There is only1-size of oversized connecting rod bearings availablefor service.
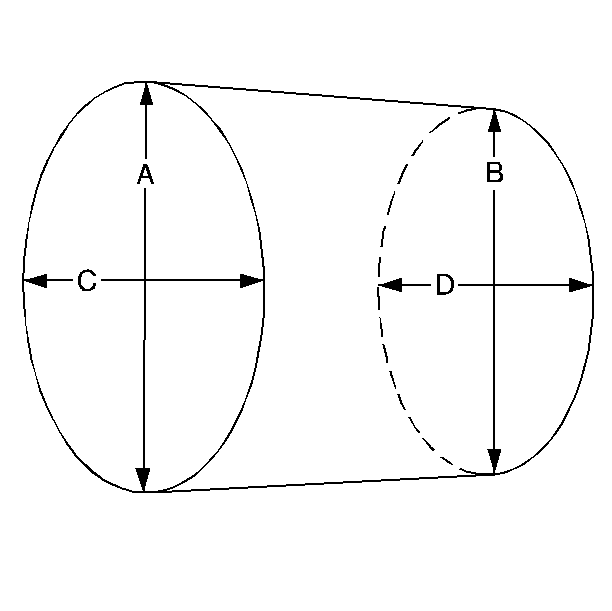
Measure the main bearing and crankpin journals forout-of-round using the followingprocedure:Using an outside micrometer, measure the journal at theextreme front and rear locations on the journal. Call these pointsA and B.Measure the journal in 2-new locations exactly90-degrees from the first points. Call these points Cand D.Subtract A from C and B from D. The differences will indicatejournal out-of-round.The out-of-round should not exceed0.004-mm (0.00016-in) maximum.If the journals are worn beyond the specifications, thecrankshaft may be ground 0.25-mm (0.010-in).There is only 1-size of oversized crankshaft andconnecting rod bearings available for service.Measure the main bearing and crankpin journals for taperusing the following procedure:Using an outside micrometer, measure the journal at theextreme front-(A) and rear-(B) of the journalparallel to the crankshaft centerline.Subtract the smallest from the largest measurement. Theresult will be the journal taper.If the main bearing journal taper exceeds 0.004-mm(0.00016-in), replace the crankshaft.If the journals are worn beyond the specifications, thecrankshaft may be ground 0.25-mm (0.010-in).There is only 1-size of oversized crankshaft andconnecting rod bearings available for service.
 Crankshaft Balancer Cleaning and Inspection Engine Block Cylinder Block Crankshaft
Cleaning ProcedureClean the crankshaft balancer in solvent that is compatiblewith the rubber-(1).Warning:Refer toSafety Glasses Warning.Dry the crankshaft balancer with compressed air.Inspection Proce ...
 Oil Filter Adapter Cleaning and Inspection Engine Lubrication Oil Filter
Cleaning ProcedureClean the oil filter adapter components withnon-corrosive solvent.Warning:Refer toSafety Glasses Warning.Dry the oil filter adapter components with compressedair.Inspection Procedure ...
Other materials:
Inflatable Restraint Passenger Presence System Scan Tool Information
Passenger Presence Module Scan Tool Data ParametersParameterExpected ValueDefinition Operating Conditions: Ignition ONBase Model Part NumberVaries, 8 Digit NumberThe scan tool displays the part number of the PPS module which is stored in non volatilememory.Battery VoltageVoltsThe scan tool will disp ...
