Chevrolet Equinox Service Manual: Crankshaft and Bearing Cleaning and Inspection Engine Block Cylinder Block Crankshaft
Special Tools
GE-7872Magnetic Base Dial Indicator Set
For equivalent regional tools, refer toSpecial Tools.
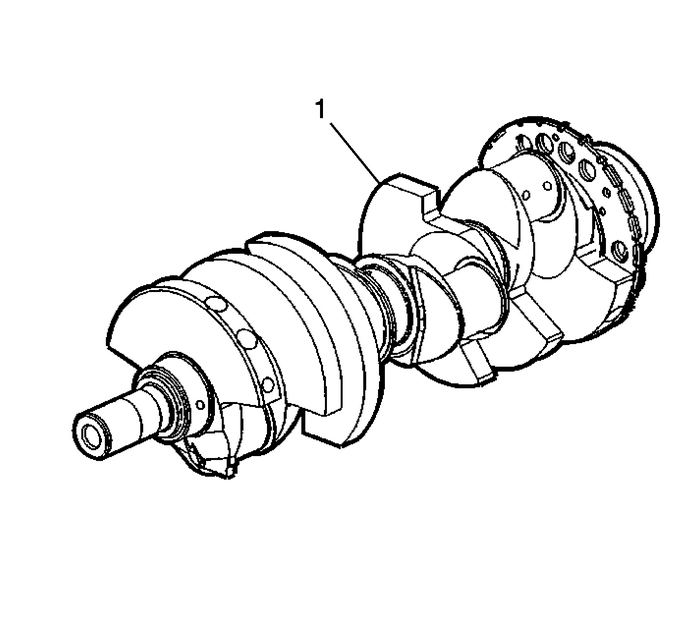
Note:Use care when handling the crankshaft. Avoid damage to thebearing surfaces or the lobes of the crankshaft position reluctorring. Damage to the teeth of the crankshaft position reluctor ringmay affect on-board diagnostic-(OBD)-IIsystem performance.
Clean the crankshaft-(1) with solvent.Thoroughly clean all oil passages and inspect forrestrictions or burrs.Warning:Refer toSafety Glasses Warning.
Dry the crankshaft with compressed air.Note:Reluctor ring teeth should not have imperfections on therising or falling edges.
Imperfections of the reluctor ring teeth may effect OBD IIsystem performance.
Perform a visual inspection of the crankshaft fordamage.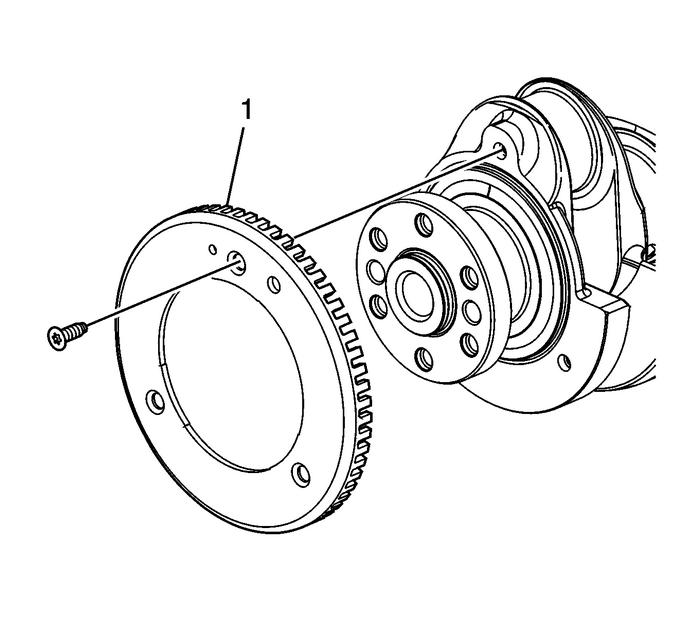
The crankshaft position reluctor ring-(1) may bereplaced if damaged. Tighten the crankshaft position reluctor ringbolts to15-Y(11-lb-ft).
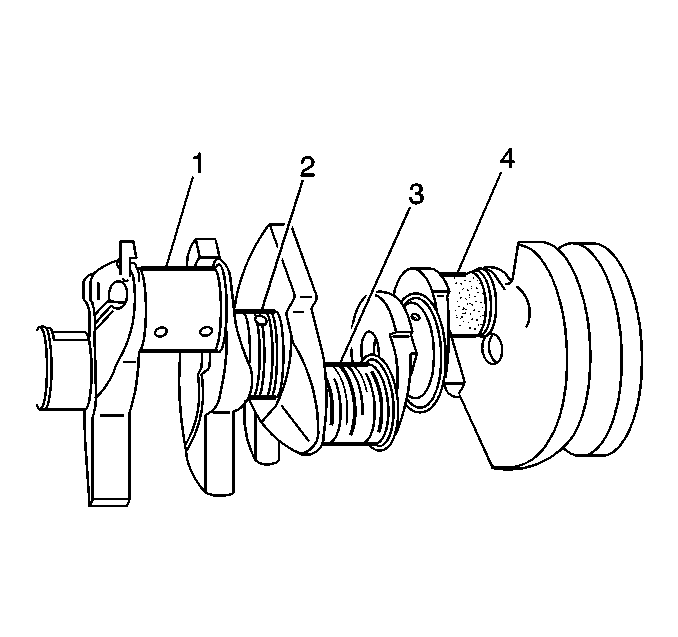
Inspect the crankshaft journals for wear-(1). Thejournals should be smooth, with no signs of scoring, wear, ordamage.Inspect the crankshaft journals for grooves orscoring-(2).Inspect the crankshaft journals for scratches orwear-(3).Inspect the crankshaft journals for pitting or imbeddedbearing material-(4).
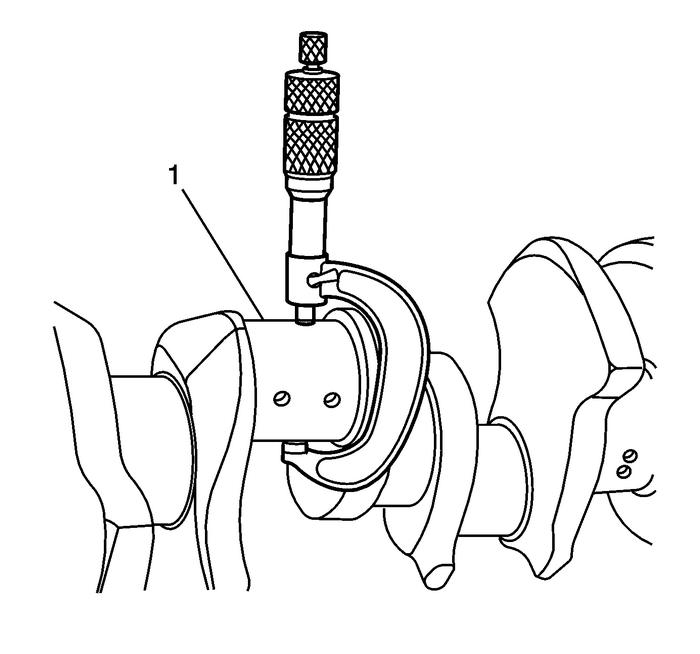
Measure the crankshaft journals-(1) forout-of-round.Measure the crankshaft journals for taper.
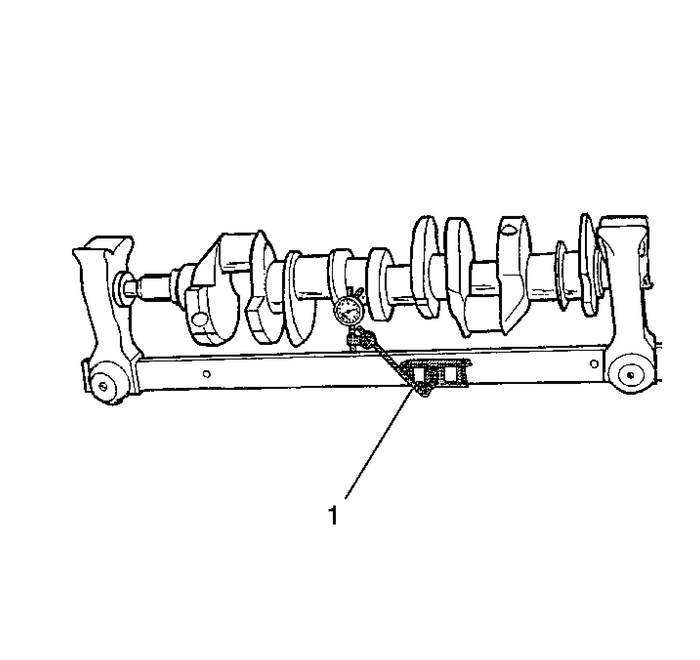
Measure the crankshaft runout.
Using wooden V-blocks, support the crankshaft onthe front and rear journals.
Use theGE-7872indicator-(1) in order to measure the crankshaft runoutat the front and rear intermediate journals.Use theGE-7872indicatorin order to measure the runout of the crankshaft rearflange.Replace the crankshaft if the measurements are not withinspecifications.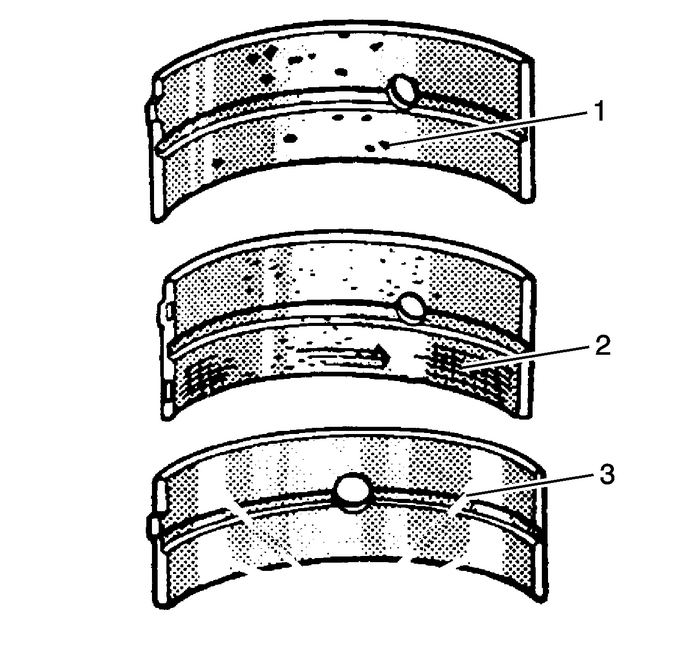
Note:Crankshaft bearings MUST be separated, marked, or organizedin a way to ensure installation to their original location andposition, when suitable for use.
Inspect crankshaft bearings for craters orpockets-(1). Flattened sections on the bearing halvesalso indicate fatigue.Inspect the crankshaft bearings for excessive scoring ordiscoloration-(2).Inspect the crankshaft bearings for dirt or debris imbeddedinto the bearing material.Inspect the crankshaft bearings for improper seatingindicated by bright, polished sections of thebearing-(3).If the lower half of the bearing is worn or damaged, bothupper and lower halves should be replaced.
Generally, if the lower half is suitable for use, the upperhalf should also be suitable for use.
 Camshaft Cleaning and Inspection Valvetrain Camshaft
Special ToolsGE 7872Magnetic Base Dial IndicatorFor equivalent regional tools, refer toSpecial Tools.Cleaning ProcedureClean the camshaft in solvent.Warning:Refer toSafety Glasses Warning.Dry the cams ...
 Cylinder Head Cleaning and Inspection Engine Block Cylinder Head
Special ToolsGE 8001Dial Indicator SetGE 8358Carbon Removal BrushEN 28410Gasket RemoverEN 42096Valve Guide ReamerEN 47909Injector Bore and Sleeve Cleaning KitFor equivalent regional tools, refer toSpe ...
Other materials:
Turning the Systems Off and On (Uplevel DIC)
Caution
Do not repeatedly brake or
accelerate heavily when TCS is
off. The vehicle driveline could be
damaged.
At speeds of 56 km/h (35 mph) or
above, this ability to turn off or on is
disabled.
TCS and StabiliTrak can be turned
off or on using the DIC controls as
fol ...
