Chevrolet Equinox Service Manual: Rear Axle Shaft Seal Replacement - Right Side Driveshafts Drive Halfshafts
Special Tools
J-44809Seal Installer
Removal ProcedureRaise and support the vehicle. Refer toLifting and Jacking the Vehicle.Drain the rear differential. Refer toDifferential Oil Replacement.Remove the exhaust system. Refer toExhaust Muffler Replacement.Remove the spare tire.Important:In the following service procedure, it is not necessary tocompletely remove the propeller shaft. Relocate the propeller shaftto the side and secure with mechanics wire or equivalent.
Remove the propeller shaft. Refer toPropeller Shaft Replacement.Remove the right rear wheel drive shaft. Refer toRear Wheel Drive Shaft Replacement.Support rear differential with a transmission jackstand.
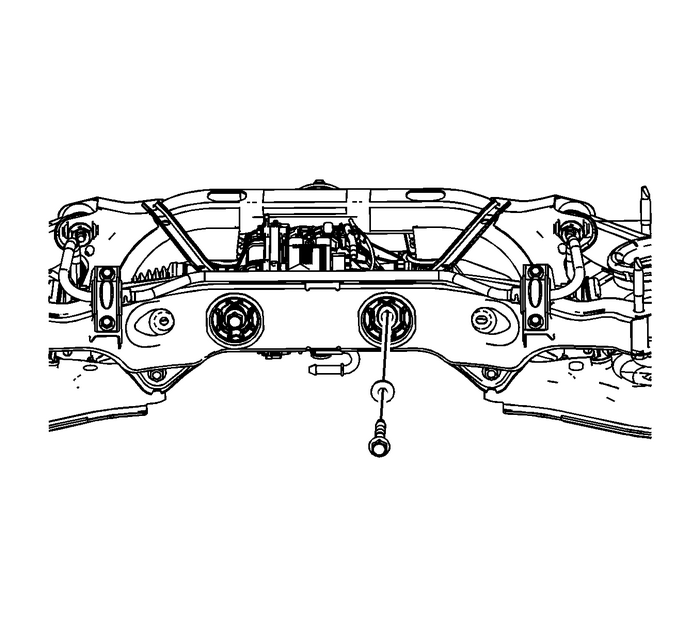
Remove the right rear differential support bushing bolt.Refer toDifferential Housing Support Bushing Replacement.

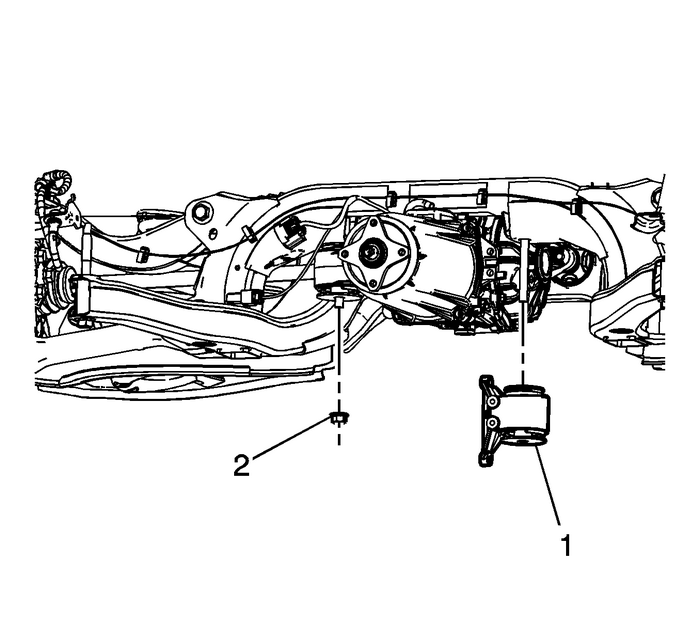
Remove the left differential mount-(1).Remove the right differential support bushingnut-(2). Refer toDifferential Housing Support Bushing Replacement.Lower the differential to gain access to the axle shaftseal.

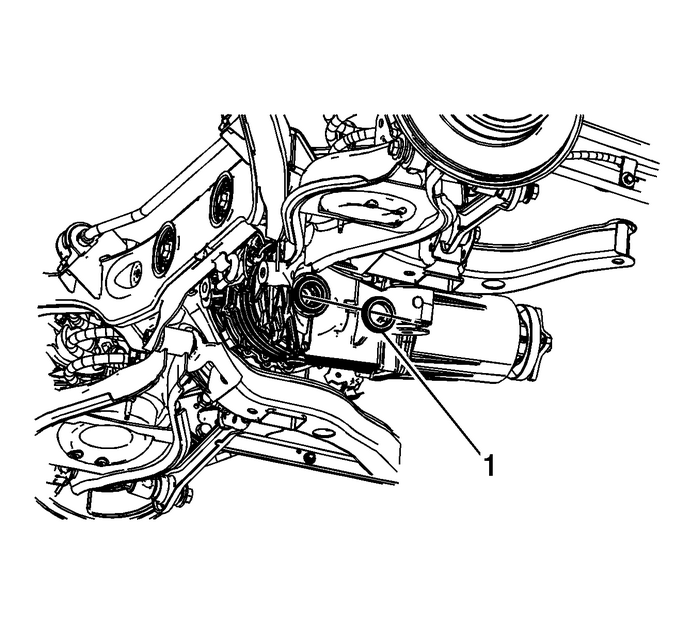
Using the appropriate tool, remove the axle shaftseal-(1).Installation Procedure

Using theJ-44809installer, install the axle shaft seal-(1).Lift and position the differential in the rear cradle.

Install the left rear support bolt.

Install right differential support bushingnut-(2). Refer toDifferential Housing Support Bushing Replacement.Install the left differential mount-(1). Refer toDifferential Housing Support Bushing Replacement.Remove the transmission jack stand.Install the right rear wheel drive shaft. Refer toRear Wheel Drive Shaft ReplacementInstall the propeller shaft. Refer toPropeller Shaft Replacement.Install the exhaust system. Refer toExhaust Muffler ReplacementRemove the spare tire.Fill the rear differential with fluid. Refer toDifferential Oil Replacement
 Transfer Case Output Flange Runout Measurement 4WD Transfer Case
Special ToolsGE-7872Magnetic Base Dial Indicator Set, or equivalentNote:This measurement procedure is intended to measuretransmission or transfer case output flange runout for systems witha constant v ...
 Driveline Working Angles Measurement
Special ToolsJ-23498-ADriveshaft Inclinometer, or equivalentJ-23498-20Driveshaft Inclinometer Adapter, or equivalentNote:This measurement procedure is intended to measure U-jointsworking angles only, ...
Other materials:
Fastener Tightening Specifications (Off Vehicle) Automatic Transmission Unit
Fastener Tightening SpecificationsApplication*Ref No.QuantitySizeSpecificationMetricEnglishA/Trans Case Cover Bolt1810M6x1.0x3012-Y106-lb-inA/Trans Fluid Pump Bolt13M6x1.0x2512-Y106-lb-inA/Trans Fluid Trough Bolt111M6x1.0x2512-Y106-lb-inControl Valve Body Assembly (Complete) Bolt19, 213M6x1.0x5512-Y ...
