Chevrolet Equinox Service Manual: Pinion Flange Runout Measurement
Special ToolsGE-8001Dial Indicator Set, or equivalentJ-23409Dial Indicator Extension, or equivalentJ-35819Flange Runout Gauge
For equivalent regional tools, refer toSpecial Tools and Equipment.
Note:This measurement procedure is intended to measure drive axlepinion flanges with 1-piece U-joint yokes only, not bolt-onyokes.
If equipped with a system balanced flange, use the followingprocedure, System Balanced Flange. If equipped with a non-systembalanced flange, use the second procedure, Non-System BalancedFlange.
System Balanced Flange
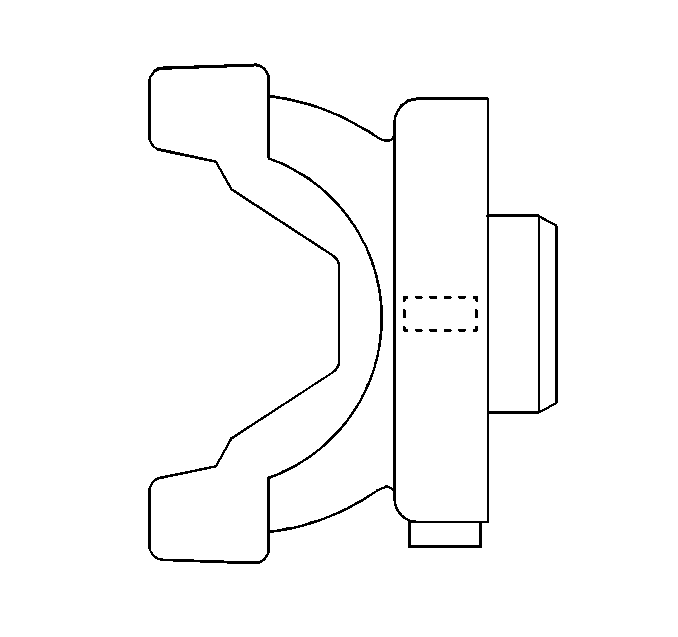
System balanced drive axles utilize a deflector design on thepinion flange, that is able to hold system balance weights on itsoutside diameter.
Raise and support the vehicle, with the wheels free torotate. Refer toLifting and Jacking the Vehicle.Remove the propeller shaft from the pinion flange.
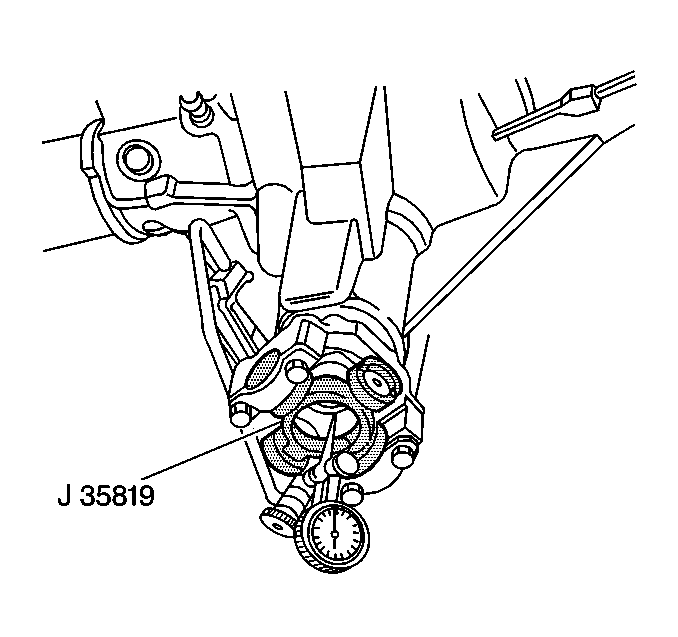
Install theJ-35819Flange Runout Gaugeto the pinion flange.Assemble and install theGE-8001Dial Indicator Setand theJ-23409Dial Indicator Extensionto the drive axle and to theJ-35819Flange Runout Gauge.
Note:The dial indicator will display inverted readings. You aremeasuring the inside diameter of the flange, not the outsidediameter. The highest reading on the dial indicator is the lowspot; the lowest reading is the high spot.
Rotate the pinion flange 360-degrees and zero thedial indicator on the low spot.Rotate the pinion flange again and record the totalrunout.Note:All runout measurement tolerances provided are to be used asguidelines. The measurement tolerances provided and their effect onvibration correction may vary for each vehicle.
If the system balanced pinion flange runout measurement isbetween 0.00–0.38-mm(0.00–0.015-in), the pinion flange isconsidered within acceptable runout limits.If the system balanced pinion flange runout measurementexceeds 0.00–0.38-mm(0.00–0.015-in), the pinion flange must bere-indexed 180-degrees or replaced.If the drive axle utilizes a crush-type sleeve to achievepinion bearing preload, the pinion flange can only be removed andinstalled 1-time before the crush-type sleeve must bereplaced. Sleeve replacement requires removal and installation ofthe ring and pinion gear set. If there is evidence that the pinionhas been removed and installed previously, replace thesleeve.
If the pinion flange has been re-indexed, re-measure thepinion flange runout.If the runout re-measurement of the re-indexed pinion flangestill exceeds the tolerance guidelines, the pinion flange requiresreplacement.Note:Inspect the runout of any replacement pinion flange.
If the pinion flange was replaced, check the runout of thereplacement pinion flange.Note:If the pinion flange was re-indexed or replaced, thedriveline MUST be system balanced.
If the pinion flange was re-indexed or replaced, systembalance the driveline. Refer toDriveline System Balance Adjustment.Non–System Balanced Flange
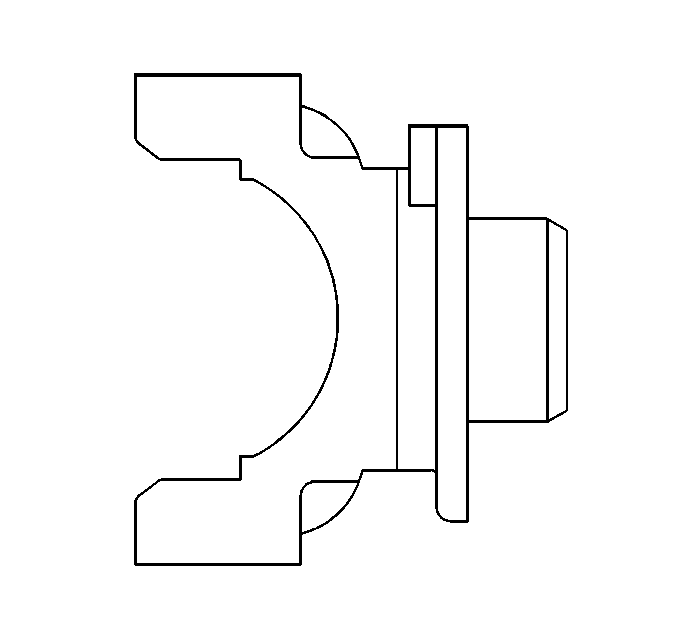
Drive axles that are non-system balanced use a pinion flangedust slinger design, that is able to hold a runout compensationweight on the face of the dust slinger.
Raise and support the vehicle, with the wheels free torotate. Refer toLifting and Jacking the Vehicle.Remove the propeller shaft from the pinion flange.
Install theJ-35819Flange Runout Gaugeto the pinion flange.Assemble and install theGE-8001Dial Indicator Setand theJ-23409Dial Indicator Extensionto the drive axle and to theJ-35819Flange Runout Gauge.
Note:The dial indicator will display inverted readings. You aremeasuring the inside diameter of the flange, not the outsidediameter. The highest reading on the dial indicator is the lowspot; the lowest reading is the high spot.
Rotate the pinion flange 360-degrees and zero thedial indicator on the low spot.Rotate the pinion flange again and record the totalrunout.Note:All runout measurement tolerances provided are to be used asguidelines. The measurement tolerances provided and their effect onvibration correction may vary for each vehicle.
If the pinion flange runout is 0.15-mm(0.006-in) or less, there should not be a runoutcompensation weight. If there is a compensation weight, remove theweight.If the pinion flange runout is greater than0.15-mm (0.006-in) but less than0.28-mm (0.011-in) and the runoutcompensation weight is at or near the low spot, no further actionis necessary. If the runout compensation weight is not at or nearthe low spot, remove the weight.If the pinion flange runout is greater than0.28-mm (0.011-in) but not greater than0.38-mm (0.015-in) and the runoutcompensation weight is at or near the low spot, no further actionis necessary. If the runout compensation weight is not at or nearthe low spot, remove the weight and re-index the pinion flangeuntil the runout is 0.25-mm (0.010-in) orless.If the drive axle utilizes a crush-type sleeve to achievepinion bearing preload, the pinion flange can only be removed andinstalled 1-time before the crush-type sleeve must bereplaced. Sleeve replacement requires removal and installation ofthe ring and pinion gear set. If there is evidence that the pinionhas been removed and installed previously, replace thesleeve.
If after re-indexing the pinion flange, it is not possible toachieve runout of 0.25-mm (0.010-in) or less,the pinion flange requires replacement.Note:Inspect the runout of any replacement pinion flange.
If the pinion flange was replaced, check the runout of thereplacement pinion flange. Torque Tube Input Flange Runout Measurement
Special ToolsGE-7872Magnetic Base Dial Indicator Set, or equivalentNote:This measurement procedure is intended to measure torque tuberunout for systems with a constant velocity (CV) joint, rubbercoupl ...
 Special Tools Ordering Information
Special ToolsThe special service tools shown in this service manual that have product numbers beginningwith J, BO, GE, CH, DT, EN, EL, SA, OR KM are available for worldwide distribution.US, Canada and ...
Other materials:
Liftgate Upper Weatherstrip Replacement Panels
Liftgate Upper Weatherstrip ReplacementCalloutComponent Name1Liftgate Upper WeatherstripProcedureClean the area where the liftgate upper weatherstrip will bemounted. Use a suitable solvent with a mixture to50-percent isopropyl alcohol and 50-percentwater by volume, or high-flash naptha.Apply thumb p ...
