Chevrolet Equinox Service Manual: Folded-Over Wire Repair
Special Tools
EL-38125-10 Splice Sleeve Crimping Tool
For equivalent regional tools, refer toSpecial Tools.
The GM global wire repair strategy uses connector assemblies (pigtails) and terminatedleads to repair wiring harnesses.
To reduce and manage GM Service Parts proliferation, the service pigtails and terminatedleads are designed with the largest wire gauge size that can be held by either theterminal or the connector housing.
The folded over wire repair technique, in which the copper wire strands are foldedover before being installed into a splice sleeve, allows the service part to be usedwhen repairing a smaller gauge size wire in a vehicle. This technique has passed allGM testing standards.
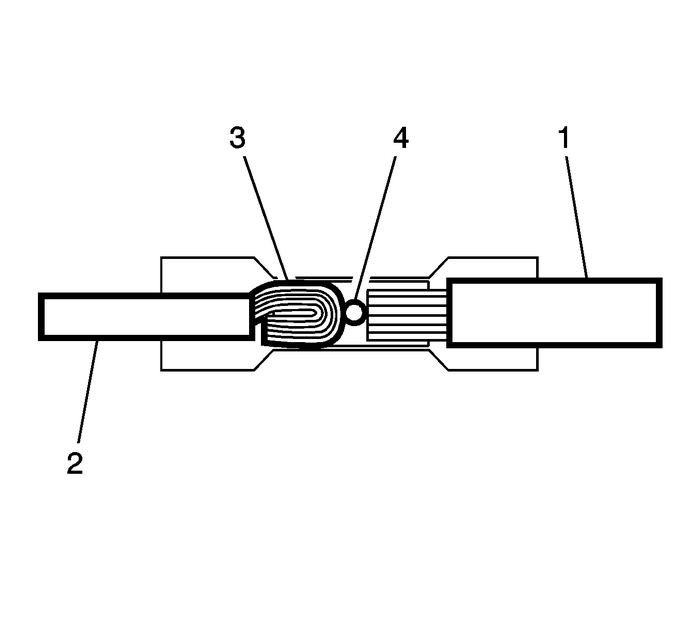
The larger harness size wires-(1) will be placed in one side of the splice sleeveand match the splice sleeve closely in size. The wires are moved into the splice sleeveuntil they hit the stop-(4) in the splice sleeve. The smaller harness size wires-(2)will be placed in the other side of the splice sleeve. The smaller harness size wireswill be folded over-(3) to match up with the splice sleeve size.
Use the folded over wire repair for:
Note:Increasing the amount of copper strands in the smaller gauge size will allow for abetter crimp
Splicing wires of 0.35-mm or less (22, 24, 26 gauge sizes)Note:Vehicle side needs to be of same or less gauge size (not greater than the servicepart’s gauge size)
Splicing wires of different gaugesUse the Service Information (SI) connector end-views to determine:
Gauge size of wiring harnessRecommended Repair: Terminated Lead or PigtailThe following table lists the acceptable variance within the gauge size
— | Salmon Color Splice Sleeve | Blue Color Splice Sleeve | Yellow Color Splice Sleeve | ||
Metric | — | 0.35-mm | 0.5–0.8-mm | 1.0–2.0-mm | 3.0–5.0-mm |
— | Wire Gauge (AWG) | 22 | 20–18 | 16–14 | 12–10 |
0.13-mm | 26 | Fold Over Wire | Fold Over Wire | Fold Over Wire | Not Acceptable |
0.22-mm | 24 | Fold Over Wire | Fold Over Wire | Fold Over Wire | Not Acceptable |
0.35-mm | 22 | Fold Over Wire | Fold Over Wire | Fold Over Wire | Not Acceptable |
0.5-mm | 20 | Not Acceptable | Wire to Wire | Fold Over Wire | Not Acceptable |
0.75-mm | — | Not Acceptable | Wire to Wire | Fold Over Wire | Not Acceptable |
0.8-mm | 18 | Not Acceptable | Wire to Wire | Fold Over Wire | Not Acceptable |
1.0-mm | 16 | Not Acceptable | Wire to Wire | Fold Over Wire | Not Acceptable |
1.5-mm | — | Not Acceptable | Not Acceptable | Wire to Wire | Fold Over Wire |
2.0-mm | 14 | Not Acceptable | Not Acceptable | Wire to Wire | Fold Over Wire |
2.5-mm | — | Not Acceptable | Not Acceptable | Wire to Wire | Fold Over Wire |
3.0-5.0-mm | 12–10 | Not Acceptable | Not Acceptable | Not Acceptable | Wire to Wire |
Example
For an IP Harness of 0.22-mm (24-gauge on left side of table) wire size, the SI connectorend-view recommends a pigtail with leads of 0.8-mm (18 gauge on the top of the table)with a salmon colored DuraSeal splice sleeve of 0.5–1.0-mm (20–16 gauge).
Follow these steps to use the folded over wire (1) technique on an IP Harness.
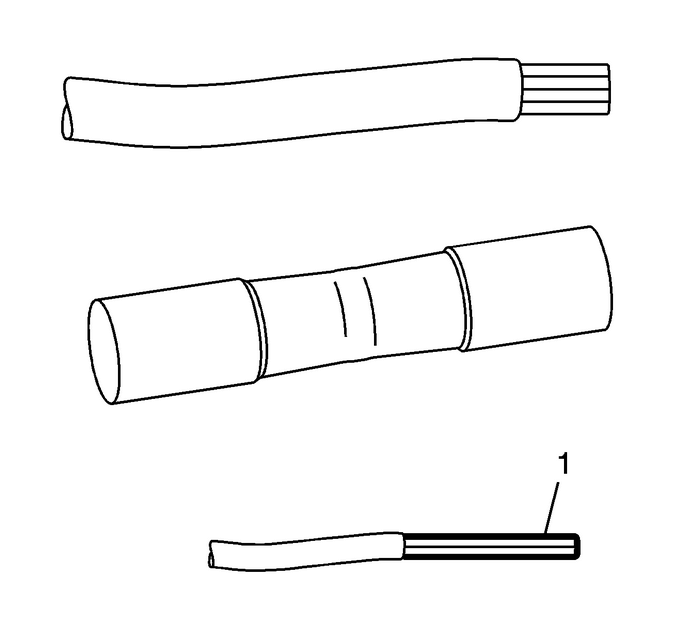
Strip twice the amount of insulation on the smaller (1) wire (IP Harness is the lowerwire) than normally required. Normally, the terminated leads have 5-mm of insulationstripped off the wire.
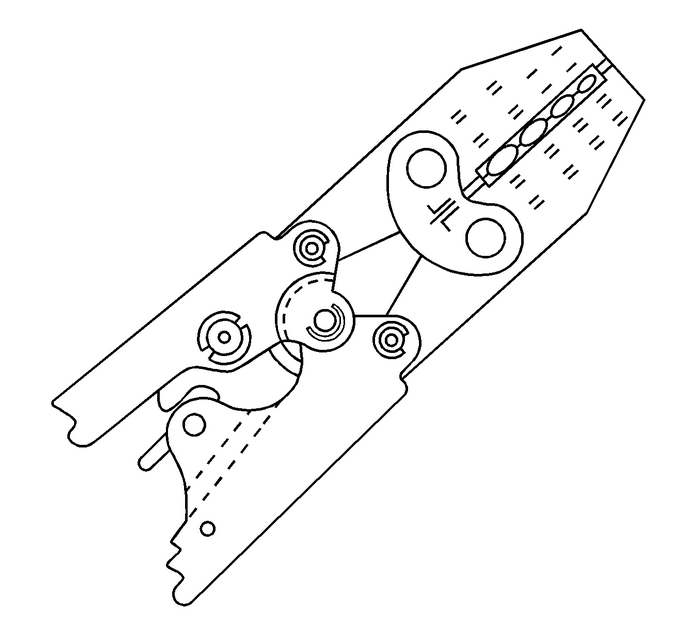
Note:Use EL-38125-10 splice sleeve crimping tool.
For wiring repair, refer toSplicing Copper Wire Using Splice Sleeves.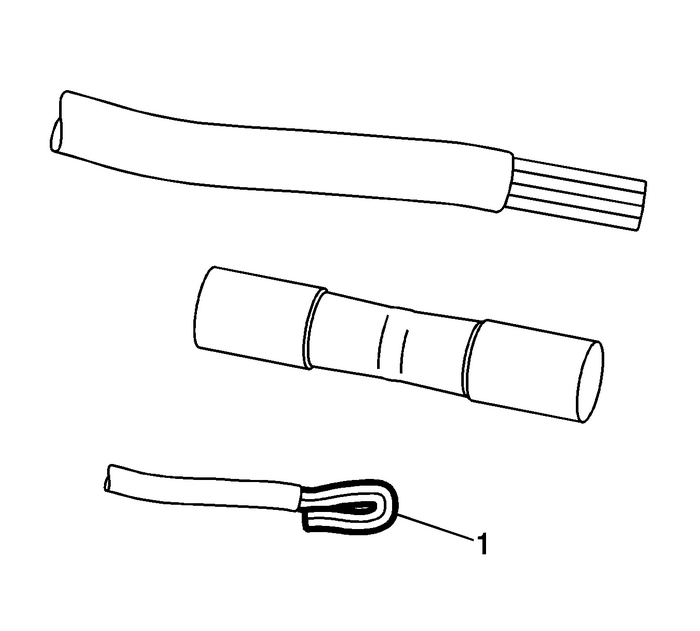
Twist the wires before you fold them over to prevent the wire strands from openingup. Fold over the copper wire strands of the smaller (1) gauge wire so that it isthe same length as the non-folded wire.
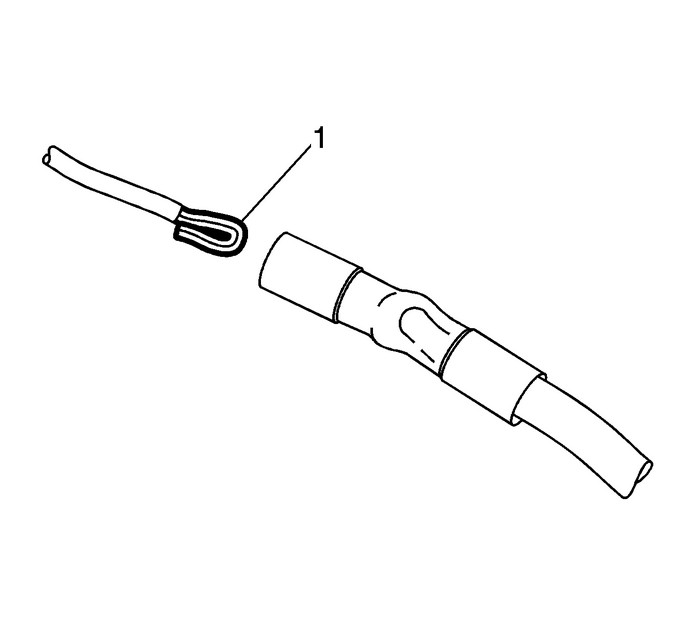
Insert the folded over wire (1) into the splice sleeve.
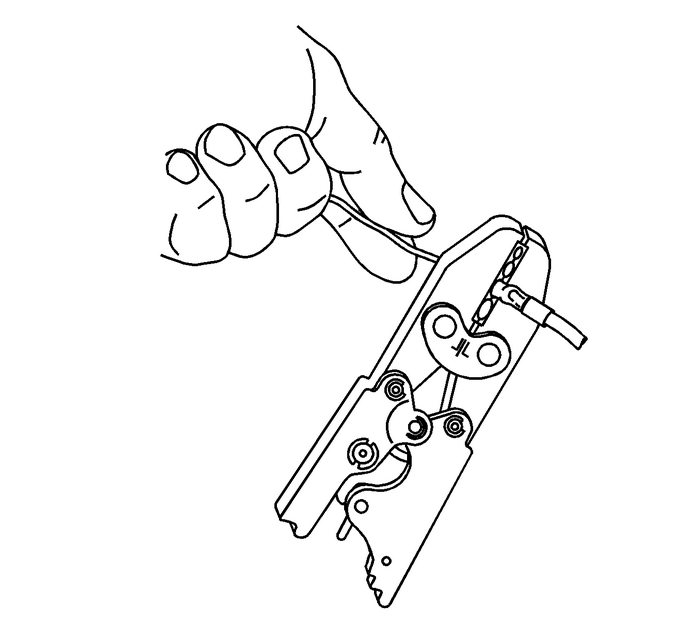
Use the proper crimp tool to crimp the splice sleeve to the smaller wire (harnessside of repair). Complete the crimp as usual (using the heat tool to shrink the tube).
 GMLAN and Media Oriented Systems Transport (MOST) Wiring Repairs
Special ToolsEL-38125-10 Splice Sleeve Crimping ToolDuraSeal splice sleevesA wire stripping toolFor equivalent regional tools, refer toSpecial Tools.The DuraSeal splice sleeves have the following 2-cr ...
 Terminal Removal
Special ToolsEL-38125-550 Terminal Release Tool KitEL-38125-580 Terminal Release Tool KitEL-35616 Terminal Test Probe KitFor equivalent regional tools, refer toSpecial Tools.Note:All repairs near the ...
Other materials:
Parking Brake Adjustment Parking Brake
Special ToolsJ-21177-ADrum-to-Brake Shoe Clearance GaugeWarning:Refer toBrake Dust Warning.Apply and fully release the park brake.Verify that the park brake pedal releases completely.Turn ON the ignition. Verify the BRAKE indicator lamp isoff.If the BRAKE indicator lamp is on, ensure the park brakep ...
