Chevrolet Equinox Service Manual: Engine Front Cover Installation Engine Block Cylinder Block Cyl Block Front Cover
Special Tools
EN–46109 Guide Pins
For equivalent regional tools, refer toSpecial Tools.
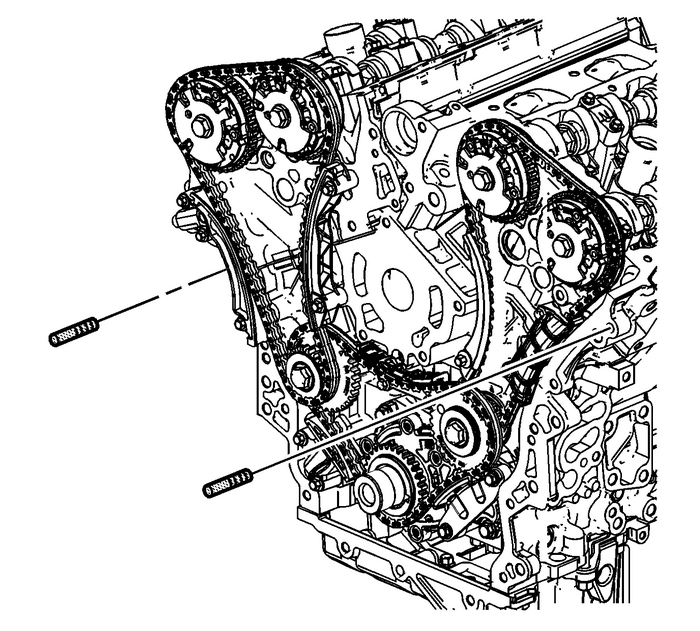
Install the 8-mm (0.315-in) guide from the EN–46109 pins into the cylinder block positions as shown.
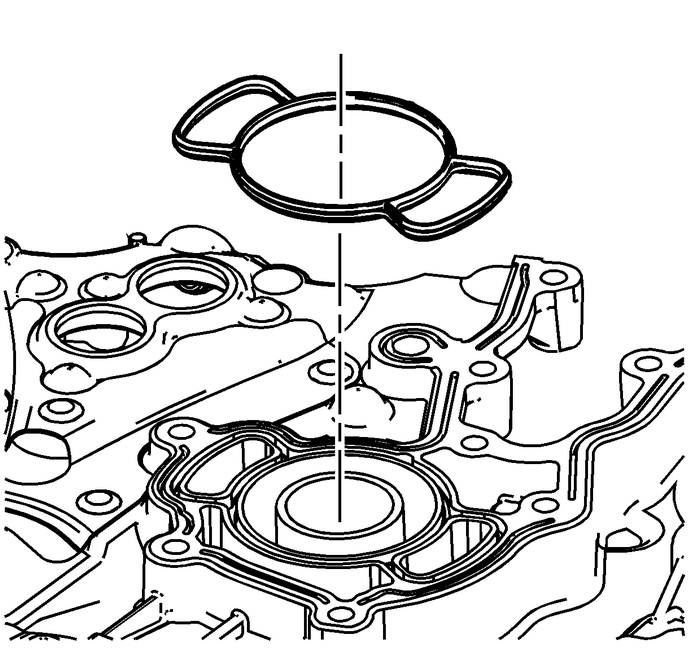
Install the NEW engine front cover to cylinder block seal.
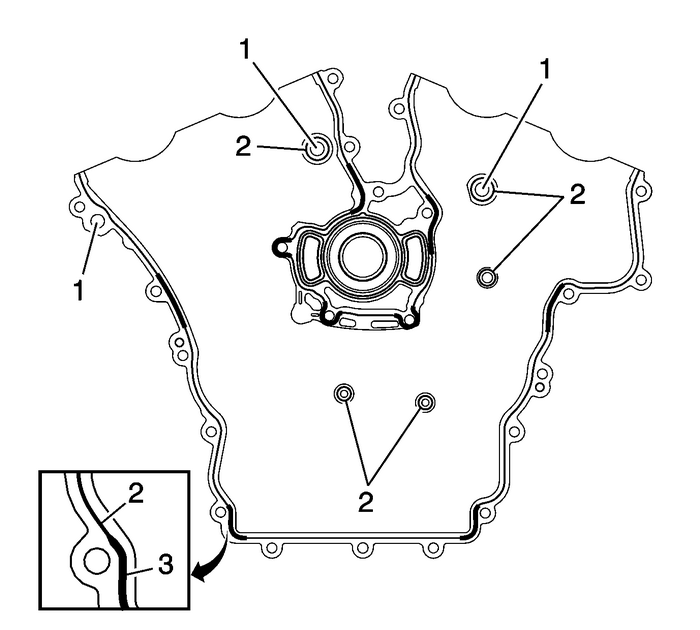
Note:No RTV sealant should be visible in the M12 bolt holes-(1) upon final assembly offront cover to engine.
Apply a 3-mm (0.118-in) bead of RTV sealant on the engine front cover as shown-(2).Apply a 5-mm (0.197-in) bead of RTV sealant on the engine front cover as shown-(3).Refer toAdhesives, Fluids, Lubricants, and Sealersfor recommended sealant.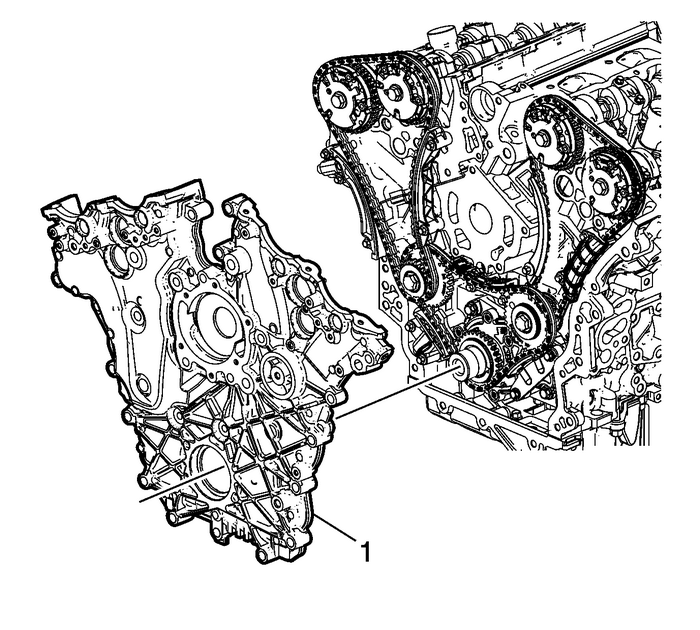
Place the engine front cover-(1) onto the EN–46109 pins and slide into position.Remove the EN–46109 pins from the cylinder block.Hand start all the engine front cover bolts.
Caution:Refer toFastener Caution.
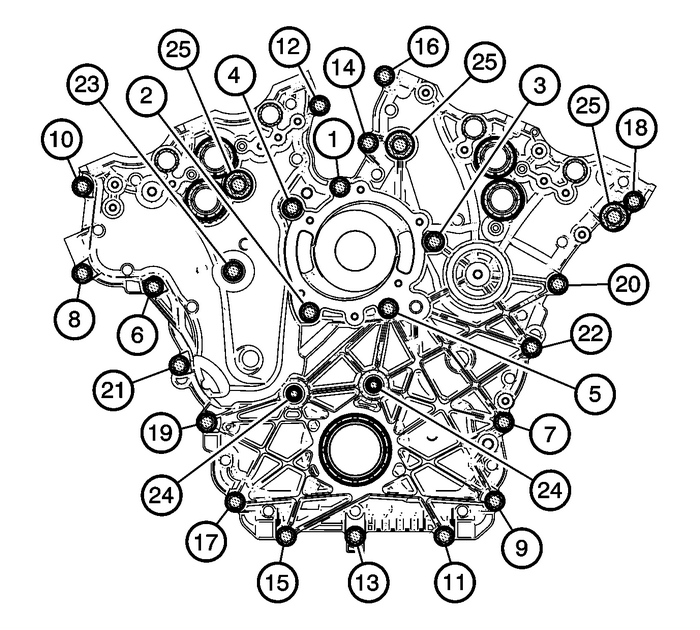
Note:Engine front cover bolts in the number-(25) location are model dependent and may notapply.
Tighten the engine front cover bolts-(1–23) in the sequence shown to 20-Y (15-lb-ft).Tighten the engine front cover bolts-(1–23) a second pass in sequence to 20-Y (15-lb-ft).Tighten the engine front cover bolts-(1–23) a third pass in sequence an additional60-degrees.Tighten the engine front cover bolts-(24) to 15-Y (11-lb-ft).Tighten the engine front cover bolts-(25) to 65-Y (48-lb-ft).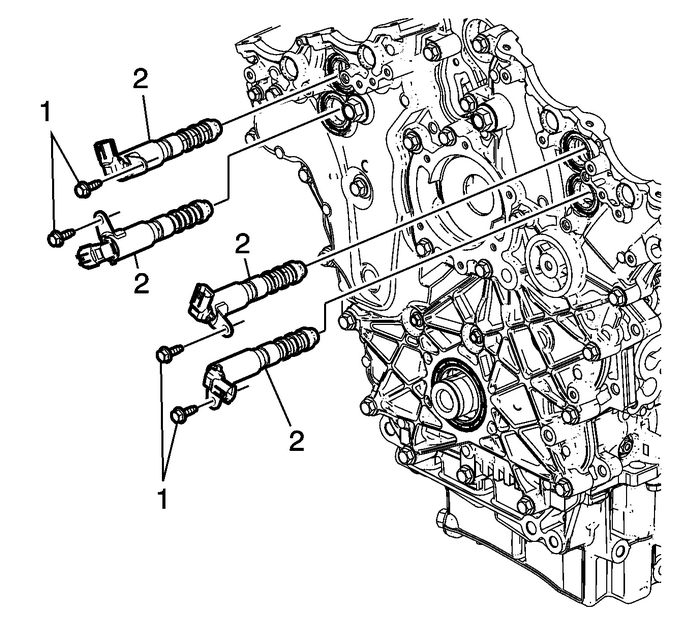
Place the camshaft position actuator valves-(2) in position on the front cover.Install the camshaft position actuator valve bolts-(1) and tighten to 10-Y (89-lb-in).
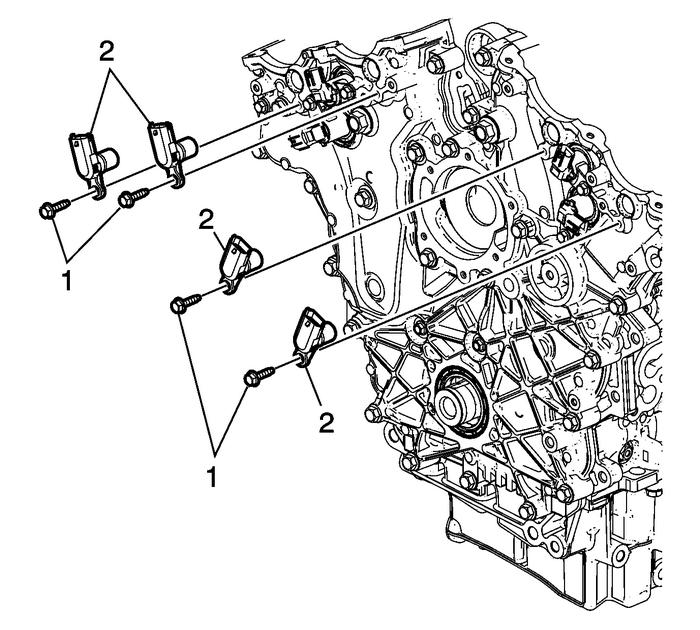
Note:Inspect the camshaft position sensor O-ring seals. If the seals are damaged, the entirecamshaft position sensor must be replaced.
Place the camshaft position sensors-(2) in position on the front cover.Install the camshaft position sensor bolts-(1) and tighten to 10-Y (89-lb-in). Oil Pan Replacement Engine Lubrication Oil Sump/Pan
Special Tools EN-46109 Guide Pin SetFor equivalent regional tools, refer toSpecial Tools.Removal ProcedureRaise and support the vehicle. Refer toLifting and Jacking the Vehicle.Drain the engine oil an ...
 Piston and Connecting Rod Assemble Engine Block Cylinder Block Piston Assembly
Special ToolsEN-46121 Connecting Rod Guide Pin SetEN-46745 Piston Pin Clip Remover/InstallerFor equivalent regional tools, refer toSpecial ToolsPiston and Piston Pin Installation ProcedureNote:The pis ...
Other materials:
Object Detection Description and Operation (Rear Vision Camera, UVC)
Rear Vision Camera System OperationThe rear vision camera system consists of a video camera located at the rear of thevehicle and the radio.When the transmission is placed into REVERSE, a 12-volt signal is sent to the rearvision camera by the body control module (BCM). This signal indicates to the c ...
