Chevrolet Equinox Service Manual: Drivetrain and Front Suspension Frame Insulator Replacement
Special Tools
CH-47672-A Frame Insulator Remover/Installer
For equivalent regional tools, refer toSpecial Tools.
Removal ProcedureRemove the frame from the vehicle. Refer toDrivetrain and Front Suspension Frame Replacement.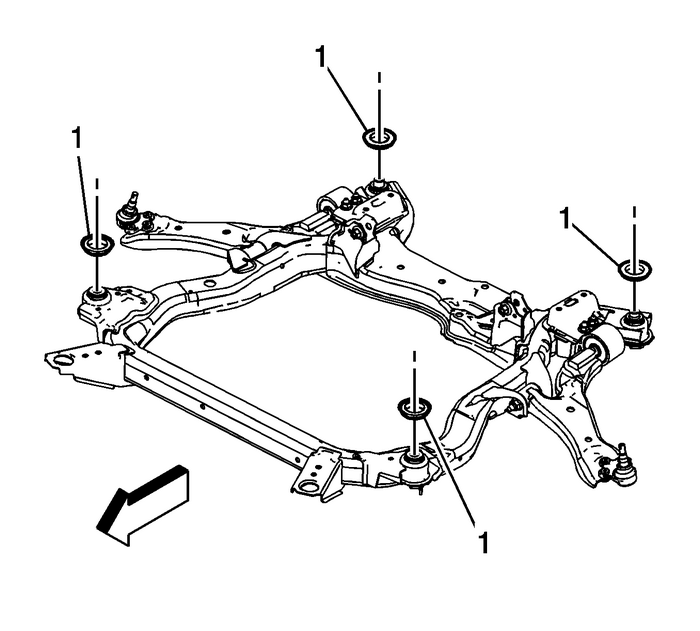
Remove the upper frame insulator-(1)
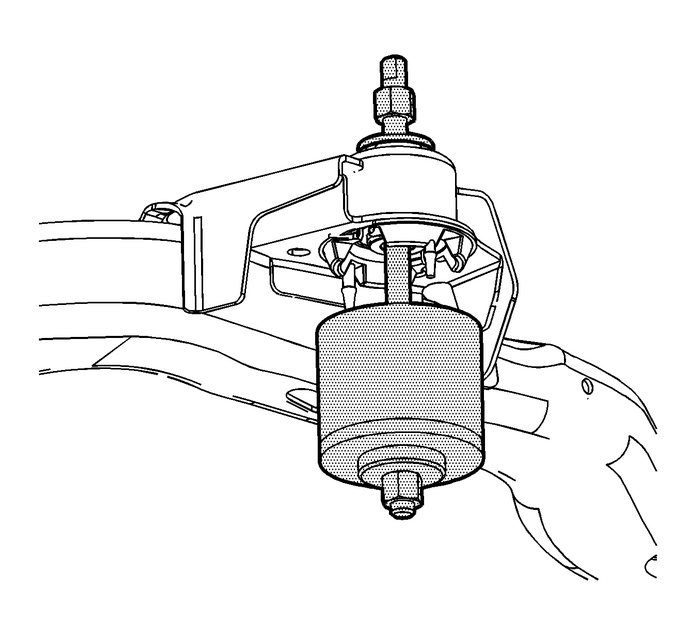
For the removal of a front frame insulator, assemble the CH-47672-A press as shown.
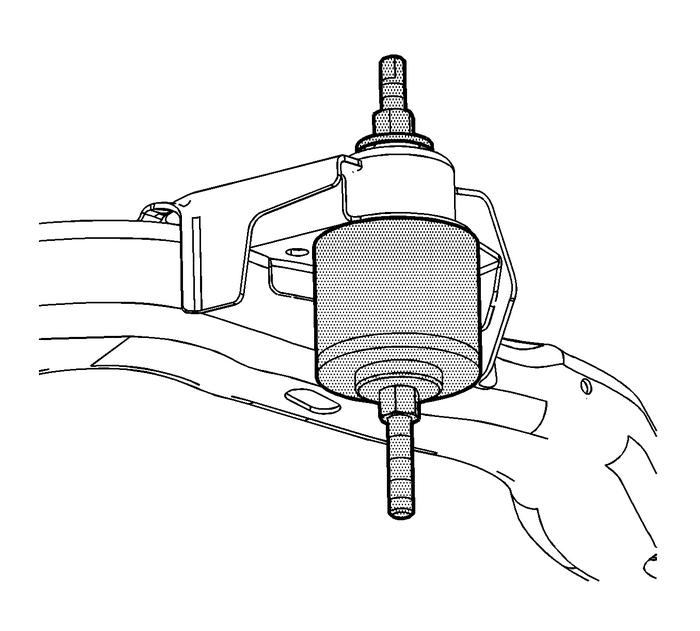
Use the CH-47672-A press to remove the front frame insulator from the frame.
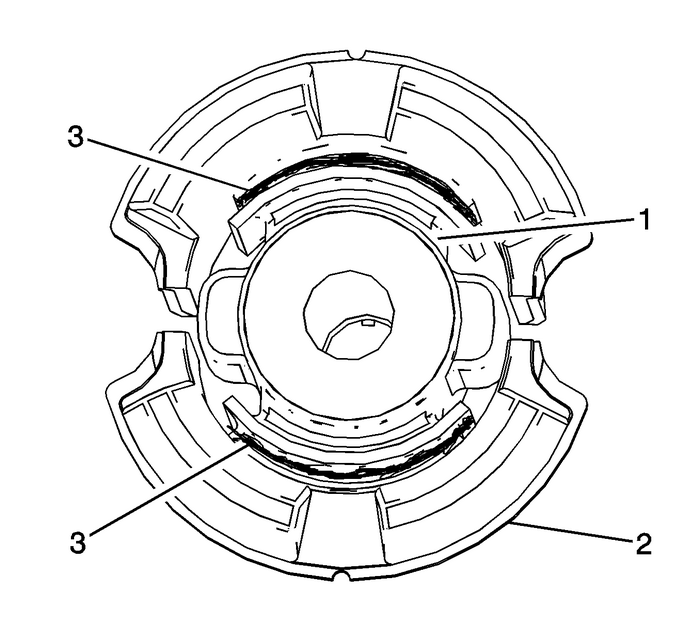
Note:For the removal of a rear frame insulator, tool cannot be used. Cut the insulatorrubber along the interior surface-(3) of the plastic outer can with a jigsaw to easeremoval of the core.
To remove a rear insulator, cut out frame insulator core-(1) from frame insulator-(2).Remove the rear frame insulator core-(1) from the outer frame insulator-(2).Remove the rear frame insulator from the drivetrain and front suspension frame usinga chisel or equivalent.Installation ProcedureClean the frame insulator opening.Apply thin coat of rubber lubricant GM-P/N-1051717 (Canadian-P/N-5728223), or equivalentto the inside of the frame insulator opening and to the insulator.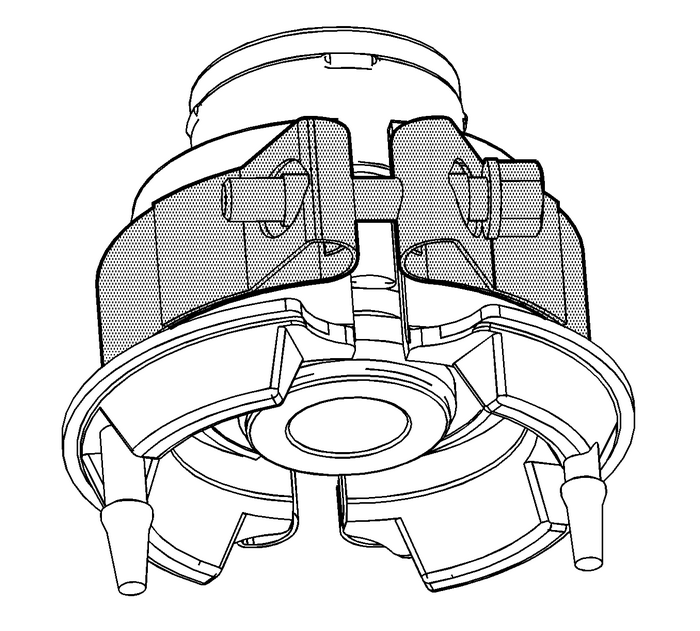
Install the CH-47672-A clamp to the bushing. Align the clamp screws with the split portion of the bushing. Positionthe edge of the clamp where the bushing chamfer blends with the straight section ofthe bushing. Alternately tighten the clamp screws until the split edges of the bushingare parallel and almost touching.
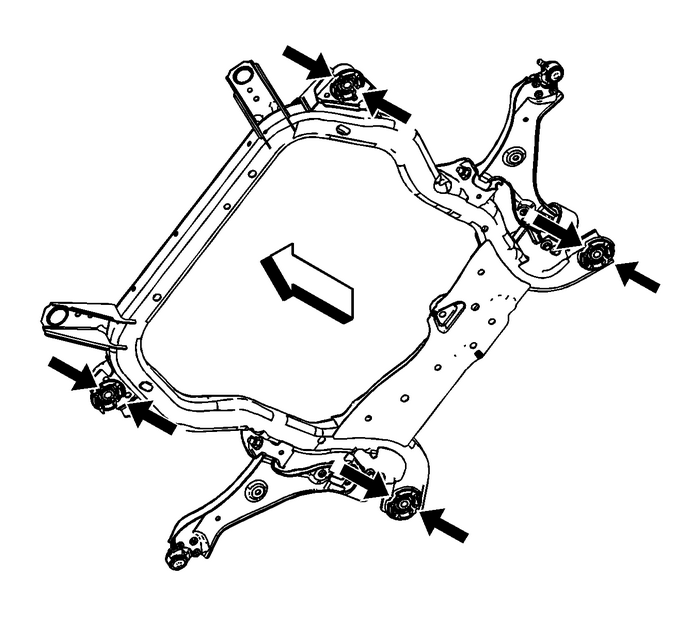
Note:The frame insulator splits must be aligned in a forward and rearward position relativeto the vehicle.
Install the frame insulator to the front frame opening with the insulator splits alignedin a forward and rearward direction relative to the vehicle.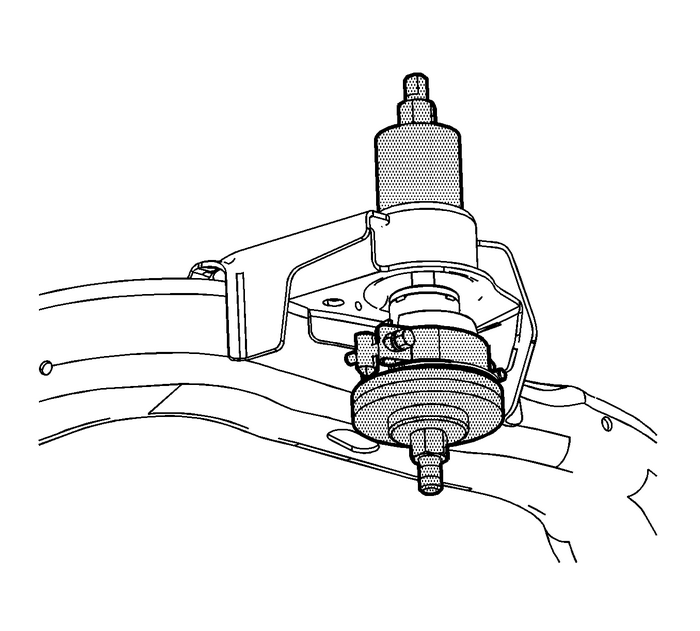
Assemble the CH-47672-A clamp and the frame insulator as shown to the frame.
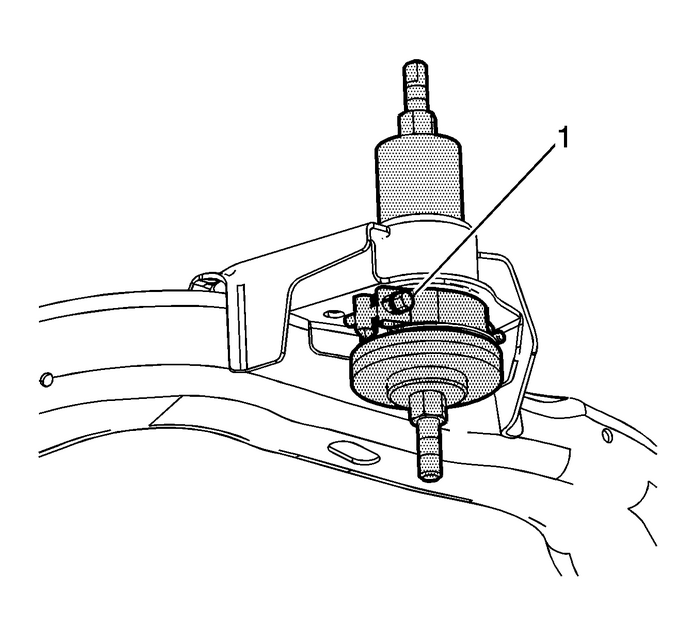
Use the CH-47672-A press to begin installing the frame insulator into the frame. STOP and remove the CH-47672-A clamp-(1) before the clamp becomes trapped between the CH-47672-A press andframe.
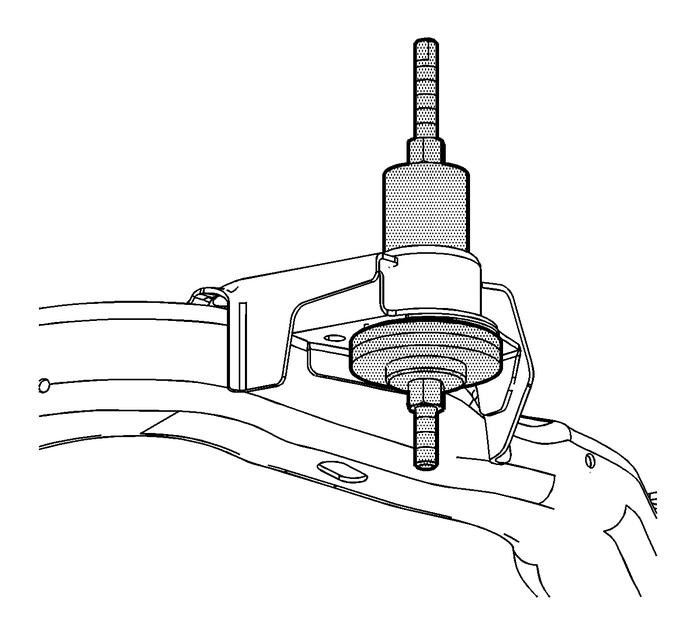
Use the CH-47672-A press to finish installing the frame insulator into the frame.
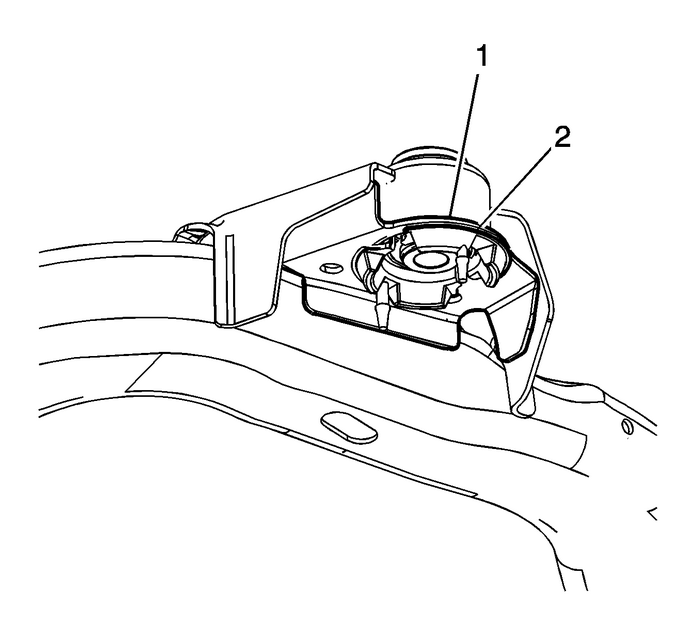
Note:Inspect and confirm that there is NO visible gap between the insulator and the frame.
Remove the CH-47672-A remover/installer from the insulator and frame. Inspect and confirm that the insulator-(2) is in directcontact with the frame-(1).
Install the upper frame insulator-(1).Install the frame to the vehicle. Refer toDrivetrain and Front Suspension Frame Replacement.
 Lower Control Arm Ball Joint Replacement Suspension Ball Joints
Removal ProcedureRemove the lower control arm. Refer toLower Control Arm Replacement.Place the lower control arm in a vise or suitable holding device.Remove the ball joint rivets using the following p ...
 Drivetrain and Front Suspension Frame Replacement
Special Tools DW-110-060 Engine Assembly Support FixtureRemoval ProcedureSupport the powertrain using the support fixture. This fixture is used to keep thepowertrain from rocking fore/aft once the fro ...
Other materials:
Radio Signals for Some Gate
Operators
For questions or programming help
call 01-800-466-0811 or see
www.homelink.com.
Some gate operators require
transmitter signals to time out or quit
after several seconds of
transmission. This may not be long
enough for the Universal Remote
system to pick up the signal during
programming.
...
