Chevrolet Equinox Service Manual: Battery Positive Cable Replacement (LFX) Low Voltage Battery
Removal ProcedureRecord all of the radio station presets.Disconnect the battery negative cable. Refer toBattery Negative Cable Disconnection and Connection.Remove the ECM mounting bracket.

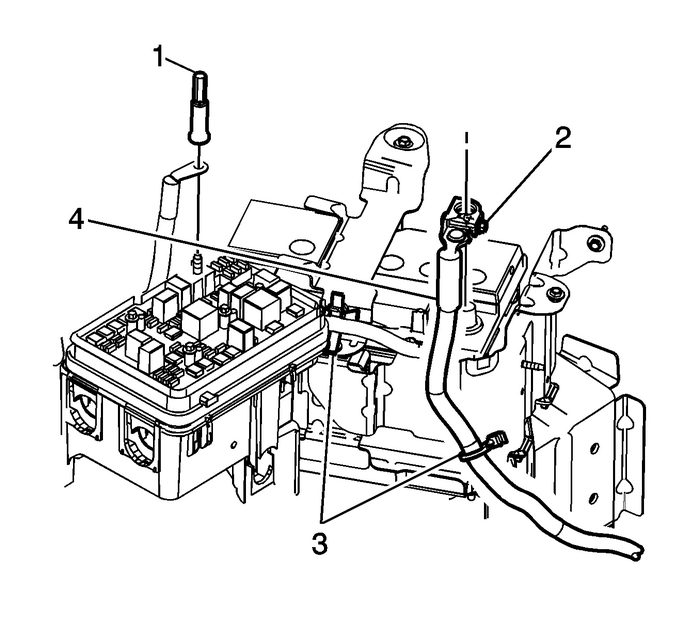
Remove the battery positive post clampnut-(2).Remove the battery retainer bracket and the battery. Refer toBattery Replacement.Remove battery positive terminal-(1) at the fuseblock.Disconnect retainers-(3) holding battery positivecable-(4).

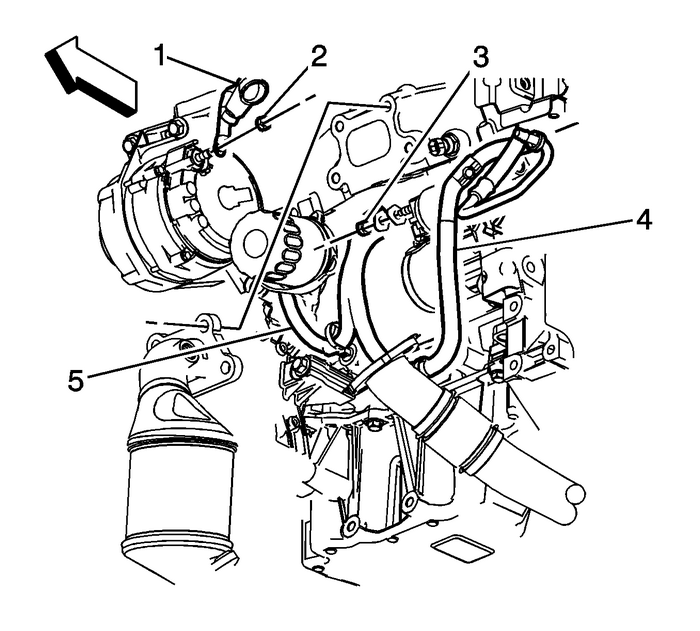
Remove generator boot-(1) and nut (2) from thegenerator B+ stud.Remove the starter solenoid nut-(3).
Note:Observe how the battery positive cable was routed within theengine compartment.
Remove the battery positive (Starter) cable-(4)and the battery positive (Generator) cable-(5) from thevehicle.Installation Procedure
Caution:Refer toFastener Caution.
Install the battery positive cable nut-(2) to theB+ generator stud and tighten to20-Y(15-lb-ft).Install battery positive cable nut-(3) andterminals (Starter/Generator) to the starter solenoid. Tighten to10-Y(88-lb-in).
Install the battery positive cable terminalnut-(1) to the fuse block and tighten to16-Y(12-lb-ft).Install battery positive cable clamp nut-(2) tothe battery post and tighten to10-Y(88-lb-in).Install engine control module (ECM) and battery cover.Reset the radio channel presets.
 Battery Positive Cable Replacement (LEA) Low Voltage Battery
Removal ProcedureRecord all of the radio station presets.Disconnect the battery negative cable. Refer toBattery Negative Cable Disconnection and Connection.Remove the battery positive post clampnut-(2 ...
 Battery Charging Low Voltage Battery
Special Tools EL 50313 Battery TesterFor equivalent regional tools, refer toSpecial Tools.Diagnostic AidsFor best results, use an automatic taper-rate battery charger with a voltage capabilityof 16 V. ...
Other materials:
Toe Description Wheels
Toe is a measurement of how much the front and/or rear wheelsare turned in or out from a straight-ahead position. When thewheels are turned in, toe is positive-(+). When thewheels are turned out, toe is negative-(−).The actual amount of toe is normally only a fraction of a degree.The purpose of to ...
