Chevrolet Equinox Service Manual: Air Conditioning System Seal Replacement
Removal Procedure

Remove the seal washer from the A/C refrigerantcomponent.Inspect the seal washer for any signs of damage.Inspect the A/C refrigerant components for damage or burrs.Repair or replace as necessary.
Note:DO NOT reuse sealing washer.
Discard the sealing washer.Installation ProcedureNote:Flat washer type seals do not require lubrication.
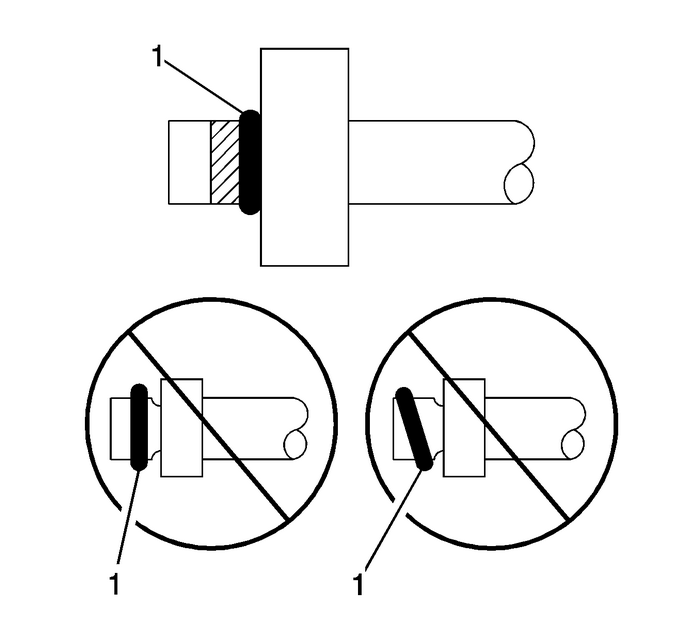
Inspect the new seal washer for any signs of cracks, cuts, ordamage.Do not use a damaged seal washer.

Using a lint-free clean, dry cloth, clean the sealingsurfaces of the A/C refrigerant components.Carefully install the new seal washer onto the A/Crefrigerant component.The washer must completely bottom against the surface of thefitting.
Note:After tightening the A/C components, there should be a slightsealing washer gap of approximately 1.2-mm(3/64-in) between the A/C line and the A/Ccomponent.
Assemble the remaining A/C refrigerant components. Refer tothe appropriate repair procedure. Air Conditioning (A/C) Evaporator Case Assembly Replacement Evaporator
Removal ProcedureRemove the HVAC module. Refer toHeater and Air Conditioning Evaporator and Blower Module Removal and Installation.Remove the heater core cover screws from the evaporator caseassembly. ...
 Side Window Defogger Outlet Duct Replacement - Left Side
Side Window Defogger Outlet Duct Replacement - Left SideCalloutComponent NamePreliminary ProcedureRemove the instrument panel lower trim panel retainer. RefertoLower Trim Pad Retainer Replacement.1Sid ...
Other materials:
Overview
1.
Press to go to the Home
Page. See Home Page.
2.
Radio: Press and release to
fast seek the strongest
previous station or channel.
USB/Music/Pictures: Press
to go to the previous
content. Press and hold to
fast rewind.
3.
Press to turn th ...
