Chevrolet Equinox Service Manual: Drain Plug Replacement Automatic Transmission Unit
Chevrolet Equinox Service Manual / Powertrain / Transmission/Transaxle / Drain Plug Replacement Automatic Transmission Unit
Removal ProcedureRaise and support the vehicle. Refer toLifting and Jacking the Vehicle.

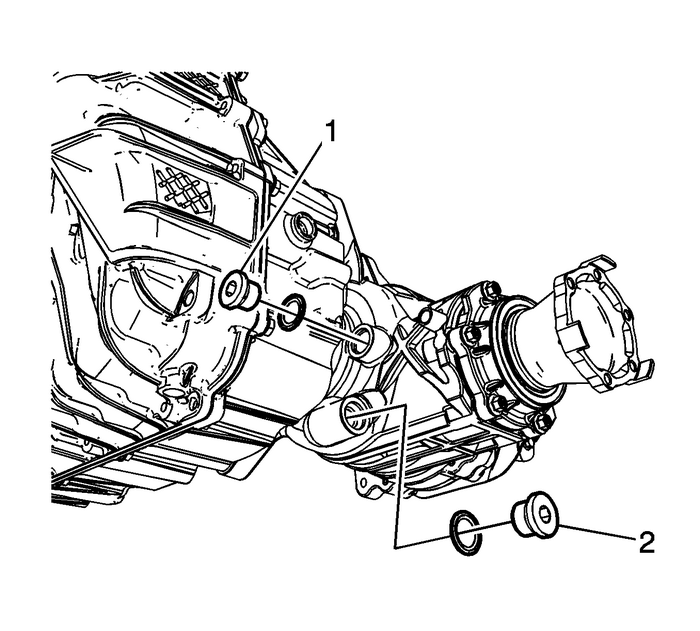
Remove the drain plug-(2).Remove the fill plug-(1).Installation Procedure

Clean and inspect the drain plug and case sealing surfaces.
Caution:Refer toFastener Caution.
Install the drain plug-(2) and tighten to 39-Y (29-lb-ft).Fill the transfer case with gear lubricant to the bottom of the fill plug, or 0.80-L(0.85-qt). Refer toAdhesives, Fluids, Lubricants, and Sealers.Install the fill plug-(1) and tighten to 39-Y (29-lb-ft).Lower the vehicle. Intermediate Drive Shaft Replacement Automatic Transmission Unit
Removal ProcedureRaise and support the vehicle. Refer toLifting and Jacking the Vehicle.Drain the transfer case fluid. Refer toTransfer Case Fluid Replacement.Remove the transfer case assembly (2). Re ...
 Fill Plug Replacement Automatic Transmission Unit
Removal ProcedureRaise and support the vehicle. Refer toLifting and Jacking the Vehicle.Remove the fill plug-(1).Installation ProcedureClean the fill plug and apply adhesive GM-P/N-12345493 (Canadian- ...
Other materials:
Low and Reverse and 1-2-3-4 Clutch Housing Assemble Automatic Transmission Unit Automatic Clutches
Table 1: 1-2-3-4 Clutch Piston InstallationTable 2: Low and Reverse Clutch Piston Installation1-2-3-4 Clutch Piston Installation1-2-3-4 Clutch Piston InstallationCalloutComponent Name11-2-3-4 Clutch PistonNote:DT-47798 protector prevents the piston seal lip from damage during installation. Apply a t ...
© 2017-2025 Copyright www.cequinox.com

