Chevrolet Equinox Service Manual: Secondary Timing Chain Tensioner Installation - Right Side Valvetrain Valvetrain Timing Timing Belt Tensioner
Special ToolsEN 45027Tensioner ToolEN 46112Tensioner Retraction Pins
For equivalent regional tools, refer toSpecial Tools.
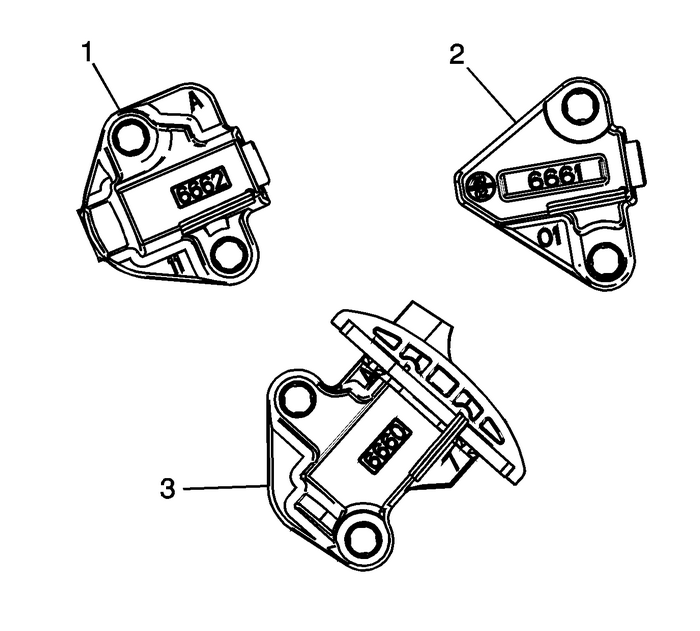
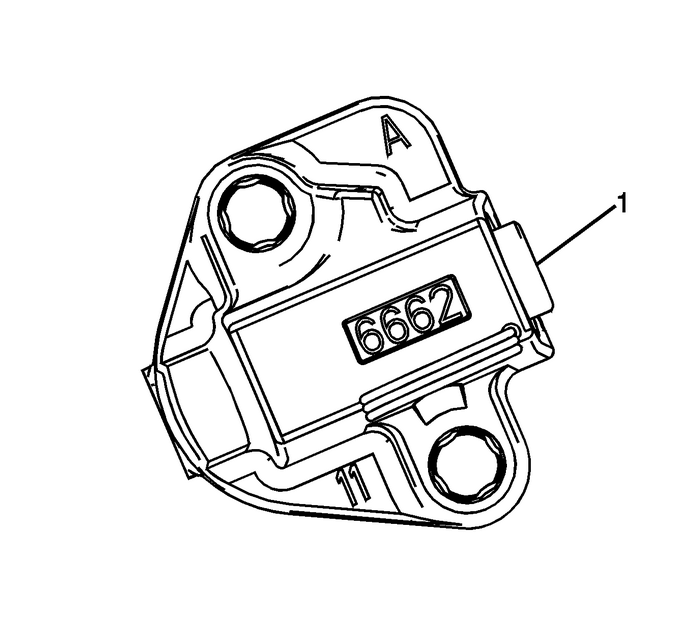
Ensure that the right secondary camshaft drive chaintensioner-(1) is being installed.
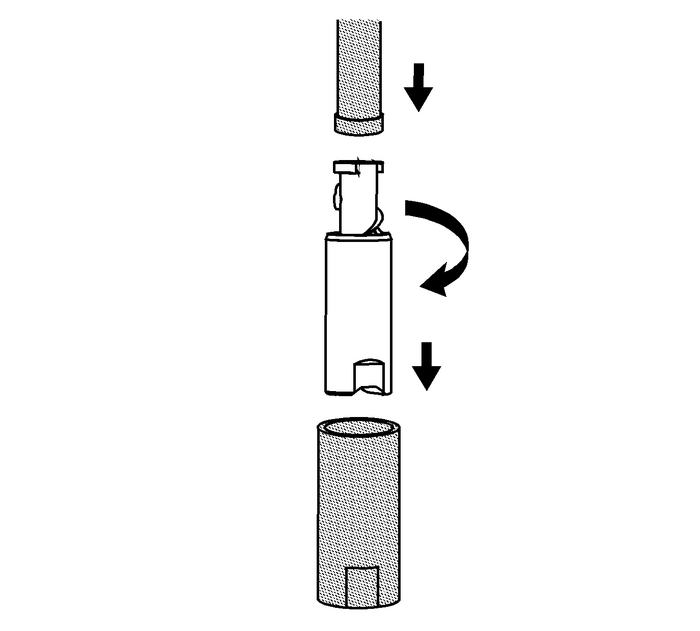
Using theEN 45027tool, reset the right secondary camshaft drive chain tensionerplunger.

Install the plunger into the right secondary camshaft drivechain tensioner body.
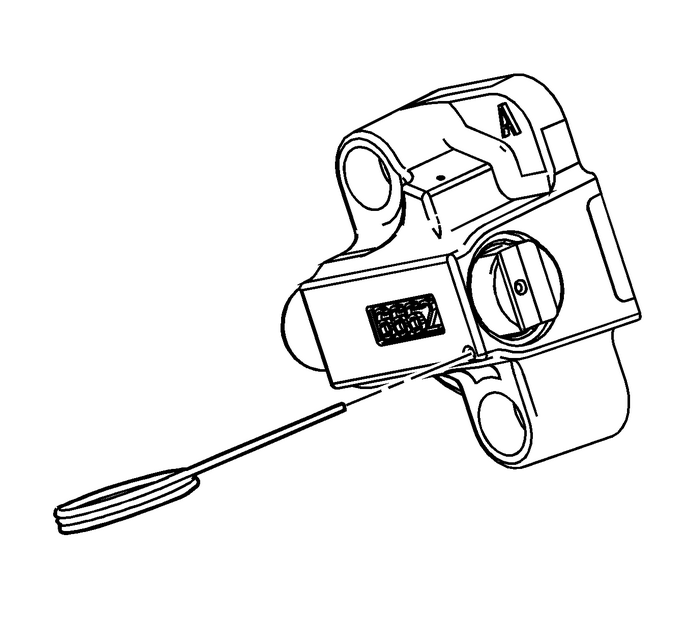
Compress the plunger into the body and lock the rightsecondary camshaft drive chain tensioner by inserting theEN 46112pinsinto the access hole in the side of the right secondarycamshaft drive chain tensioner body.Slowly release pressure on the right secondary camshaft drivechain tensioner. The right secondary camshaft drive chain tensionershould remain compressed.
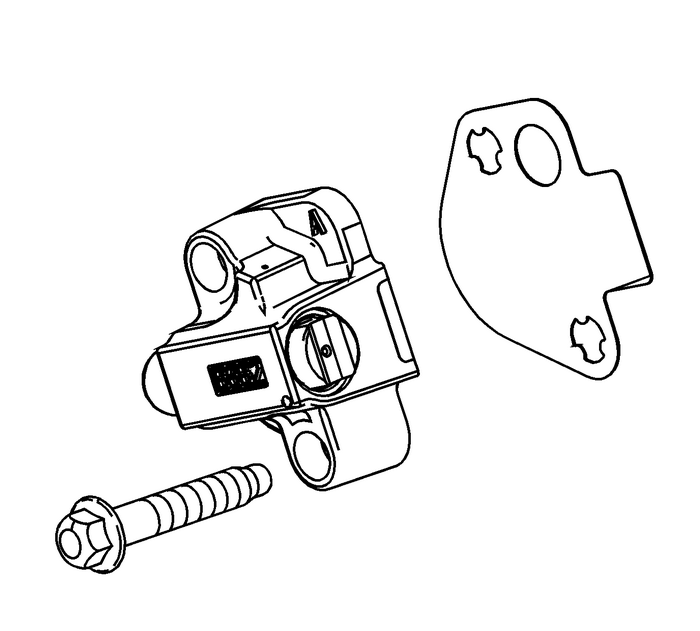
Install a NEW right secondary camshaft drive chain tensionergasket to the right secondary camshaft drive chaintensioner.Install the right secondary camshaft drive chain tensionerbolts through the right secondary camshaft drive chain tensionerand gasket.Ensure the right secondary camshaft drive chain tensionermounting surface on the right cylinder head does not have any burrsor defects that would degrade the sealing of the NEW rightsecondary camshaft drive chain tensioner gasket.

Place the right secondary camshaft drive chain tensioner intoposition and loosely install the bolts to the block.
Caution:Refer toFastener Caution.
Verify the proper placement of the right secondary camshaftdrive chain tensioner gasket tab-(1).First PassTighten the right secondary camshaft drive chain tensionerbolts to5-Y(44-lb-in).
Final PassTighten the right secondary camshaft drive chain tensionerbolts to25-Y(18-lb-ft).
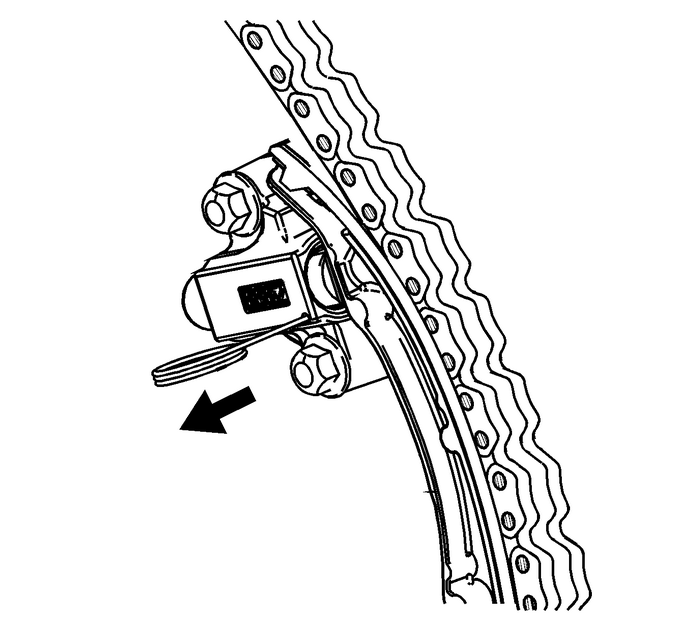
Release the right camshaft drive chain tensioner by pullingout theEN 46112pinsand unlocking the tensioner plunger.
Caution:Ensure that all timing chain tensioners are completelyreleased. A timing chain tensioner that is not properly releasedcan lead to serious engine damage.
Verify all primary and secondary camshaft drive chain timingmark alignments. Refer toTiming Chain Alignment Diagram– StageTwo. Secondary Timing Chain Tensioner Installation - Left Side Valvetrain Valvetrain Timing Timing Belt Tensioner
Special ToolsEN 45027Tensioner ToolEN 46112Tensioner Retraction PinsFor equivalent regional tools, refer toSpecial Tools.Ensure that the left secondary camshaft drive chaintensioner-(2) is being insta ...
 Timing Chain Tensioner Replacement Valvetrain Valvetrain Timing Timing Belt Tensioner
Special ToolsEN-45027Tensioner ToolFor equivalent regional tools, refer toSpecial Tools.Removal ProcedureDisconnect the negative battery cable. Refer toBattery Negative Cable Disconnection and Connect ...
Other materials:
Brake Fluid
The brake master cylinder reservoir is filled with DOT 3 brake fluid as indicatedon the reservoir cap. SeeEngine Compartment Overviewfor the location of the reservoir.There are only two reasons why the brake fluid level in the reservoir might go down:The brake fluid level goes down because of normal ...
