Chevrolet Equinox Service Manual: Lower Control Arm Ball Joint Replacement Suspension Ball Joints
Removal Procedure

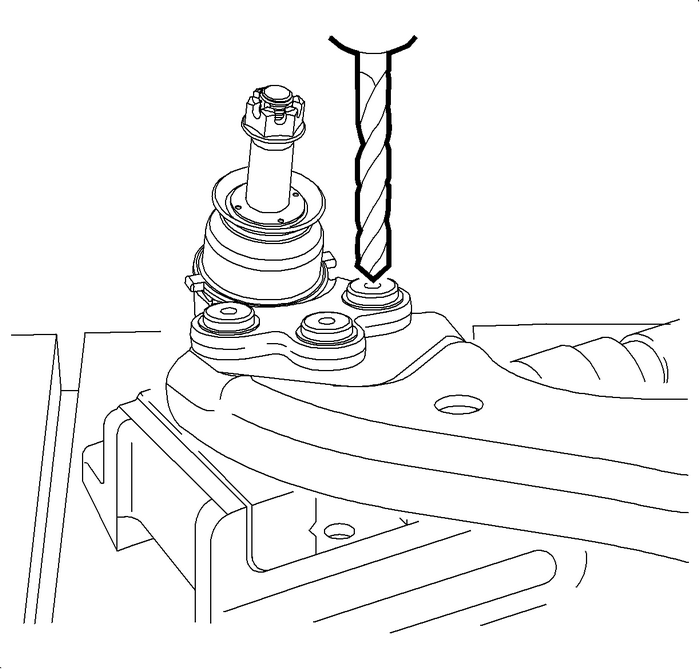
Remove the lower control arm. Refer toLower Control Arm Replacement.Place the lower control arm in a vise or suitable holding device.Remove the ball joint rivets using the following procedure.Drill through the rivets using an 8-mm (5/16-in) drill bit.Enlarge the hole using a 12-mm (31/64-in) drill bit.Remove any remaining burs from the lower control arm.Remove the lower control arm ball joint from the lower control arm. Note the positionof the ball joint for reassembly.Installation Procedure

Note:The lower control arm must be clean and free of debris before installing the new lowercontrol arm ball joint.
Position the lower control arm ball joint on the lower control arm as previously noted.Caution:Refer toFastener Caution.
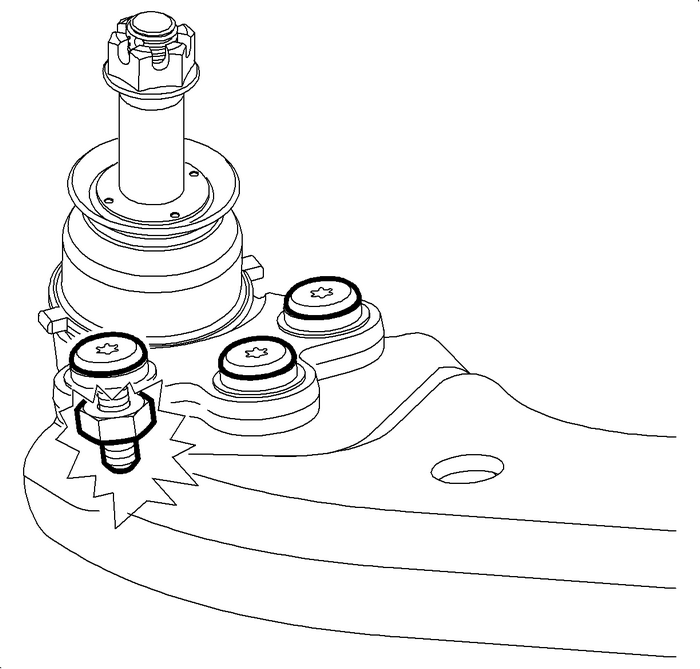
Note:
Only use the hardware provided with the new lower control arm ball joint.The lower control arm ball joint bolts must be installed with the bolt head on thetop side of the ball joint.Install the lower control arm ball joint bolts and nuts and tighten to 68-Y (50-lb-ft).Install the lower control arm. Refer toLower Control Arm Replacement. Strut Assembly Removal and Installation Strut Assembly
Removal ProcedureRemove the 3-upper strut mount bolts.Raise and support the vehicle. Refer toLifting and Jacking the Vehicle.Remove the wheel and tire assembly. Refer toTire and Wheel Removal and Inst ...
 Drivetrain and Front Suspension Frame Insulator Replacement
Special Tools CH-47672-A Frame Insulator Remover/InstallerFor equivalent regional tools, refer toSpecial Tools.Removal ProcedureRemove the frame from the vehicle. Refer toDrivetrain and Front Suspensi ...
Other materials:
Transmission Internal Mode Switch Logic Transmission Control Transmission Control Sensors Transmission Range Switch
Transmission Internal Mode Switch LogicGear Selector PositionSignal ASignal BSignal CSignal PParkLOWHIHILOWPark/ReverseLOWLOWHILOWReverseLOWLOWHIHIReverse/NeutralHILOWHIHINeutralHILOWHILOWNeutral/Drive-6HILOWLOWLOWDrive-6HILOWLOWHIDrive-6/Drive-4LOWLOWLOWHIDrive-4/MLOWLOWLOWLOWDrive-4/Drive-3LOWHILO ...
