Chevrolet Equinox Service Manual: Intake Manifold Replacement Intake and Forced Induction Intake Manifold
Removal ProcedureRemove the intake manifold cover. Refer toIntake Manifold Cover Replacement.Remove the air cleaner outlet duct. Refer toAir Cleaner Outlet Duct Replacement.Remove the power steering fluid reservoir upper bracket only.Remove the power brake booster vacuum check valve and hose. Refer toPower Brake Booster Vacuum Check Valve and Hose Replacement.Remove the coolant air bleed pipe. Refer toEngine Coolant Air Bleed Pipe Replacement.
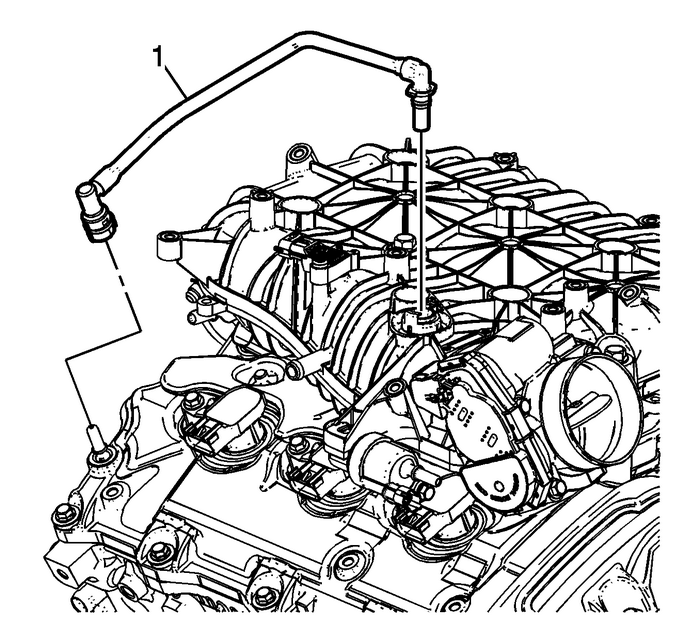
Disconnect and remove the positive crankcase ventilation (PCV) tube-(1) from the intakemanifold and right camshaft cover.
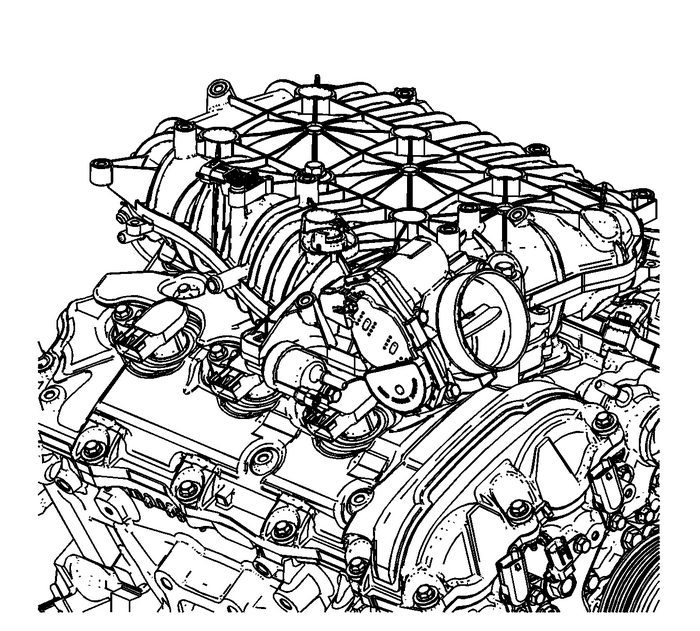
Remove the evaporative emission (EVAP) hose from the intake manifold and EVAP solenoid.Remove the fuel pipe shield. Refer toFuel Pipe Shield Replacement.Disconnect and reposition wire harnesses as necessary.
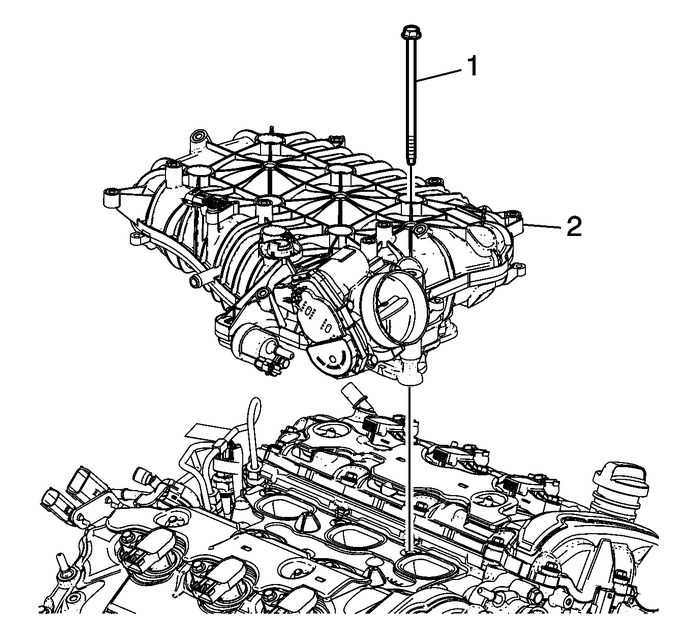
Remove the intake manifold bolts-(1).Remove the intake manifold assembly-(2).
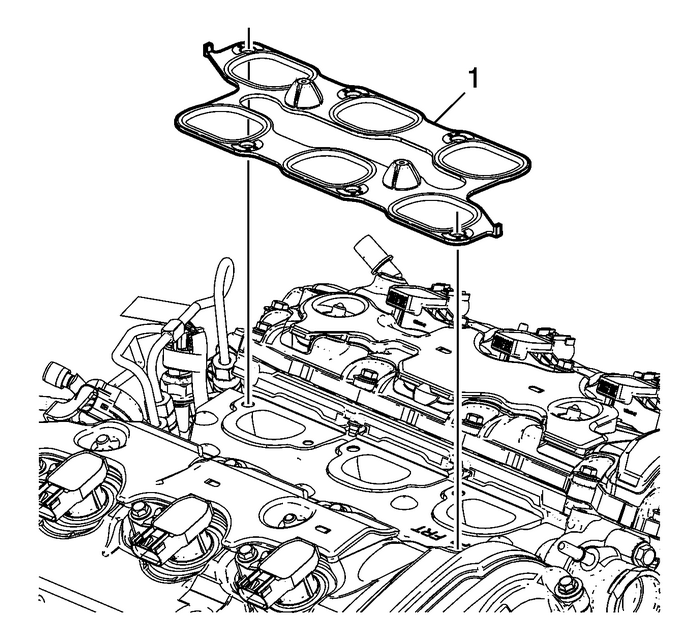
Remove and discard the intake manifold gasket-(1).To clean the intake manifold, refer toIntake Manifold Cleaning and Inspection.To disassemble the intake manifold, refer toIntake Manifold Disassemble.Installation ProcedureAssemble the intake manifold if needed. Refer toIntake Manifold Assemble.

Install the NEW intake manifold gasket-(1).

Install the intake manifold assembly-(2).
Caution:Refer toFastener Caution.
Install the intake manifold bolts-(1).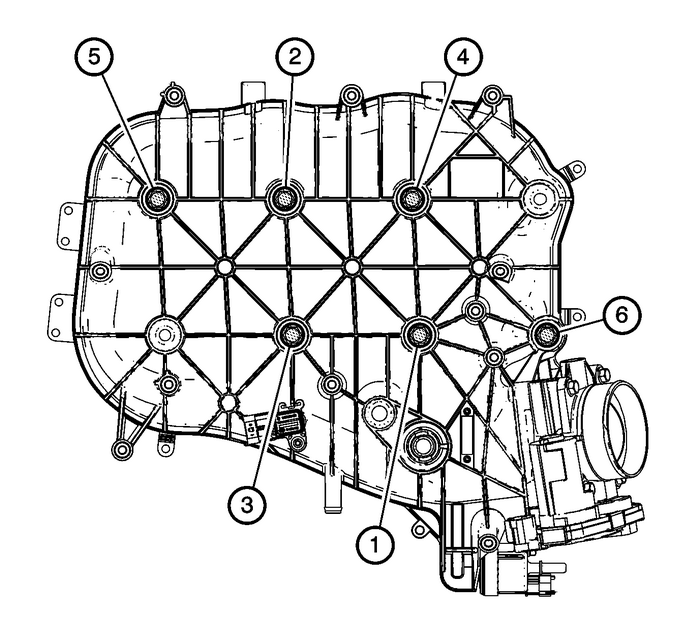
Tighten the intake manifold bolts in the sequence shown.Tighten the intake manifold bolts in sequence to 25-Y (18-lb-ft).Tighten the intake manifold bolts a second pass in sequence to 25-Y (18-lb-ft).Install the fuel pipe shield. Refer toFuel Pipe Shield Replacement.Position wire harnesses and connect as necessary.

Connect the EVAP hose to the upper intake manifold and EVAP solenoid.

Connect the PCV tube assembly-(1) to the upper intake manifold and the right camshaftcover.Install coolant hose.Install the coolant air bleed pipe. Refer toEngine Coolant Air Bleed Pipe Replacement.Install the power steering fluid reservoir upper bracket.Install the power brake booster vacuum check valve and hose. Refer toPower Brake Booster Vacuum Check Valve and Hose Replacement.Install the air cleaner outlet duct. Refer toAir Cleaner Outlet Duct Replacement.Install intake manifold cover. Refer toIntake Manifold Cover Replacement.
 Intake Camshaft and Valve Lifter Replacement Valvetrain Camshaft
Removal ProcedureRemove the intake camshaft position actuator. ReferCamshaft Position Intake Actuator Replacement.Remove the intakecamshaft position actuator solenoid valve bolt-(1) and valve-(2).Remo ...
 Oil Level Indicator Tube Replacement Engine Lubrication Oil Level Indicator Tube
Removal ProcedureRemove the intake manifold cover. Refer toIntake Manifold Cover ReplacementRemove the oil level indicator tube bracketbolt-(1).Remove the oil level indicator and tube-(2) bysliding th ...
Other materials:
HVAC Component Replacement Reference
HVAC Component Replacement ReferenceScan Tool NameComponent Code / Schematic NameService NameRepair Instruction NamePassenger Compartment Humidity, Passenger Compartment Humidity Sensor Temperature,Windshield TemperatureB160-Windshield Temperature and Inside Moisture SensorHumidity/Windshield Temper ...
