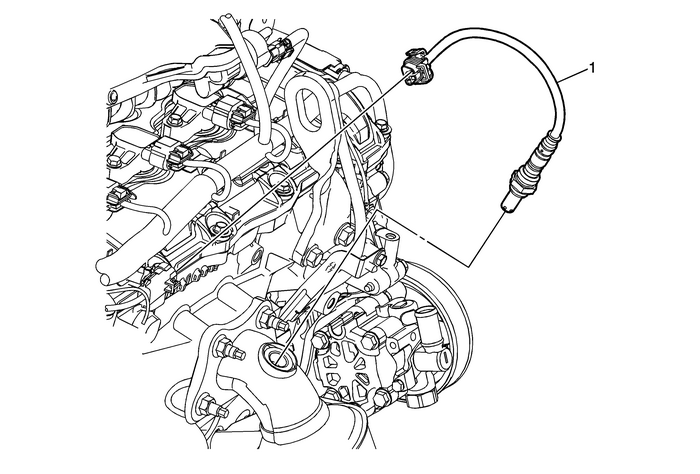
Chevrolet Equinox Service Manual: Heated Oxygen Sensor Replacement - Bank 1 Sensor 1 Engine Control Engine Control Sensors O2 Sensors

| Preliminary ProceduresIf equipped with FWD, raise and support the vehicle. Refer toLifting and Jacking the Vehicle.If equipped with AWD, lower the front suspension frame. Refer toDrivetrain and Front Suspension Frame Replacement. | |
1 | Heated Oxygen Sensor Caution:Refer toHeated Oxygen and Oxygen Sensor Caution. Caution:Refer toFastener Caution. Tip:A special anti-seize compound is used in the HO2S threads. The compound consists ofliquid graphite and glass beads. The graphite tends to burn away, but the glass beadsremain, making the sensor easier to remove. New, or service replacement sensors alreadyhave the compound applied to the threads. If the sensor is removed from an exhaustcomponent and if for any reason the sensor is to be reinstalled, the threadsmust have anti-seize compound applied before reinstallation. ProcedureDisconnect the heated oxygen sensor harness connector.If reinstalling the old sensor, coat the threads with anti-seize compound. Refer toAdhesives, Fluids, Lubricants, and Sealers.Tighten42-Y (31-lb-in) |
 Fuel Tank Pressure Sensor Replacement (Without NU6) Engine Control Engine Control Sensors Fuel Tank Pressure Sensor
Fuel Tank Pressure Sensor ReplacementCalloutComponent NamePreliminary ProceduresLower the fuel tank. Refer toFuel Tank Replacement.Raise and support the vehicle. Refer toLifting and Jacking the Vehicl ...
 Heated Oxygen Sensor Replacement - Bank 1 Sensor 2 Engine Control Engine Control Sensors O2 Sensors
Heated Oxygen Sensor Replacement - Bank 1 Sensor 2CalloutComponent NamePreliminary ProcedureRaise and support the vehicle. Refer toLifting and Jacking the Vehicle.1Heated Oxygen SensorCaution:Refer to ...
Other materials:
Intake Manifold Installation Intake and Forced Induction Intake Manifold
Special Tools EN-48896 HP Fuel Pump Installation Alignment GaugeFor equivalent regional tools, refer toSpecial Tools.Caution:Refer toFastener Caution.Install the intake manifold studs in the manifold face and tighten to 15-Y (11-lb-ft).Install the intake manifold-(1). Start and hand tighten the inta ...
