Chevrolet Equinox Service Manual: Control Valve Body Cover Replacement Automatic Transmission Unit Control Valve Body
Removal ProcedureDisconnect the negative battery cable. Refer toBattery Negative Cable Disconnection and Connection.Disconnect the radiator outlet hose from the radiator. RefertoRadiator Outlet Hose Replacement.

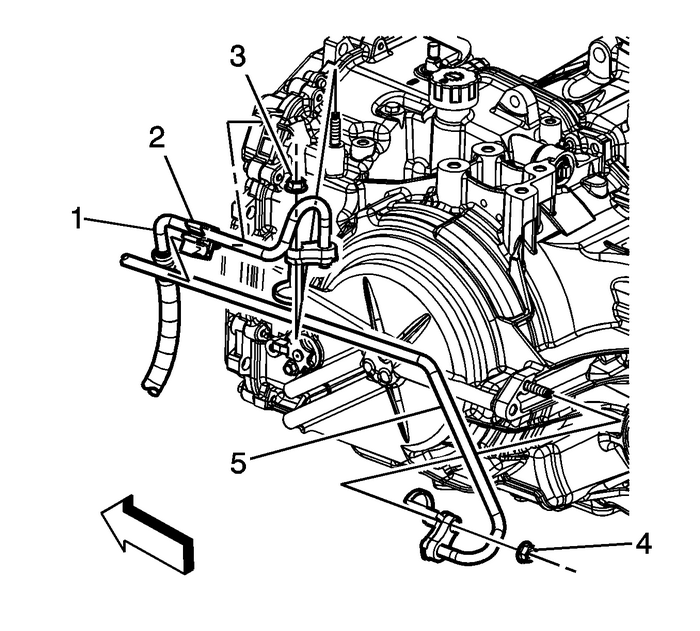
Remove the oil cooler inlet-(1) andoutlet-(2) hoses from the retainer-(2) on thecontrol valve body cover.Raise and support the vehicle. Refer toLifting and Jacking the Vehicle.Remove the front transmission mount. Refer toTransmission Front Mount Replacement.Drain the transmission. Refer toTransmission Fluid Drain and Fill.

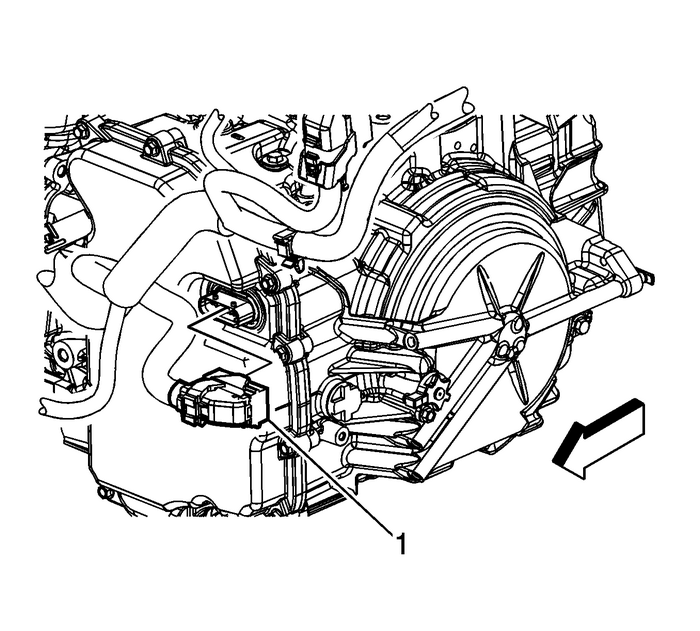
Disconnect the control valve body transmission control module(TCM) electrical connector-(1), then the wiring harnessfrom the cover.

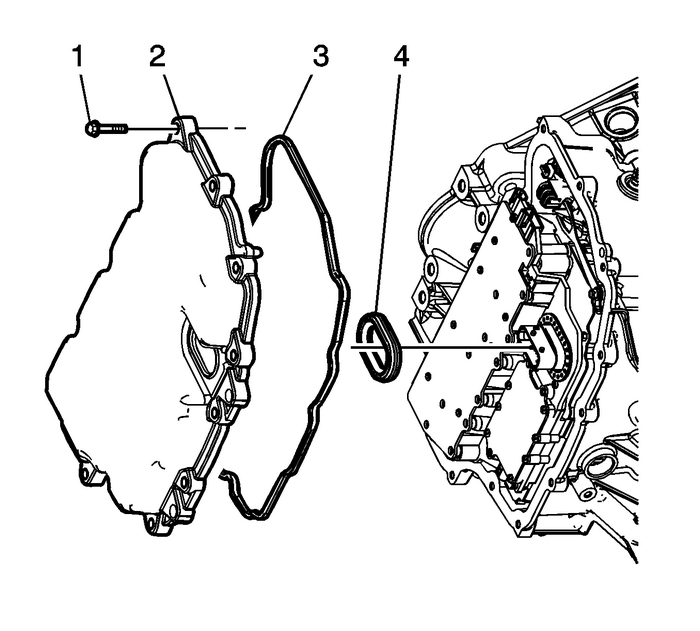
Remove the control valve body coverbolts-(1).Support the transmission with a transmission jack.Using the transmission jack raise the transmission to gainclearance for removal of the control valve body cover.Remove the control valve body cover.Remove the control valve body cover gasket.
Caution:Support the control solenoid valve assembly around theconnector when removing the seal. Excessive pulling force candamage the internal electrical connections.
Remove the control valve body cover wiring connector holeseal.Remove all traces of the old gasket material. Clean thetransmission case and control valve body cover gasketsurfaces.Installation Procedure
Install the control valve body cover wiring connector holeseal-(4).Install the control valve body cover gasket-(3) tothe control valve body cover.Install the control valve body cover-(2).Lower the transmission and remove the transmissionjack.Hand start the control valve body coverbolts-(1).

Caution:Refer toFastener Caution.
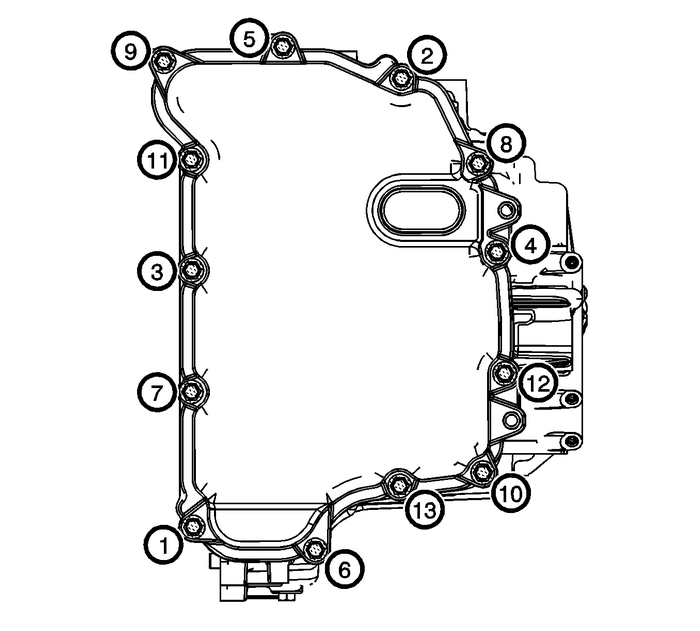
Note:Install all control valve body cover bolts and studs by handthen torque all bolts and studs in sequence.
Install the control valve body cover bolts. Tighten the boltsin sequence to12-Y(106-lb-in).
Connect the control valve body TCM electricalconnector-(1), then clip the wiring harness to thecover.Install the front transmission mount. Refer toTransmission Front Mount Replacement.Lower the vehicle.

Install the oil cooler inlet-(1) andoutlet-(5) hoses to the retainer-(2) on thecontrol valve body cover.Connect the radiator outlet hose to the radiator. Refer toRadiator Outlet Hose Replacement.Connect the negative battery cable. Refer toBattery Negative Cable Disconnection and Connection.Fill the transmission. Refer toTransmission Fluid Drain and Fill.Check for leaks.
 Rear Output Drive Housing Cleaning and Inspection Automatic Transmission Unit
Rear Output Drive Housing Cleaning and InspectionCalloutComponent NamePreliminary ProceduresClean all components in cleaning solvent and air dry.The transfer case internal components are not to be ser ...
 Transmission Fluid Cooler Hose/Pipe Quick-Connect Fitting Disconnection and Connection Automatic Transmission Unit
Removal ProcedureImportant:Perform the following procedure when removing the retainingrings and cooler lines from the quick connect fittings located onthe radiator and/or the transmission.Pull the pla ...
Other materials:
Fuel Feed Hose Replacement Engine Control
Fuel Feed Hose ReplacementCalloutComponent NamePreliminary ProceduresRelieve the fuel system pressure. Refer toFuel Pressure Relief.Raise and support the vehicle. Refer toLifting and Jacking the Vehicle.Remove the fuel tank. Refer toFuel Tank ReplacementDisconnect the quick connectors. Refer toPlast ...
