Chevrolet Equinox Service Manual: Transfer Case Assembly Replacement Automatic Transmission Unit
Removal ProcedureRaise and support the vehicle. Refer toLifting and Jacking the Vehicle.Drain the transfer case fluid. Refer toTransfer Case Fluid Replacement.Drain the transmission fluid. Refer toTransmission Fluid Drain and Fillfor the 6T30/6T40/6T45 orTransmission Fluid Drain and Fillfor the 6T70/6T75.Remove the propeller shaft. Refer toPropeller Shaft Replacement.Remove the right wheel drive shaft. Refer toFront Wheel Drive Shaft Replacement.Remove the catalytic converter. For the LFW engine, refer toCatalytic Converter Replacement - Right Sideand for the LAF engine refer toCatalytic Converter Replacement.

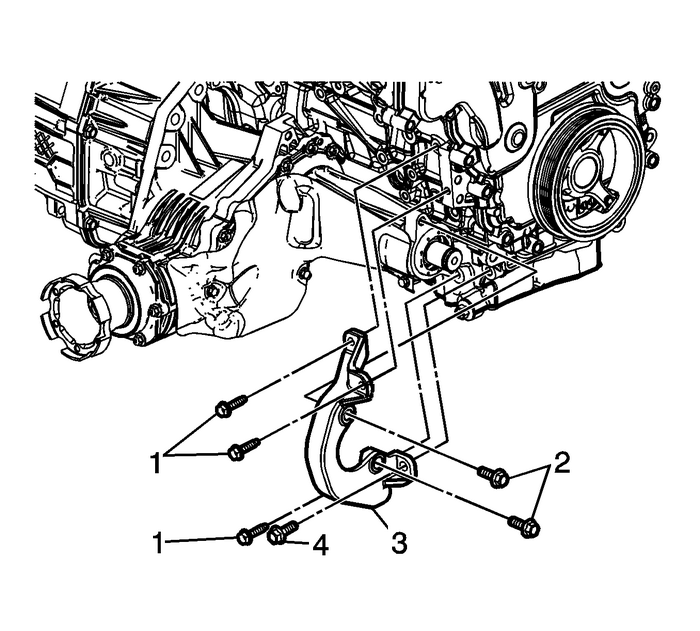
Remove the transfer case brace-(3). Refer toTransfer Case Brace Replacement.Remove the transfer case mounting bracket-(3).Support the transaxle with a jackstand.Remove the rear transmission mount and bracket. Refer toTransmission Rear Mount Bracket Replacement.

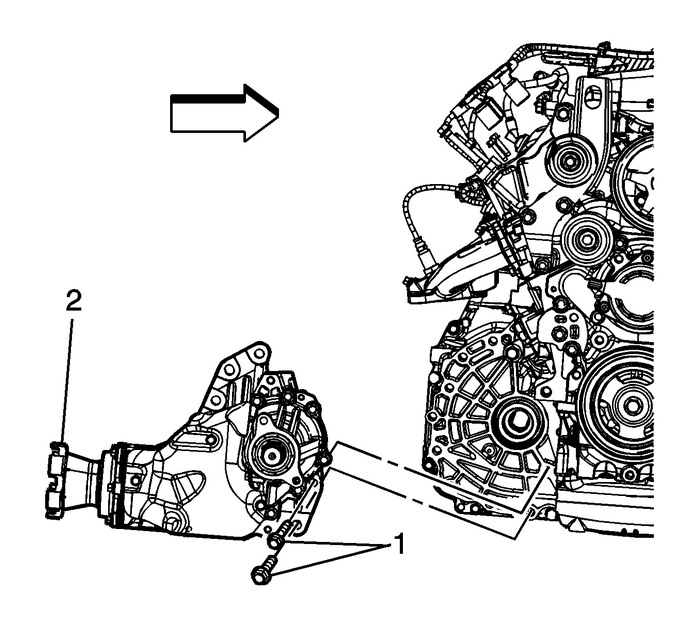
Remove the bolts-(1) securing the transfer case to the transaxle.Remove the transfer case-(2) from the transaxle.Remove the transfer case to transmission O-ring for (LFW) engine or the gasket for(LAF) engine.Installation ProcedureInstall a NEW the transfer case to transmission O-ring for LFW engine or NEW gasketfor LAF engine. Lube the O-ring with light coating of automatic transmission fluid.

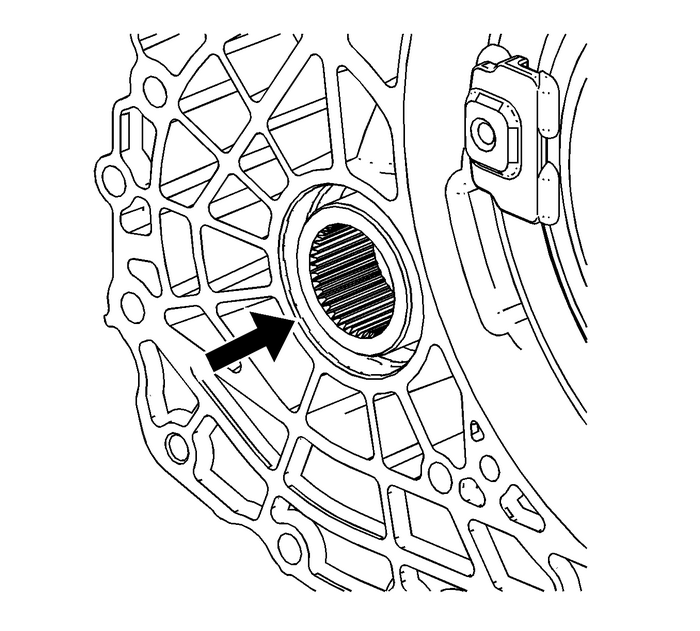
Note:Oxidation must be removed from the transmission torque converter housing bore beforeinstallation of the transfer case. A clean bore will prevent oxidation build up fromscuffing or cutting the O-ring seal upon transfer case installation, resulting ina leak.
Carefully insert a clean soft cloth into the transmission torque converter housingdifferential bore to prevent debris from entering the transmission.Clean the oxidation from the transmission torque converter housing differential boresurface using steel wool or crocus cloth.Carefully remove any debris and the cloth from the transmission torque converter housingdifferential bore.
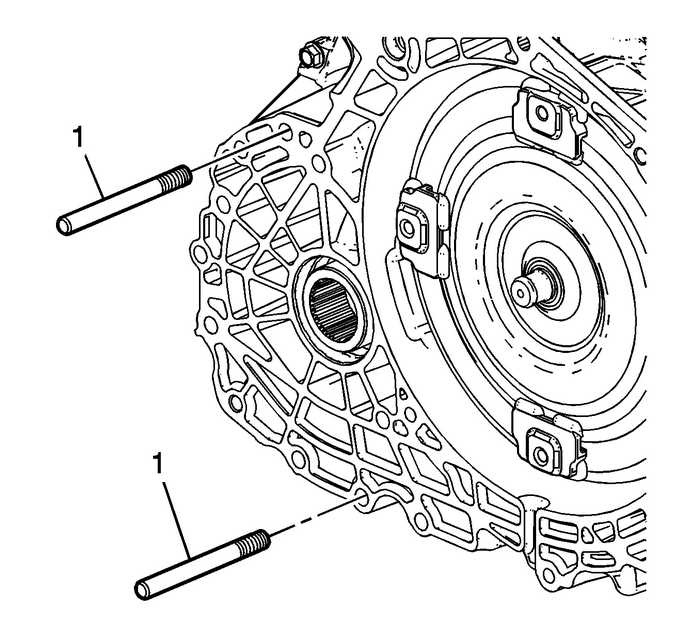
Note:Use guide pins to aid in alignment and installation of the transfer case to the transmission.Failure to use guide pins may result in cutting the transfer case O-ring seal duringinstallation of the transfer case causing a fluid leak.
Fabricate 2 guide pins by cutting the heads off of 2 bolts M12x1.75x75. chamfer andremove burrs from the cut end of the bolt.Hand thread the guide pins (1) into the transmission upper and lower transfer casemounting bolt holes.Note:Transmission fluid may creep from the transmission bore during installation.
Thoroughly clean the transmission bore and ribbing of fluid and debris immediatelyprior to installing the transfer case.
Install the transfer case-(2) to the transaxle.Remove the guide pins.
Caution:Refer toFastener Caution.
Install the bolts-(1) securing the transfer case to the transaxle and tighten thebolts to 50-Y (37-lb-ft).Install the rear transmission mount and bracket. Refer toTransmission Rear Mount Bracket Replacement.Remove the jackstand supporting the transaxle.
Note:Tighten bolts in specified sequential order.
Install the transfer case brace-(3). Refer toTransfer Case Brace Replacement.Install the catalytic converter. For the LFW engine, refer toCatalytic Converter Replacement - Right Sideand for the LAF engine refer toCatalytic Converter Replacement.Install the right wheel drive shaft. Refer toFront Wheel Drive Shaft Replacement.Install the propeller shaft. Refer toPropeller Shaft Replacement.Fill the transmission fluid. Refer toTransmission Fluid Drain and Fillfor the 6T30/6T40/6T45 orTransmission Fluid Drain and Fillfor the 6T70/6T75.Fill the transfer case with fluid. Refer toTransfer Case Fluid Replacement.Lower the vehicle. Transmission Fluid Cooler Hose/Pipe Quick-Connect Fitting Disconnection and Connection Automatic Transmission Unit
Removal ProcedureImportant:Perform the following procedure when removing the retainingrings and cooler lines from the quick connect fittings located onthe radiator and/or the transmission.Pull the pla ...
 Input Shaft Seal Replacement Automatic Transmission Unit
Removal ProcedureRaise and support the vehicle. Refer toLifting and Jacking the Vehicle.Drain the transfer case fluid. Refer toTransfer Case Fluid Replacement.Remove the propeller shaft. Refer toPrope ...
Other materials:
Range Selector Lever Cable Replacement Automatic Transmission Unit
Removal ProcedureSet the park brake and chock the wheels.Disconnect the transmission range selector lever cable terminal-(1) from the transmissionmanual shift lever pin-(6).Slide the retainer-(4) rearward to release the transmission range selector lever cablefrom the bracket.Remove the left front fl ...
