Chevrolet Equinox Service Manual: Rear Axle Upper Control Arm Replacement Axles Rear
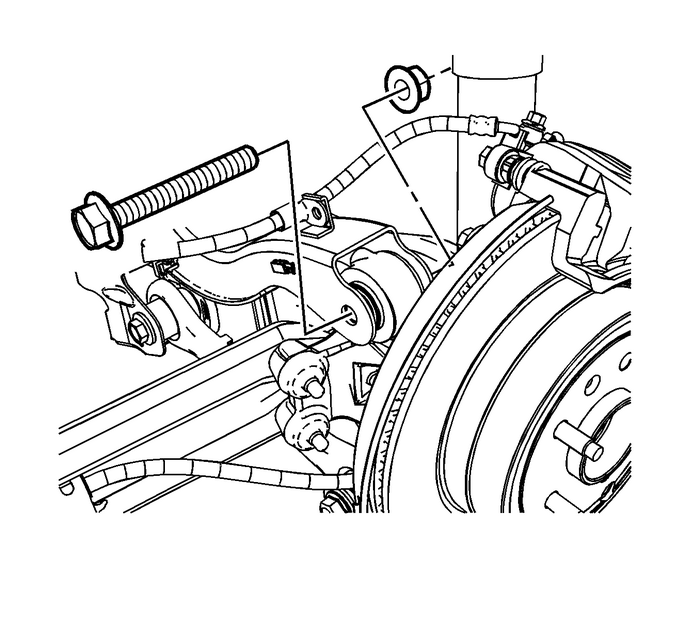
Removal ProcedureRaise and support the vehicle. Refer toLifting and Jacking the Vehicle.Remove the rear tire and wheel assembly. Refer toTire and Wheel Removal and Installation.Disconnect the antilock brake system (ABS) brake wiring harness from the upper controlarm.Remove the rear brake hose bracket to upper control arm nut and bolt.

Remove the upper control arm to knuckle nut and bolt.

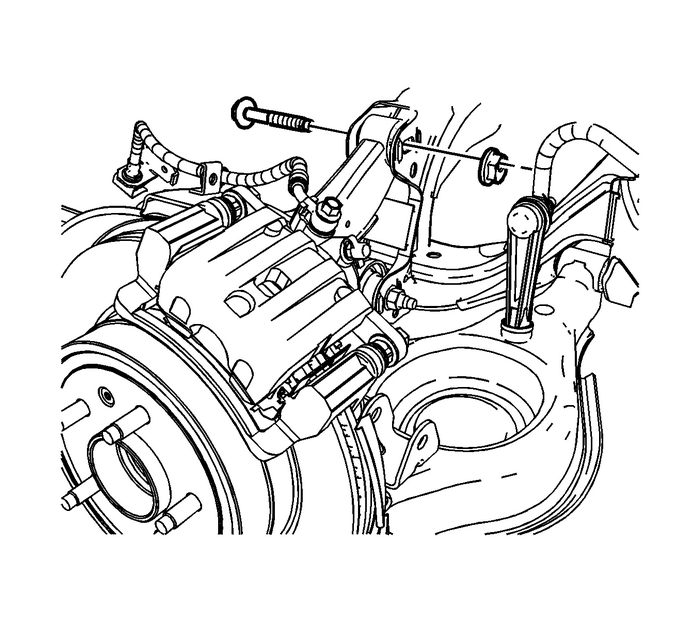
Remove the upper control to support cam nut and bolt.If replacing the driver’s side upper control arm, remove the fuel tank. Refer toFuel Tank Replacement.If replacing the passenger’s side upper control arm, remove the fuel tank filler pipe.Refer toFuel Tank Filler Pipe Replacement.Remove the upper control arm.Installation Procedure

Install the upper control arm to the knuckle.Loosely install the upper control arm to knuckle nut and bolt.

Install the upper control to support bolt and cam nut.Install fuel tank, if removed. Refer toFuel Tank Replacement.Install fuel tank filler pipe, if removed. Refer toFuel Tank Filler Pipe Replacement.
Caution:Refer toFastener Caution.
Tighten the upper control arm to knuckle nut and bolt to 160-Y (118-lb-ft).Tighten the upper control arm to support bolt to 164-Y (121-lb-ft).
Note:
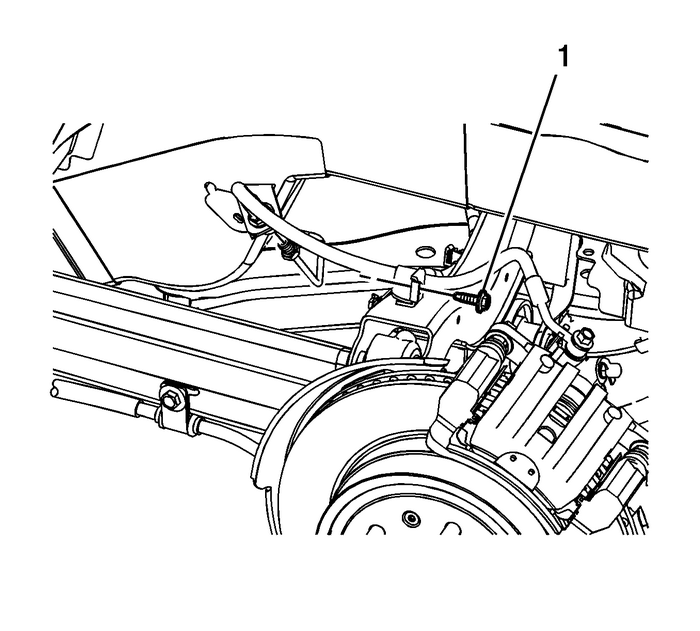
The rear brake hose bracket must be installed on the side of the upper control armbracket closest to the front of the vehicle. The rear brake hose bracket must be installedparallel to the upper control arm.The head of the rear brake hose bracket must be installed facing the rear of the vehicle.Install the rear brake hose routing nut and bolt-(1)-and tighten to 25-Y (18-lb-ft).Connect the ABS brake wiring harness to the upper control arm.Install the rear tire and wheel assembly. Refer toTire and Wheel Removal and Installation.Lower the vehicle.Check the rear alignment. Refer toWheel Alignment Measurement. Differential Replacement Axles Rear
Removal ProcedureRaise and support the vehicle. Refer toLifting and Jacking the Vehicle.Drain the rear differential, if needed. Refer toDifferential Oil Replacement.Remove the exhaust system. Refer to ...
 Driveline System Balance Adjustment
Special ToolsEL-38792-2020-Foot Timing Light Power CordExtensionEL-38792-25Inductive Pickup Timing Light, orequivalentEL-38792-AElectronic VibrationAnalyzer-(EVA)-2EL-38792-276-Foot EVA Power CordExte ...
Other materials:
#03-03-10-007H: Information on Tire/Wheel Characteristics (Vibration, Balance, Shake, Flat Spotting) of GM Original Equipment Tires - (Oct 18, 2013) Tires
Subject:Information on Tire/Wheel Characteristics (Vibration, Balance, Shake, Flat Spotting)of GM Original Equipment TiresModels: 2014 and Prior GM Cars and Light Duty Trucks This bulletin has been revised to add the 2014 model year. Please discard CorporateBulletin Number 03-03-10-007G.The pur ...
