Chevrolet Equinox Service Manual: Lower Crankcase Installation Engine Block Cylinder Block
Special Tools
EN 45059Angle Meter
For equivalent regional tools, refer toSpecial Tools.
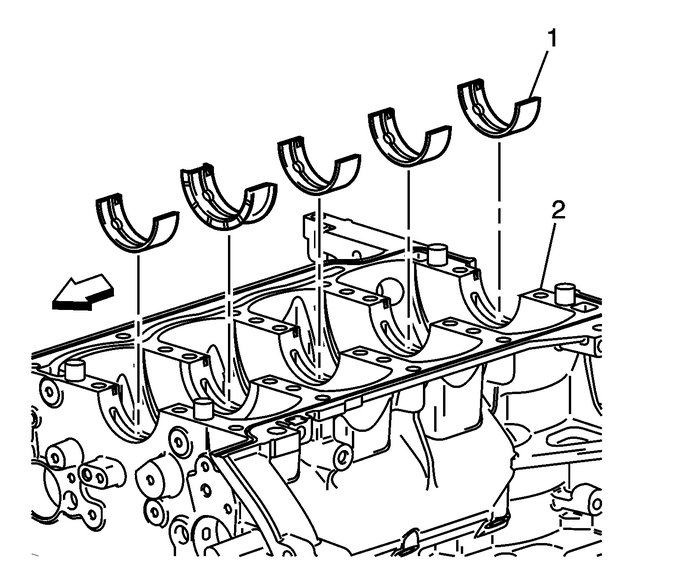
Note:Crankshaft bearings MUST be separated, marked, or organizedin a way to ensure installation to their original location andposition, when suitable for use.
Install the upper crankshaft bearings-(1) andlubricate bearing surfaces with engine oil.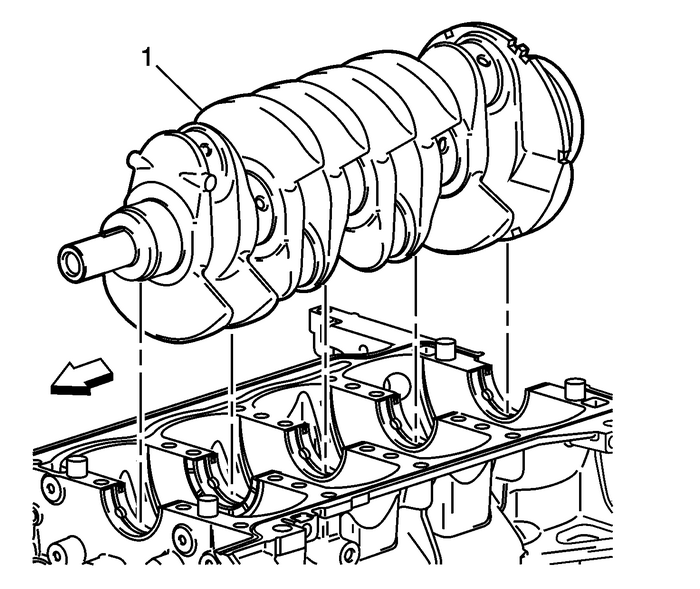
Install the crankshaft-(1) on the journals.
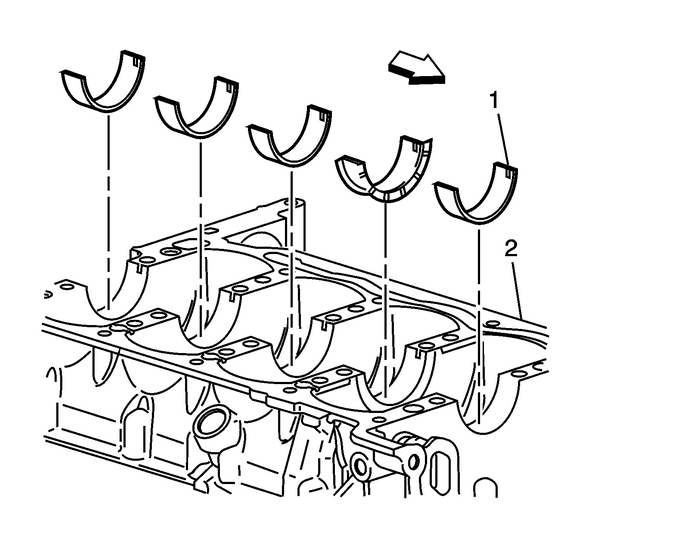
Install the lower bearing halves-(1), withoutgrooves, into the lower crankcase. Apply oil to bearingsurfaces.
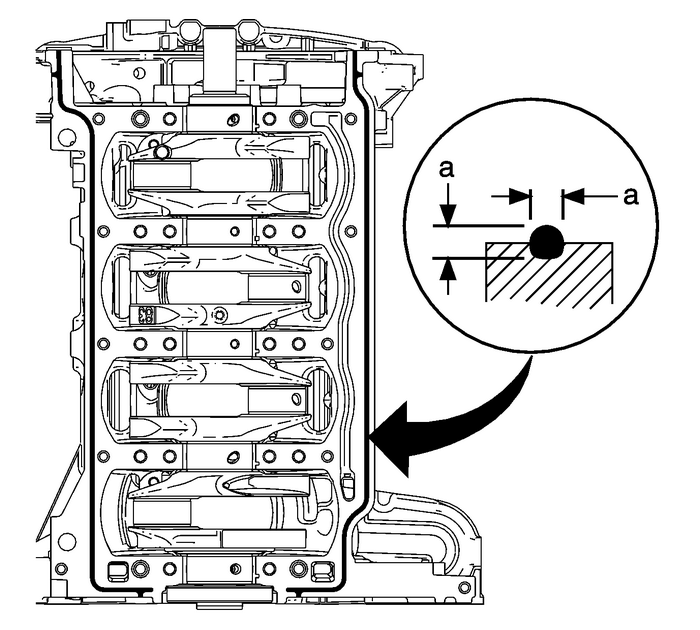
Note:
The block assembly surface must be free of contaminationprior to applying the sealer.Install and align the bedplate to block within20-minutes of applying the sealer.The bedplate must be fastened to final torque specificationwithin 60-minutes of applying the sealer.Apply a4.25-mmbead of sealer,dimension-(a), directly in the groove of the block tobedplate mating surfaces. Refer toAdhesives, Fluids, Lubricants, and Sealers.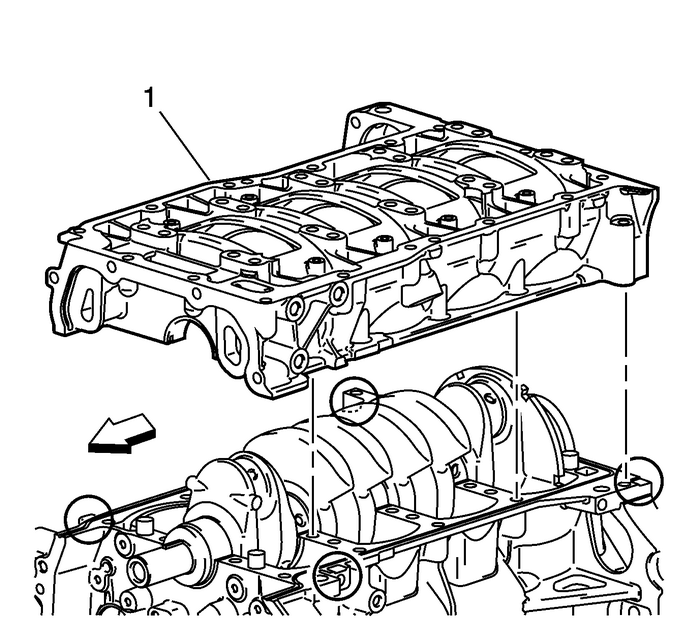
Install the lower crankcase-(1). Tap gently intoplace with a suitable tool if necessary. Ensure it is alignedproperly on the dowels.
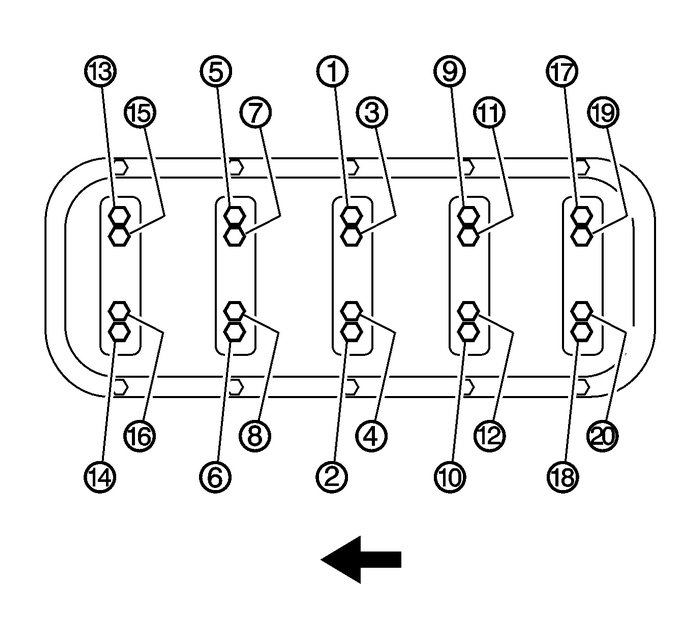
Caution:Refer toFastener Caution.
Install the NEW crankshaft bearing bolts in sequence fingertight.Tighten the crankshaft bearing bolts in sequence to20-Y-(15-lb-ft).Tighten the crankshaft bearing bolts in sequence using theEN 45059meteran additional 70-degrees.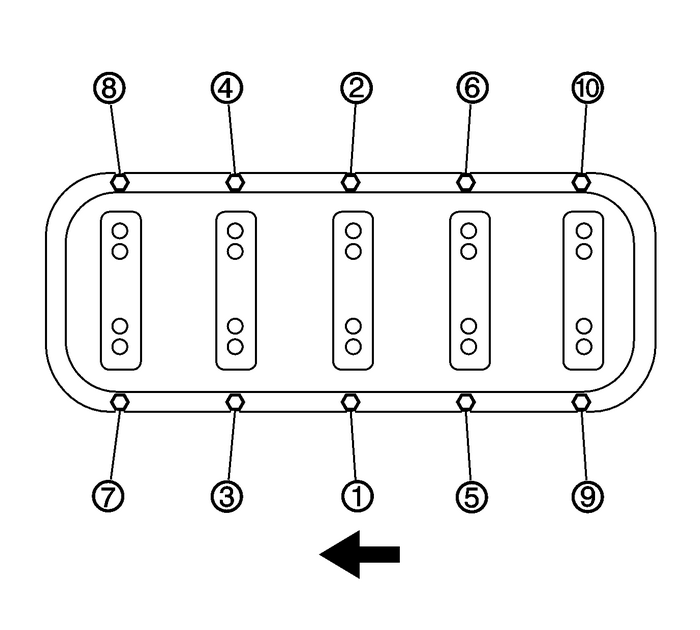
Tighten the lower crankcase perimeter bolts in sequence to25-Y-(18-lb-ft).
 Cylinder Head Installation - Right Side Engine Block Cylinder Head
Special Tools EN 45059 Angle MeterFor equivalent regional tools, refer toSpecial Tools.Ensure the cylinder head locating pins are securely mounted in the cylinder blockdeck face.Install a NEW right cy ...
 Cylinder Head Installation (LAF, LEA, or LUK) Engine Block Cylinder Head
Special ToolsEN 45059Angle MeterFor equivalent regional tools, refer toSpecial ToolsNote:Do not use any sealing material.Install the cylinder head gasket to the block.Install the cylinder head. Ensure ...
Other materials:
Radio Antenna Cable Extension Radio End Cable Replacement Entertainment Audio
Radio Antenna Cable Extension Radio End Cable ReplacementCalloutComponent NamePreliminary ProcedureLower the headlining trim panel where needed. Refer toHeadlining Trim Panel Replacement.1Radio Antenna Cable Extension Radio End CableProcedureDisconnect the electrical connectors at each end of theant ...
