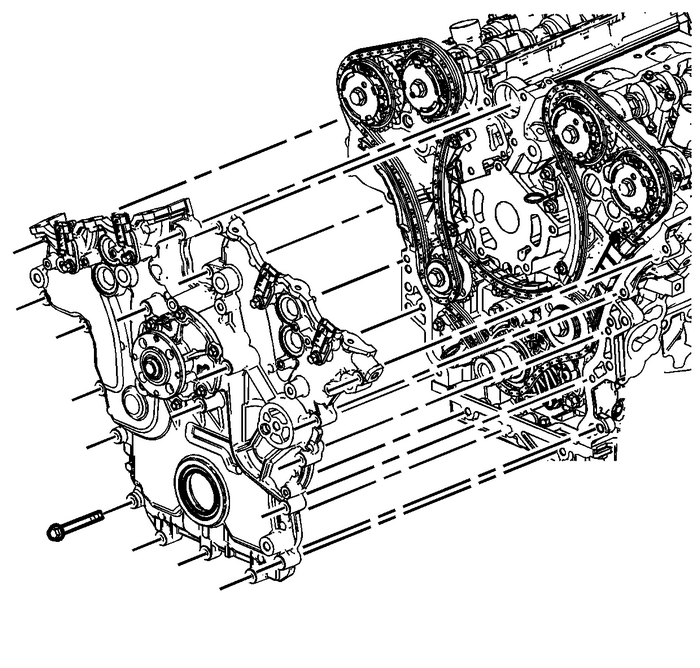
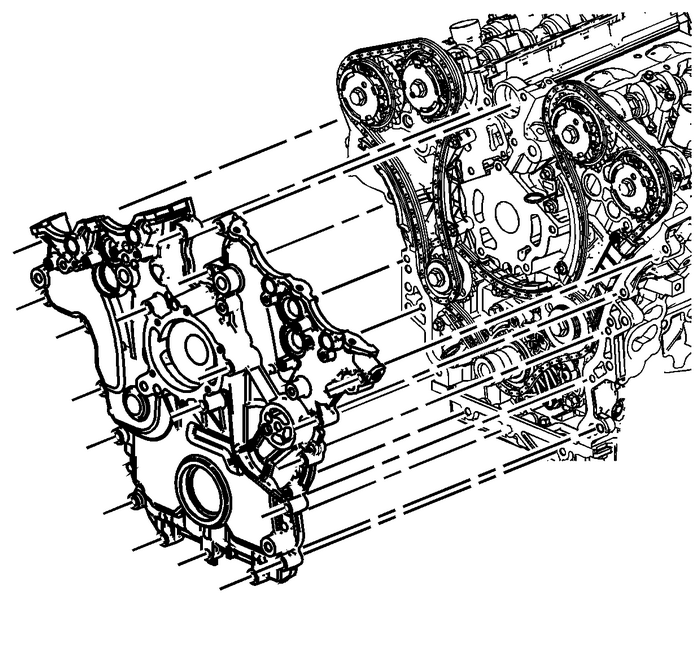
Chevrolet Equinox Service Manual: Engine Front Cover Replacement Engine Block Cylinder Block Cyl Block Front Cover
Special Tools
EN-46109Engine Front Cover Installation GuidePins
For equivalent regional tools, refer toSpecial Tools.
Removal ProcedureRemove the intake manifold. Refer toIntake Manifold Replacement.Remove the camshaft covers. Refer toCamshaft Cover Replacement - Left SideandCamshaft Cover Replacement - Right Side.Drain the engine coolant. Refer toCooling System Draining and Filling.Disconnect the purge vent hose from the water outlet.Remove the water outlet with the radiator hose and repositionaside. Refer toWater Outlet Replacement.Remove the crankshaft balancer. Refer toCrankshaft Balancer Replacement.Remove the camshaft position sensors. Refer toCamshaft Position Sensor Replacement - Bank 2 (Left Side) Exhaust,Camshaft Position Sensor Replacement - Bank 2 (Left Side) Intake,Camshaft Position Sensor Replacement - Bank 1 (Right Side) ExhaustandCamshaft Position Sensor Replacement - Bank 1 (Right Side) Intake.Remove the generator. Refer toGenerator Replacement.Remove the water pump pulley only.Remove the drive belt tensioner. Refer toDrive Belt Tensioner Replacement.Remove the camshaft position actuator solenoid valves fromthe front cover. Refer toCamshaft Position Actuator Solenoid Valve Solenoid Replacement - Bank 1 (Right Side)Intake,Camshaft Position Actuator Solenoid Valve Solenoid Replacement - Bank 1 (Right Side)Exhaust,Camshaft Position Actuator Solenoid Valve Solenoid Replacement - Bank 2 (Left Side)Intake, andCamshaft Position Actuator Solenoid Valve Solenoid Replacement - Bank 2 (Left Side)Exhaust.
Note:There are a total of 22 M8 bolts that must be removed and 3optional M12 bolts that may need to be removed before the frontcover will separate from the engine block.
Remove the engine front cover with the water pump. Refer toEngine Front Cover Removal.Disassemble the engine front cover. Refer toEngine Front Cover Disassemble.Note:Do NOT use sharp and/or metal gasket scrapers in order toclean the sealing surfaces.
Carefully clean the engine front cover sealing surfaces.Refer toEngine Front Cover Cleaning and Inspection.Note:Insert a piece of cardboard between the oil pan front and theoil pump in order to prevent any contaminants from falling into theoil pan.
Carefully clean the engine front cover sealing surfaces.Refer toEngine Front Cover Cleaning and Inspection.Use compressed air in order to remove any engine coolant fromthe engine cooling passages and from the top of the oil pan scraper(windage tray).Installation ProcedureAssemble the engine front cover. Refer toEngine Front Cover Assemble.
Use theEN-46109pinsin order to install the engine front cover. Refer toEngine Front Cover Installation.Install the camshaft position actuator solenoid valves to thefront cover. Refer toCamshaft Position Actuator Solenoid Valve Solenoid Replacement - Bank 1 (Right Side)Intake,Camshaft Position Actuator Solenoid Valve Solenoid Replacement - Bank 1 (Right Side)Exhaust,Camshaft Position Actuator Solenoid Valve Solenoid Replacement - Bank 2 (Left Side)Intake, andCamshaft Position Actuator Solenoid Valve Solenoid Replacement - Bank 2 (Left Side)Exhaust.Install the camshaft position sensors. Refer toCamshaft Position Sensor Replacement - Bank 2 (Left Side) Exhaust,Camshaft Position Sensor Replacement - Bank 2 (Left Side) Intake,Camshaft Position Sensor Replacement - Bank 1 (Right Side) ExhaustandCamshaft Position Sensor Replacement - Bank 1 (Right Side) Intake.Install the crankshaft balancer. Refer toCrankshaft Balancer Installation.Install the generator bracket with the generator and the belttensioner. Refer toGenerator Replacement.Install the water outlet. Refer toWater Outlet Replacement.Install the purge vent hose to the water outlet.Fill the cooling system. Refer toCooling System Draining and Filling.Install the water pump pulley.Install the drive belt tensioner. Refer toDrive Belt Tensioner Replacement.Install the camshaft covers. Refer toCamshaft Cover Replacement - Left SideandCamshaft Cover Replacement - Right Side.Install the intake manifold. Refer toIntake Manifold Replacement.Fill the cooling system. Refer toCooling System Draining and Filling.
 Water Pump Removal Engine Cooling Coolant Pump
Special Tools EN 46104 Water Pump Pulley Holding ToolFor equivalent regional tools, refer toSpecial Tools.Install the EN 46104 holding tool -(1) onto the water pump pulley.Remove the water pump pulley ...
 Oil Pan Replacement Engine Lubrication Oil Sump/Pan
Special Tools EN-46109 Guide Pin SetFor equivalent regional tools, refer toSpecial Tools.Removal ProcedureRaise and support the vehicle. Refer toLifting and Jacking the Vehicle.Drain the engine oil an ...
Other materials:
Parking and Turn Signal Lamp Bulb Replacement (Terrain) Lighting Exterior Lighting Turn Signal and Hazard Lamps
Parking and Turn Signal Lamp Bulb ReplacementCalloutComponent NamePreliminary ProceduresOpen and support the hood.Remove the front bumper fascia opening cover. Refer toFront Bumper Fascia Opening Cover Replacement.1Park Turn Signal Lamp Bulb SocketWarning:Refer toHalogen Bulb Warning.ProcedureRotate ...
